
Breaking in leather sandals is an essential process to ensure maximum comfort and longevity. While new leather can often feel stiff and abrasive, patience and the right techniques can transform them into a perfectly fitting and comfortable pair of sandals.
This guide on how to break in leather sandals will walk you through effective strategies for softening the leather and adapting the sandals to the unique shape of your feet so you can enjoy a stylish and pain-free experience every time you wear them.
Why Break in Leather Sandals?
Leather is a natural material that can take some time to mold and soften. The initial stiffness of leather sandals may cause discomfort, blisters, or chafing when worn for extended periods. By breaking them in, you are allowing the leather to stretch and conform to your feet’s shape, making it more pliable and comfortable.
Moreover, breaking in leather sandals can also prevent premature wear and tear. If you try to wear new leather sandals for long periods without breaking them in, they may become damaged or lose their shape. By taking the time to properly break them in, you will ensure that your sandals last longer and maintain their quality.
Necessary Materials
To break in leather sandals, you will need the following materials:
- Leather Sandals (Preferably Made With High-quality Leather)
- Thick Socks or Bandages
- Leather Softener or Conditioner
- A Shoe Stretcher (Optional)
9 Step-by-step Guides on How to Break in Leather Sandals
Step 1: Start by Wearing Your Sandals for Short Periods
Begin the breaking-in process by wearing your leather sandals inside your home for short periods. This will help the sandals to start conforming to the unique shape of your feet without causing discomfort or irritation. Aim for 1 to 2 hours a day, gradually increasing the duration over the course of a week.
Wearing them with thick socks can provide an extra layer of cushioning while helping to stretch the leather gently. This gradual approach will minimize the risk of blisters and allow the leather to relax gradually, making subsequent steps more effective.
Step 2: Use a Leather Softener or Conditioner
Applying a leather softener or conditioner is crucial for easing the stiffness of new leather sandals. After wearing your sandals for short periods, remove them and gently apply a small amount of conditioner to the leather with a soft cloth. Ensure that you cover key areas such as straps and discomfort-prone spots.
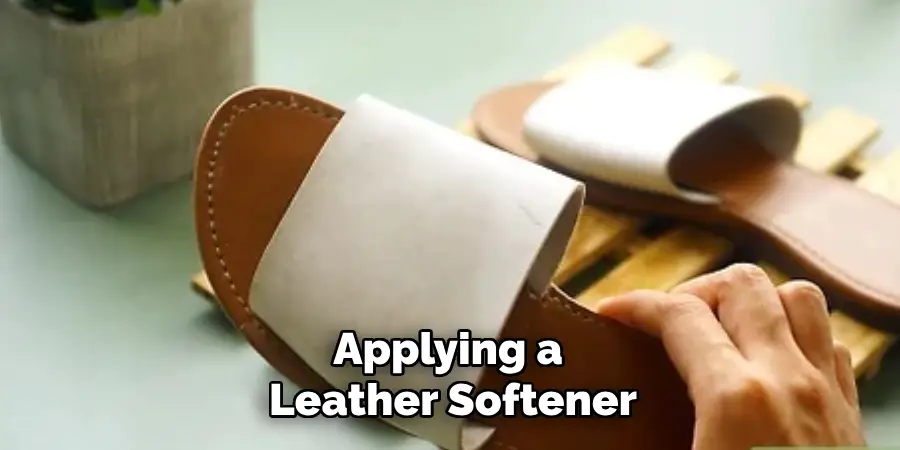
The conditioner will penetrate the leather, making it more supple and less prone to forming cracks. Allow the conditioner to absorb fully by letting the sandals sit for a few hours or overnight. This will further aid the leather in adapting to the shape of your feet and enhance the overall comfort of the sandals.
Step 3: Use a Shoe Stretcher (Optional)
If your leather sandals are still too tight or stiff after applying conditioner, consider using a shoe stretcher as an optional step. A shoe stretcher can help to gently expand the leather and accelerate the breaking-in process. To use it, insert the stretcher into your sandals and adjust it to apply a slight outward pressure. Leave the stretcher in place for at least 12 to 24 hours.
This step is especially useful if there are specific areas in your sandals that feel too snug, as some shoe stretchers come with attachments that can target those pressuring spots. Regular use may be needed until your sandals fit comfortably.
Step 4: Wear Them Outside for Short Walks
Once you have worn your sandals indoors and applied conditioner, it’s time to take them outside for short walks. Start with shorter distances and gradually increase the duration as your feet become more accustomed to the sandals. The outdoor terrain will provide a different type of pressure on the leather, further aiding in breaking them in.
If you experience any discomfort during these walks, try adjusting the straps or using bandages on areas that are prone to rubbing or blisters. This step also allows you to test how well the sandals fit and whether any further adjustments are needed before wearing them for longer periods.
Step 5: Apply Heat to the Leather
Using heat is an effective way to soften the leather and make it more malleable. After wearing your sandals for short walks, you can apply heat by using a hair dryer on low or medium heat. Hold the dryer about six inches away from the leather and move it back and forth until the entire sandal is warm.
Once warmed, put the sandals on and walk around for a few minutes. The heat will help to stretch the leather further while also softening it, making it easier to conform to your feet’s shape.

Step 6: Repeat Steps 1-5 Regularly
Breaking in leather sandals is an ongoing process that may take several weeks or even months, depending on how often you wear them and the type of leather used. It’s essential to repeat steps 1-5 regularly until the sandals feel comfortable enough to wear for extended periods.
Be patient and consistent with this process, as rushing through it can cause discomfort or damage to both the sandals and your feet. Over time, you will notice that the sandals have formed a unique shape that fits your feet perfectly.
Step 7: Condition and Store Your Sandals Properly
Once you have successfully broken in your leather sandals, it’s essential to continue caring for them properly to maintain their quality and comfort. Regularly applying a leather conditioner can help prevent the leather from drying out and cracking.
When storing your sandals, keep them in a cool, dry place away from direct sunlight. Avoid stacking or placing heavy objects on top of them to prevent misshaping. If possible, store them in individual cloth bags or shoe boxes to protect them from dust and potential damage.
Step 8: Consider Using Insoles for Extra Comfort
If you still experience discomfort or want to add extra cushioning, consider using insoles. There are various types of insoles available, such as gel, foam, and leather, that can provide additional support and padding for your feet.
Ensure that the insoles fit properly and do not make the sandals too tight. You may need to try a few different types before finding the perfect fit for your specific needs.
Step 9: Be Patient and Take Your Time
Breaking in new leather sandals takes time and patience; it’s not something that can be rushed. It’s essential to take your time with each step on how to break in leather sandals and allow the leather to adapt gradually without causing discomfort or damage. In the end, you will have comfortable and well-fitted sandals that will last for years to come.
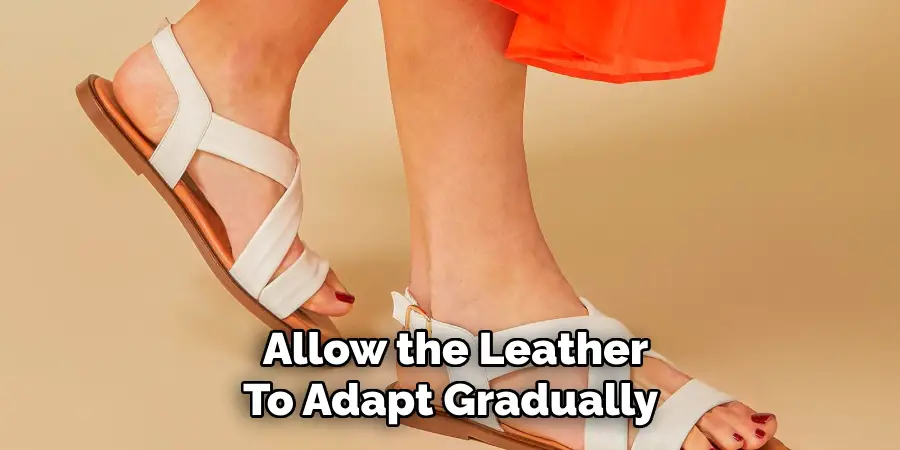
Remember to listen to your feet and make any necessary adjustments as you go through the breaking-in process.
With proper care and patience, your leather sandals will become a beloved staple in your wardrobe, perfect for any occasion. So don’t be discouraged if they feel stiff or uncomfortable at first – just keep breaking them in, and soon, they will become your go-to footwear choice. Enjoy your new leather sandals!
Additional Tips for Maintaining Leather Sandals
In addition to the steps above, here are a few extra tips to help maintain your leather sandals and extend their lifespan:
- Avoid getting them wet whenever possible. Leather is not waterproof, and excessive exposure to water can cause damage or discoloration. If they do get wet, let them air dry naturally.
- Clean off any dirt or debris regularly with a soft brush or cloth. For tougher stains, use a specialized leather cleaner and follow the instructions carefully.
- Avoid leaving them in extreme temperatures, such as direct sunlight or near heat sources like heaters or fireplaces.
- Keep an eye out for any signs of wear and tear, such as loose threads, worn-out soles, or cracked leather. Address these issues as soon as possible to prevent further damage.
By following these tips and regularly caring for your leather sandals, you can ensure that they will last for many seasons to come. Happy breaking in!
Frequently Asked Questions
Q: How Long Does It Take to Break in Leather Sandals?
The time it takes to break in leather sandals can vary depending on the type of leather and how often you wear them. It is recommended to repeat the breaking-in process regularly until they feel comfortable enough for extended periods, which can take several weeks or even months.
Q: Can I Speed Up the Breaking-In Process?
While it can be tempting to try and speed up the breaking-in process, it’s essential to take your time to avoid discomfort or damage to both the sandals and your feet. Rushing through this process can also result in the leather not conforming properly to your feet’s shape, leading to ill-fitting sandals. Be patient and consistent with each step for the best results.
Q: Can I Use Other Methods Besides Wearing Them for Short Walks?
Some other methods people have tried include wearing thick socks with the sandals, using a shoe stretcher, or applying rubbing alcohol or Vaseline directly on the leather. However, these methods may not be as effective or can potentially damage the leather, so it’s best to stick with the steps outlined in this guide.
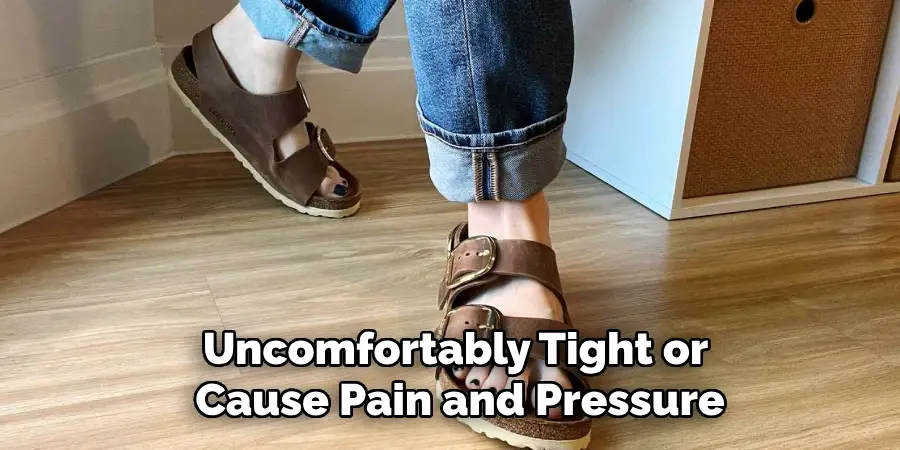
Q: How Do I Know If My Sandals Are Too Tight?
If your sandals feel uncomfortably tight or cause pain and pressure points on your feet, they are likely too tight. You should be able to move your toes freely and have some wiggle room in the sandals. If they feel too tight, try repeating step 5 or consider using insoles for additional cushioning.
Conclusion
Breaking in leather sandals requires patience, care, and a methodical approach. By following the outlined steps and additional maintenance tips on how to break in leather sandals, you can ensure that your sandals mold perfectly to your feet, offering comfort and style for many years. Beyond just breaking them in, caring for the leather correctly helps preserve its appearance and longevity.
Remember that each pair of sandals is unique and may respond differently to the process, so listen to your feet and make any necessary adjustments. With persistence and routine care, your sandals will not only fit like a glove but also become a cherished part of your footwear collection. Enjoy the journey and the comfort of your beautifully broken-in leather sandals!