Coloring leather boots is a fantastic way to refresh their appearance or customize them to suit your personal style. Whether you want to restore a faded finish or experiment with a completely new shade, the process can be both rewarding and straightforward with the right techniques and tools.
This guide on how to color leather boots will walk you through the essential steps to ensure a professional-looking result while preserving the quality and longevity of your boots.
What is Leather?
Before we dive into the coloring process, it’s essential to understand what leather is and how it differs from other materials. Leather is a durable and flexible material made from tanned animal skin, primarily cattle hide.
It has been used for centuries to make various products, including footwear, clothing, furniture, and accessories.
Needed Materials
To color your leather boots, you will need the following materials:
Leather Dye or Paint:
Choose a high-quality and specifically designed product for coloring leather. Avoid using regular fabric or acrylic paint as they won’t penetrate the leather properly.
Leather Conditioner:
This will help to nourish and protect the leather from drying out after coloring. Look for a conditioner that is specifically made for leather products.
Brushes or Sponges:
These are essential tools for applying the dye or paint evenly on your boots.
Rubbing Alcohol:
This can be used to remove any existing finish or polish on your boots before you begin the coloring process.
Sandpaper:
If you want to change the color of already finished boots, sandpaper can help roughen up the surface and allow better adhesion of the new color.
8 Step-by-step Guides on How to Color Leather Boots
Step 1: Prepare Your Workspace
Before you begin the coloring process, it’s important to set up a suitable workspace to ensure a smooth and clean experience. Choose a well-ventilated area to avoid inhaling any fumes from the dye, paint, or rubbing alcohol. Lay down a protective sheet, such as plastic or newspaper, to safeguard your work surface from spills or stains.
Make sure you have all your materials within reach and wear gloves to protect your hands from the dye or paint. Proper preparation of your workspace will make the process more efficient and help achieve professional-looking results.
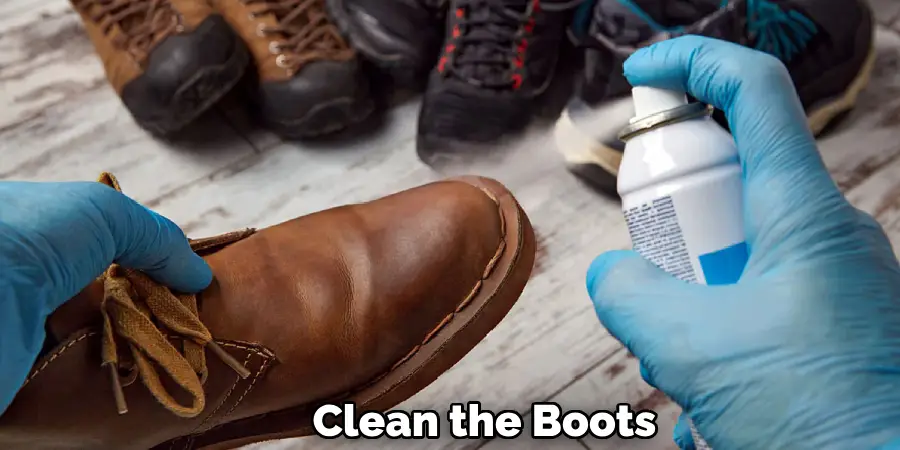
Step 2: Clean Your Boots
Cleaning your boots is a crucial step to ensure the dye or paint adheres properly. Start by using a soft cloth or brush to remove any dirt, dust, or debris on the surface of the leather. For more thorough cleaning, dampen a cloth with rubbing alcohol and gently wipe the boots.
This will help strip away any existing finish, polish, or oils that might interfere with the coloring process. Allow the boots to dry completely before moving on to the next step, as any leftover moisture can impact the application of the dye or paint.
Step 3: Test the Color on a Small Area
Before applying the dye or paint to the entire surface of your boots, it’s important to test the color on a small, inconspicuous area. This step ensures that the chosen shade matches your expectations and reacts well with the leather.
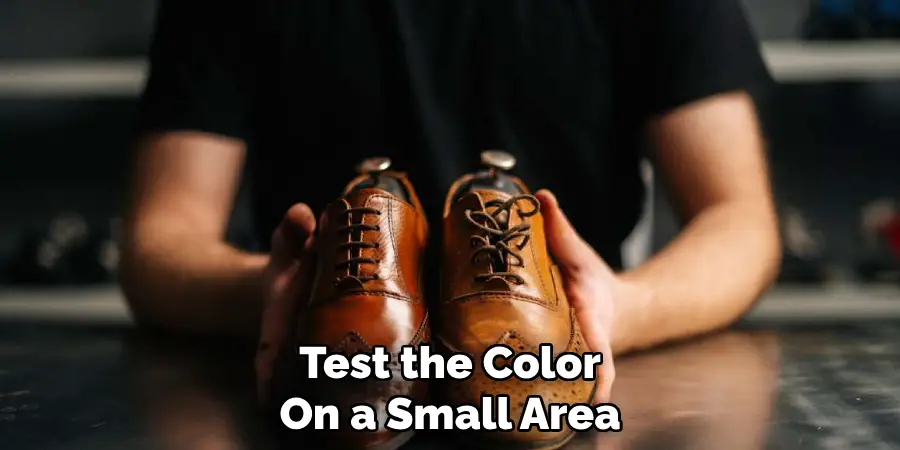
Use a brush or sponge to apply a small amount of dye or paint to the test area, and then allow it to dry completely to see the final result. Checking the color beforehand can save you from unwanted surprises and give you an opportunity to make adjustments if necessary. Once you are satisfied with the color, proceed confidently to the next steps.
Step 4: Apply the Dye or Paint
Now, it’s time to apply the dye or paint to your boots. Dip your brush or sponge into the product and start applying it with smooth, even strokes. Work section by section, starting from the toe of the boot towards the heel. Make sure to cover all areas evenly, including crevices and edges.
For a more vibrant color, you can apply multiple coats, allowing each coat to dry completely before applying the next one. If you are using leather dye, make sure to follow the manufacturer’s instructions on how many coats to apply for optimal results.
Step 5: Allow Your Boots to Dry
After finishing applying the dye or paint, allow your boots to dry completely before handling them. This can take several hours, depending on the type of product used and the number of coats applied. It’s essential to resist the urge to touch or wear your boots until they are fully dry as this can ruin the finish and result in an uneven appearance.
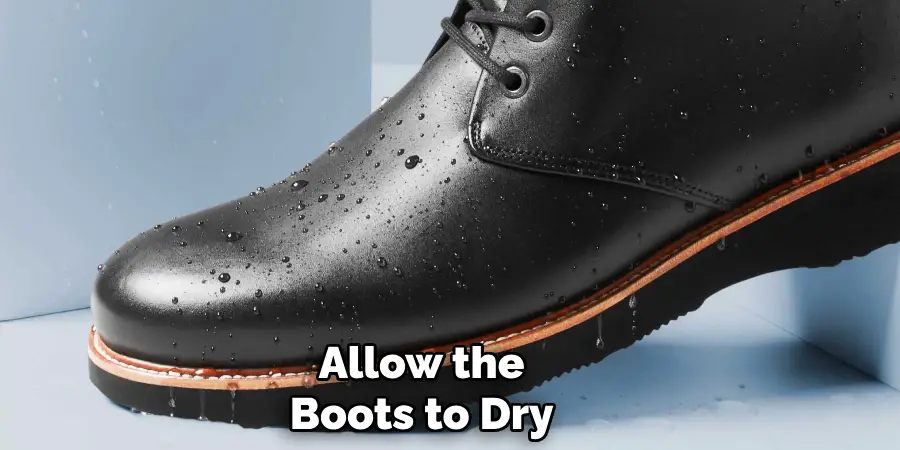
Allow your boots to dry overnight before handling them again.
Step 6: Condition Your Boots
Once your boots are completely dry, it’s crucial to condition them with a suitable leather conditioner. Apply a small amount of conditioner onto a soft cloth and gently rub it onto the surface of your boots in circular motions.
This will help nourish and protect the leather from drying out or cracking after being exposed to chemicals from the dye or paint.
Step 7: Buff Your Boots
After conditioning your boots, the next step is to buff them to achieve a smooth and polished finish. Use a soft, clean cloth or a specialized leather buffing brush to gently rub the surface of the boots in small, circular motions. This process helps to even out the color and enhances the leather’s natural sheen, giving your boots a professional and refined appearance.
Spend extra time on any areas that appear dull or uneven to ensure a consistent finish. Buffing not only improves the look of your boots but also helps set the color and enhances their overall durability. Once you’re satisfied with the result, your boots are ready for the final step.
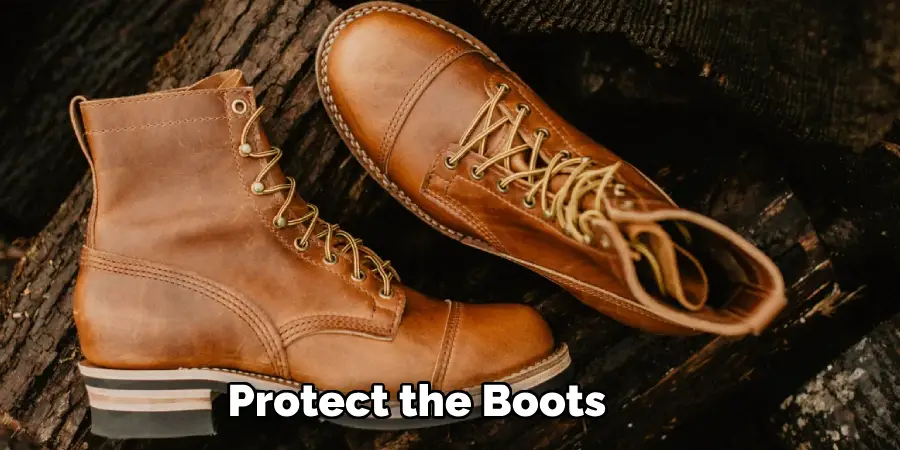
Step 8: Protect Your Boots
To prolong the life of your newly colored boots, it’s essential to protect them from external factors such as water, dirt, and sunlight. You can use a waterproofing spray or wax specifically designed for leather products to create a protective barrier on your boots. This will help repel water and prevent any stains or damage caused by exposure to the elements.
It’s also recommended to store your boots in a cool, dry place away from direct sunlight when not in use. This will help maintain their color and prevent fading over time. With proper care and maintenance, your colored leather boots can last for years to come!
Following these simple steps on how to color leather boots, you can easily transform the look of your old or boring leather boots into a vibrant and personalized fashion statement. Whether you choose to use leather dye or paint, with proper preparation and techniques, you can achieve professional-looking results that will make your boots stand out from the crowd. Now it’s time to put on those colorful boots and step out in style!
Additional Tips
- If you’re using leather paint, make sure to choose a high-quality product specifically designed for leather to ensure longevity and prevent cracking or peeling.
- For a more unique and creative look, consider mixing different shades of dye or paint to create your own customized color.
- When choosing a protective spray or wax, make sure it’s suitable for the type of leather used in your boots. Some products may be too harsh for certain types of leather and can cause discoloration or damage.
- Avoid wearing your newly colored boots in wet conditions as this can cause the color to bleed onto other items and ruin the finish.
- If you make any mistakes during the coloring process, don’t panic! You can use a leather stain remover or acetone to remove the unwanted color and start over.
- Regularly condition and buff your colored leather boots to maintain their appearance and protect them from wear and tear.
Frequently Asked Questions
Q1: Can I Color My Leather Boots if They Have a Glossy Finish?
A: Yes, you can still dye or paint your leather boots even if they have a glossy finish. However, it’s essential to lightly sand the surface of the boots before applying the dye or paint to help it adhere better.
Q2: Can I Use Regular Paint on My Leather Boots?
A: No, it’s not recommended to use regular paint on leather boots as it can cause cracking and peeling. Instead, opt for high-quality leather paint specifically designed for this purpose.
Q3: How Long Will the Colored Finish Last on My Boots?
A: With proper care and maintenance, the colored finish can last for a long time. However, keep in mind that exposure to sunlight and harsh elements can cause fading over time.
Q4: Can I Wear My Newly Colored Boots Right After Finishing the Process?
A: It’s best to wait at least 24 hours before wearing your boots to ensure that the color is fully set and dry. The longer you wait, the better the results will be.
Conclusion
Coloring your leather boots is a creative way to give them a fresh look and make a bold fashion statement. By following the outlined steps on how to color leather boots, from proper preparation to applying dye or paint, conditioning, and protecting your boots, you can achieve stunning, professional results. Remember to take your time with each step and use high-quality products to ensure lasting durability and a polished finish.
With a little effort and care, you can transform your old or dull leather boots into a vibrant and eye-catching accessory that reflects your personal style. Take pride in your work and enjoy showing off your beautifully customized boots!