
Dyeing suede leather can be an excellent way to refresh or change the look of your favorite items, from shoes to jackets and accessories. Suede, with its soft and textured surface, requires specific techniques and materials to achieve a vibrant, even finish without damaging the material. This guide will walk you through the essential steps and tips for how to dye suede leather.
What is Suede Leather?
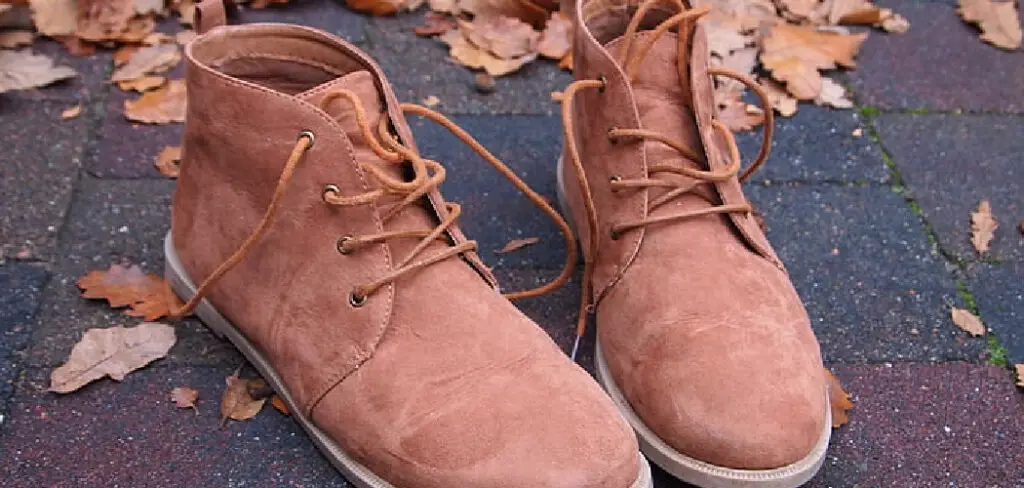
Suede leather is a type of leather characterized by its soft, velvety surface. It is made from the underside of animal hides, such as cow, lamb, or goat, giving it a smooth and textured appearance. Unlike full-grain leather, suede is more lightweight and pliable, making it a popular choice for clothing, footwear, and accessories. Despite its delicate feel, suede is durable and versatile, though it requires proper care to maintain its look and quality. Its unique texture and luxurious appeal make it a stylish option for a variety of applications.
Why Dye Suede Leather?
Dyeing suede leather allows you to customize or revitalize your items, giving them a fresh, new appearance. Over time, suede can fade due to exposure to sunlight, moisture, or general wear and tear. Dyeing can restore its vibrancy and help extend the life of your favorite pieces. Additionally, dyeing suede provides the opportunity to completely change the color of an item, allowing for greater versatility and personalization in your wardrobe or accessories.
Whether you’re looking to rejuvenate an old pair of suede shoes or match a jacket to a specific outfit, dyeing is an effective way to breathe new life into well-loved items.
Materials Needed for Dyeing Suede

Before you begin dyeing suede leather, it’s important to gather all the necessary materials to ensure a smooth and successful process. Here’s what you’ll need:
- Suede Dye: Choose a high-quality dye specifically designed for suede. This ensures proper absorption and even color distribution.
- Soft Bristle Brush or Suede Brush: Used for cleaning the surface of the suede and removing any dirt or debris before dyeing.
- Clean Cloths: These are essential for cleaning, blotting, or wiping excess dye during the process.
- Painter’s Tape: Helpful for masking areas you want to protect from dye, such as soles on shoes or non-suede parts of an item.
- Gloves: Protect your hands from staining by wearing gloves throughout the dyeing process.
- Plastic or Drop Cloth: Cover your work surface to prevent spills or stains on unwanted areas.
- Small Applicator or Sponge: Used to apply the dye evenly across the suede.
- Water Repellent Spray: For post-dye treatment to protect the suede and enhance its durability.
Make sure all materials are organized and within easy reach before starting. Proper preparation will make the dyeing process more efficient and help you achieve the best results.
10 Methods How to Dye Suede Leather
1. Choose the Right Suede Dye
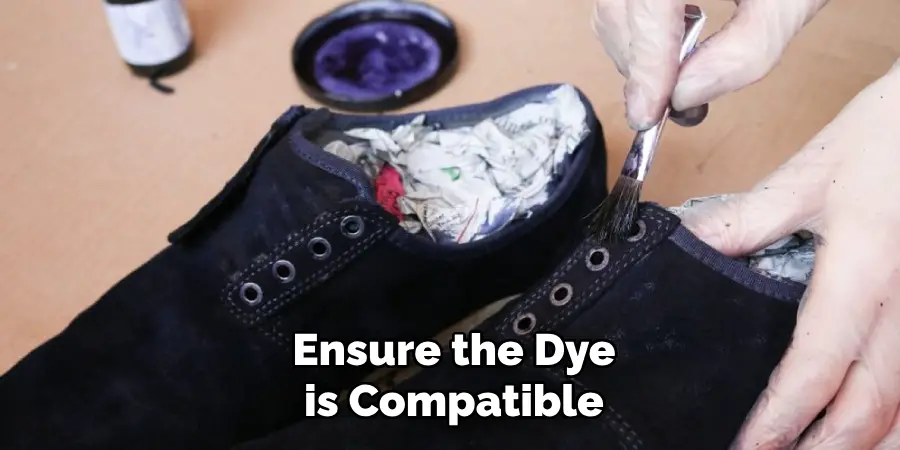
The first step in dyeing suede is selecting the appropriate dye specifically formulated for suede leather. Unlike regular leather dyes, suede dyes penetrate deeply and maintain the material’s texture. Opt for high-quality, alcohol-based suede dyes in your desired color. Ensure the dye is compatible with your item’s material to achieve even and long-lasting results.
2. Prepare the Suede Surface
Preparation is key to successful dyeing. Clean the suede thoroughly to remove dirt, oils, and debris that can hinder dye absorption. Use a suede brush or eraser to lift embedded dirt and restore the nap. If necessary, apply a suede cleaner and let the item dry completely. Proper preparation ensures the dye adheres evenly and prevents blotches.
3. Protect Surrounding Areas
Dyeing suede can be a messy process. Protect areas not intended for dyeing by masking them with painter’s tape. For items like shoes or jackets, cover hardware, soles, or lining to avoid accidental staining. Lay down a protective covering, such as newspaper or a drop cloth, to prevent dye from spreading to unintended surfaces.
4. Test the Dye on a Small Area
Before committing to dyeing the entire item, test the dye on an inconspicuous area to assess color accuracy and absorption. Apply a small amount of dye using a cotton swab or sponge, and let it dry completely. If the color matches your expectations and the suede remains supple, proceed with the full application.
5. Apply the Dye Evenly
Use a clean, soft brush or sponge to apply the dye in even strokes. Start with a light coat, working in small sections to ensure uniform coverage. Allow the first coat to dry before applying additional layers to deepen the color. Avoid saturating the suede, as excessive dye can stiffen the material and affect its texture.
6. Work the Dye into the Nap
To maintain suede’s velvety texture, work the dye into the nap using circular motions. A suede brush or soft-bristled brush can help distribute the dye evenly and enhance absorption. Brush the suede gently between coats to lift the nap and prevent it from becoming matted. This step ensures a consistent and natural finish.
7. Allow Ample Drying Time
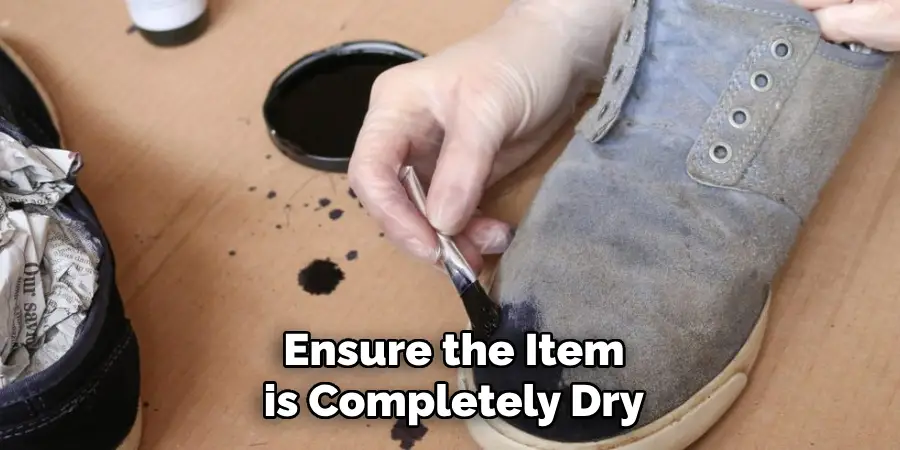
Proper drying is crucial for achieving durable results. Let the dyed suede air dry in a well-ventilated area, away from direct sunlight or heat sources that can cause fading or stiffness. Depending on the dye and environmental conditions, drying may take several hours. Ensure the item is completely dry before proceeding to the next step.
8. Seal the Dye
To preserve the color and protect the suede from moisture and stains, apply a suede sealant or protector. Spray the sealant evenly over the dyed surface, following the manufacturer’s instructions. Allow the sealant to dry thoroughly. This step enhances the durability of the dye and maintains the suede’s softness.
9. Restore the Suede’s Texture
Dyeing can sometimes flatten suede’s nap. Use a suede brush to gently lift and restore the texture after the dye has dried and been sealed. Brush in one direction to achieve a uniform appearance. Regular maintenance with a suede brush helps keep the material looking fresh and prevents matting over time.
10. Perform Regular Maintenance
To prolong the life of your dyed suede item, practice regular maintenance. Clean the suede periodically with a brush or eraser to remove dirt and maintain the nap. Reapply suede protector as needed to guard against moisture and stains. Proper care ensures your dyed suede retains its vibrant color and luxurious feel.
Things to Consider When Dyeing Suede
While dyeing suede can revitalize your items, there are several factors to keep in mind to avoid potential challenges and ensure the best results:
- Material Compatibility: Not all suede items react the same way to dye. Check the item’s label or test a small hidden area to confirm that the material is true suede and can absorb dye effectively.
- Color Selection: Choose a dye color that complements the original shade of the suede. Darker colors are often easier to achieve and provide better coverage than lighter or bright tones.
- Environmental Conditions: Ensure you work in a well-ventilated area to prevent inhaling fumes from the dye. Avoid humid or damp environments, as these can interfere with the drying process.
- Irreversible Changes: Dyeing suede is a permanent alteration. Make sure you are fully committed to the color and ready to sacrifice the original appearance of the item.
- Multiple Coats: Achieving an even, vibrant finish may require multiple coats of dye. Be patient and allow each layer to dry thoroughly before applying the next.
- Effect on Texture: Some dyes may cause minimal stiffening of the suede’s texture. To maintain its softness, invest in high-quality products and follow proper techniques outlined above.
Common Mistakes to Avoid
When dyeing suede, it’s easy to make errors that can affect the final outcome. Avoid these common mistakes to ensure a smooth and successful process:

- Skipping Preparation: Failing to clean and prepare the suede properly can lead to uneven dye absorption and blotchy results. Always take the time to brush, clean, and dry the suede thoroughly before starting.
- Using the Wrong Type of Dye: Applying a dye not specifically designed for suede can damage the material and result in poor color retention. Stick to high-quality suede dyes for the best results.
- Over-Saturating the Material: Applying too much dye at once can stiffen the suede and cause pooling or streaking. Use light, even coats and build up the color gradually.
- Neglecting to Test the Dye: Skipping the patch test can lead to disappointment if the color doesn’t match your expectations or if the suede reacts poorly. Always test the dye on a hidden area first.
- Rushing the Drying Process: Applying additional coats of dye or a sealant before the suede is fully dry can lead to smudging or uneven coverage. Be patient and allow sufficient drying time between steps.
Conclusion
Dyeing suede is an excellent way to breathe new life into worn or outdated items, giving them a refreshed and personalized appearance. By following the proper preparation, application, and maintenance techniques, you can achieve beautiful, long-lasting results while preserving the texture and integrity of the material. Remember to take your time, choose the right products, and work carefully to avoid common mistakes. Thanks for reading our blog post on how to dye suede leather! We hope you found it helpful and informative.