
Are you tired of seeing the same old color on your synthetic leather shoes? Do you want to give them a new and unique look? Well, why not try dyeing them yourself at home?
Dyeing synthetic leather shoes is a creative way to refresh their look, personalize them to your style, or restore their original color after wear and tear. While synthetic leather differs from genuine leather in composition and texture, achieving a vibrant, even finish with the correct dyes and techniques is still possible.
This guide on how to dye synthetic leather shoe will walk you through the essential steps and precautions needed to ensure a successful and long-lasting result, helping you transform your synthetic leather shoes with ease. Let’s dive in!
What Are the Benefits of Dyeing Synthetic Leather Shoes?
Dyeing synthetic leather shoes has numerous benefits, making it a popular DIY project among shoe enthusiasts. Here are some key advantages:
- Personalization: By dyeing your synthetic leather shoes, you can choose any color or combination of colors to match your style and preferences.
- Cost-effective: Instead of buying a new pair of shoes, dyeing your old ones can save you money while still giving them a fresh look.
- Sustainability: In today’s world, where sustainable practices are gaining importance, dyeing your synthetic leather shoes is an eco-friendly way to give them a new life instead of throwing them away.
What Will You Need?
Before we dive into the steps, here are some essential materials and tools you will need to dye synthetic leather shoes:
- Synthetic Leather Dye: There are various types of dyes available for artificial leather, including water-based and alcohol-based options. Choose a high-quality brand that offers a wide range of colors.
- Deglazer or Acetone: This removes any existing finish on the shoe’s surface and prepares it for the dye.
- Brushes or Sponges: These apply the dye evenly on the shoe.
- Protective Gloves: To protect your hands from potential stains.
- Newspaper or Plastic Sheet: To cover your workspace and prevent any potential mess.
Once you have all the necessary materials, it’s time to start!
10 Easy Steps on How to Dye Synthetic Leather Shoe
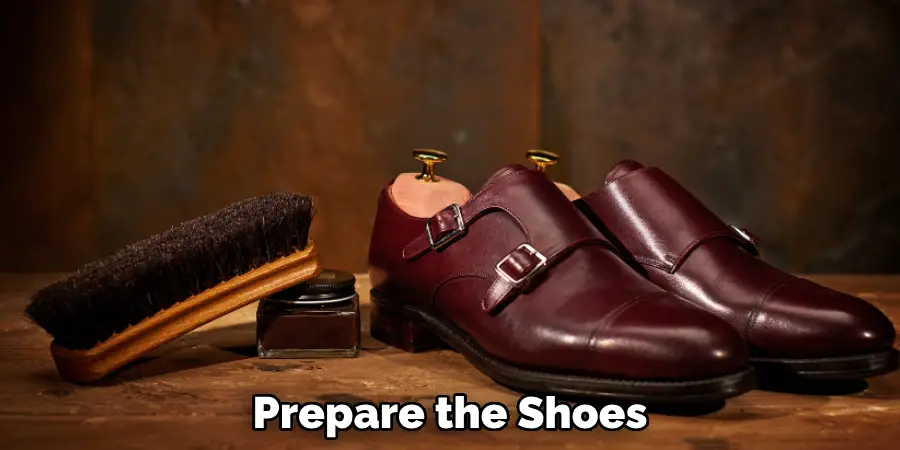
Step 1: Prepare the Shoes
Start by preparing your shoes for dyeing to ensure the dye adheres appropriately and delivers the best results. Begin by cleaning the shoes thoroughly to remove any dirt, dust, or debris from the surface. Use a soft cloth or a microfiber towel dampened with water and mild soap to gently wipe the shoes clean.Allow the boots to dry completely before moving on to the next step.
Step 2: Remove the Existing Finish
Using deglaze or acetone, carefully remove the existing finish on the surface of the synthetic leather shoes. This step is crucial to ensure the dye adheres evenly and effectively. Apply the deglaze or acetone to a clean cloth, then gently rub it over the entire surface of the shoes.
Be thorough but gentle to avoid damaging the material. Allow the boots to dry completely before proceeding to the next step.
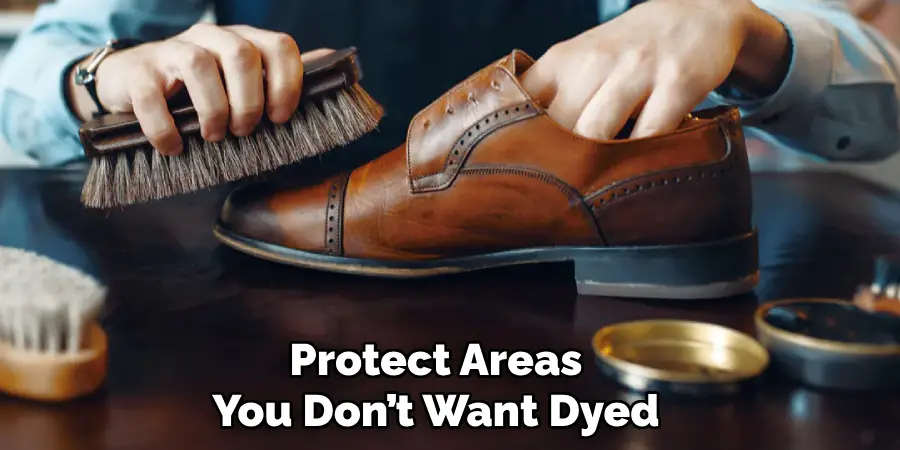
Step 3: Protect Areas You Don’t Want Dyed
Before applying the dye, you must safeguard any parts of the shoes you wish to keep untouched. Use painter’s or masking tape to cover soles, buckles, or decorative accents. Ensure the tape is firmly pressed to create a tight seal, preventing the dye from seeping underneath.
If intricate details or hard-to-reach sections exist, consider using a small brush to apply a barrier coat or petroleum jelly for added precision. Taking the time to protect these areas will ensure a clean and professional-looking finish. Double-check all taped sections before moving on to the dyeing process.
Step 4: Apply the Dye
With your shoes prepped and protected, you’re ready to apply the dye. Begin by shaking the dye bottle thoroughly to ensure the color is evenly mixed. Dip it into the dye using a foam brush, applicator, or clean cloth and apply in light, even strokes. Work in small sections, ensuring the dye is absorbed evenly into the material.
Avoid over-saturating any area to prevent blotches or streaks. If needed, apply multiple thin coats, allowing each layer to dry completely before adding the next. This layering technique will result in a smooth and vibrant finish. Take time during this step, as patience is key to achieving a professional result.
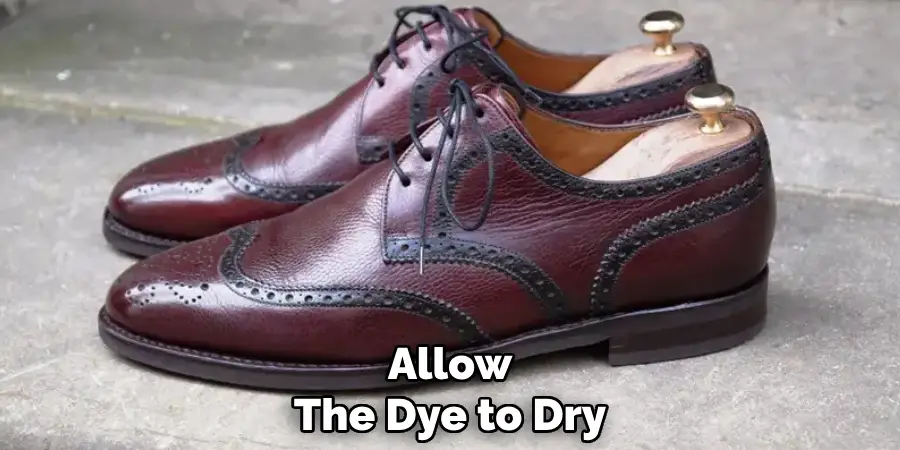
Step 5: Allow the Dye to Dry
After applying the dye, it’s crucial to allow ample drying time before moving on to the next steps. Place the shoes in a well-ventilated area, away from direct sunlight or heat sources, as excessive heat can cause discoloration or damage to the material. Depending on the type of dye and material, drying can take several hours or even overnight. To ensure the best results, do not rush this process.
Check the shoes for uneven patches once dry, and touch up those areas if necessary, with an additional thin coat of dye. Once completely dry and even, you’re ready to proceed to the final finishing touches.
Step 6: Apply a Protective Finish
To preserve the color and protect the dyed material, apply a protective finish specifically designed for the type of dye and material you use. Use a clean brush or cloth to spread the finish evenly across the surface, ensuring full coverage without oversaturating. This layer will help safeguard the dye from fading, cracking, or scuffing over time.
Allow the protective finish to dry thoroughly in a well-ventilated area, following the product’s recommended drying time. Once dry, your shoes will be ready to wear or display, with their vibrant color secured for long-lasting durability.
Step 7: Buff and Polish
After the protective finish has dried completely, gently buff the shoes with a soft, clean cloth. This step enhances the shine and gives the dyed material a professional appearance. Work in small, circular motions to achieve a consistent luster across the entire surface. If desired, apply a small amount of polish suitable for the material to enhance the sheen further.
Once polished, your shoes are complete and ready to showcase their renewed beauty.
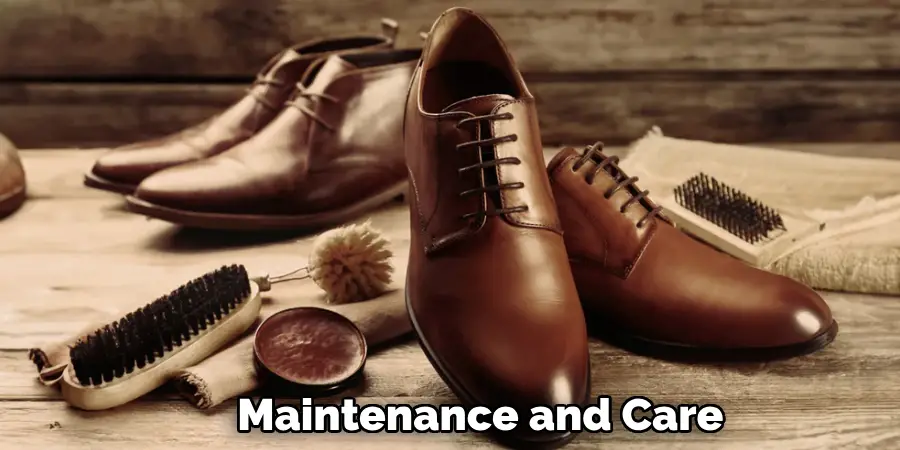
Step 8: Maintenance and Care
Regular maintenance is essential to preserve the vibrant color and polished finish of your shoes. Clean the shoes gently with a damp cloth to remove dirt or debris, avoiding harsh chemicals that could damage the dye.
Apply a protective spray or conditioner suitable for the material periodically to maintain the finish and safeguard against wear. Store the shoes in a cool, dry place, away from direct sunlight, to prevent fading.
Step 9: Troubleshooting Common Issues
Even with careful application, minor issues may arise during or after dyeing. If the color appears uneven, consider applying an additional coat of dye in the affected areas, ensuring consistent strokes. For any unwanted streaks or smudges, gently rub the area with a damp cloth to blend the dye.
If the finish becomes dull over time, reapply a light layer of polish to restore the shine. Address these issues promptly to maintain the professional appearance of your dyed shoes.
Step 10: Keep Experimenting
Dyeing shoes can be a fun and creative way to give old or worn-out footwear new life. Don’t be afraid to experiment with different colors, techniques, and materials to create unique and personalized designs. With practice and patience, you can become an expert in shoe dyeing and transform your shoe collection into a colorful array of one-of-a-kind masterpieces.
By following these steps and tips, you can successfully dye your synthetic leather shoes and achieve a professional-looking finish.
5 Things You Should Avoid
- Skipping Thorough Cleaning: Before dyeing, failing to clean your shoes properly can result in uneven dye application or poor adhesion. Remove dirt, dust, and previous finishes to ensure a smooth surface for the dye.
- Using the Wrong Type of Dye: Avoid using dyes not specifically formulated for synthetic leather. Regular leather dyes or fabric dyes might not bond properly and can lead to peeling or cracking over time.
- Neglecting to Test the Dye: Applying dye directly to your shoes without testing it can lead to undesired results. Always test on a small, inconspicuous area or a similar material first to confirm the color and compatibility.
- Applying Dye Too Thickly: Overloading your brush or sponge with dye can create blotchy patches or drips. Instead, use several thin, even layers to achieve a consistent and professional finish.
- Skipping Sealing or Finishing: Failing to seal your dyed shoes can leave them vulnerable to scuffs, moisture, and fading. Always use a proper finisher to protect and enhance the longevity of your work.
Avoiding these mistakes will help ensure your synthetic leather shoes look vibrant, durable, and professionally dyed.
Conclusion
How to dye synthetic leather shoe can seem daunting, but with the right techniques and attention to detail, it is entirely achievable.
You can create a stunning and durable finish by carefully selecting a suitable dye, thoroughly preparing the surface, and applying thin, even layers. Always test the dye beforehand and seal your work with a proper finisher to protect it.
With patience and precision, you can breathe new life into your synthetic leather shoes and achieve a professional, long-lasting result.