
Crafting your own leather bookmark is a fun and rewarding DIY project that combines creativity with functionality. A leather bookmark not only adds a touch of elegance to your reading experience but also makes for a thoughtful and personalized gift.
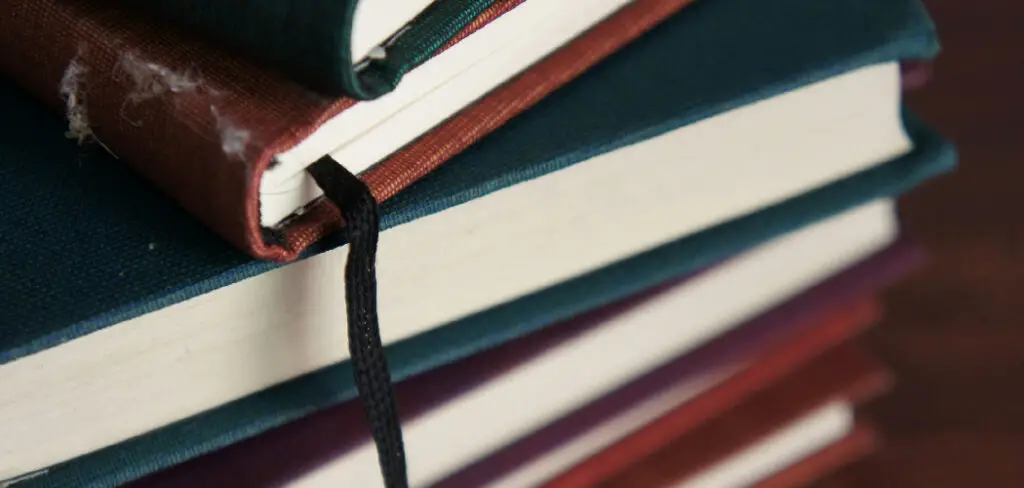
Whether you’re a seasoned crafter or a beginner, this guide on how to make a leather bookmark will walk you through the steps to create a durable and stylish bookmark that will last for years to come.
Why Choose Leather?
Leather is a timeless material that has been used for centuries to make various items, including bookmarks. Its durability and flexibility make it ideal for creating a long-lasting bookmark that can withstand daily use. Leather also develops a unique patina over time, giving your bookmark more character and charm.
Furthermore, leather comes in different colors and textures, allowing you to create a truly personalized bookmark that reflects your style and preferences.
Materials You Will Need
To make a leather bookmark, you will need the following materials:
A Piece of Leather (Preferably 2-3 Oz Thickness):
This can be a scrap piece of leather or a larger piece that you can cut to the desired size. Choose a color and texture that appeals to you. You can also experiment with different types of leather, such as cowhide, suede, or even faux leather.
Leather Cutting Tool:
This can be a leather knife, scissors, or a rotary cutter. Choose a tool that you are comfortable using and provides precise cuts.
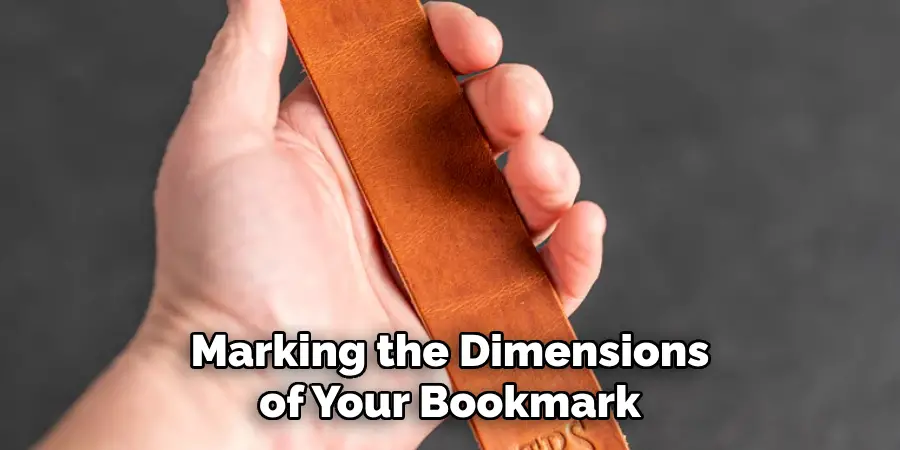
Ruler and Pen:
These will come in handy for measuring and marking the dimensions of your bookmark on the leather.
Hole Puncher:
You will use this to create holes for the tassel or ribbon to go through.
Tassel or Ribbon:
This is optional but adds a decorative touch to your bookmark. You can use a pre-made tassel or make one yourself with thread or leather scraps.
8 Step-by-step Guides on How to Make a Leather Bookmark
Step 1: Measure and Cut the Leather
Using a ruler and pen, measure the dimensions of your bookmark directly on the leather. A standard size for a bookmark is approximately 6 inches long and 1.5 inches wide, but you can adjust the size to suit your preference.
Once you’ve marked the measurements, use your leather cutting tool to carefully cut along the lines. Ensure your cuts are clean and even, as this will affect the overall appearance of your bookmark. Take your time with this step to achieve a precise shape.
Step 2: Create the Tassel (Optional)
If you’re using a tassel, now is the time to make one. You can use thread or leather scraps for this step. Cut your desired length of thread or leather strips and tie them together at one end. Then, fold the strands in half and wrap another piece of thread around them to hold them together.
You can also use a pre-made tassel and simply attach it to your bookmark later.
Step 3: Punch Holes for the Tassel or Ribbon
Using a hole puncher, create a small hole near the top of your bookmark where the tassel or ribbon will be attached. Make sure the hole is centered and not too close to the edge to avoid tearing the leather.
If you are adding multiple tassels or decorations, plan and mark the spots for the additional holes beforehand. Once the hole(s) are punched, you can test the fit by threading your tassel or ribbon through to ensure it attaches securely.
Step 4: Decorate the Bookmark (Optional)
This step is optional but can add a personal touch to your bookmark. You can decorate your leather bookmark by stamping it with letters, symbols, or designs using leather stamps and mallets. Alternatively, you can also use paint or markers to create unique designs on the leather.
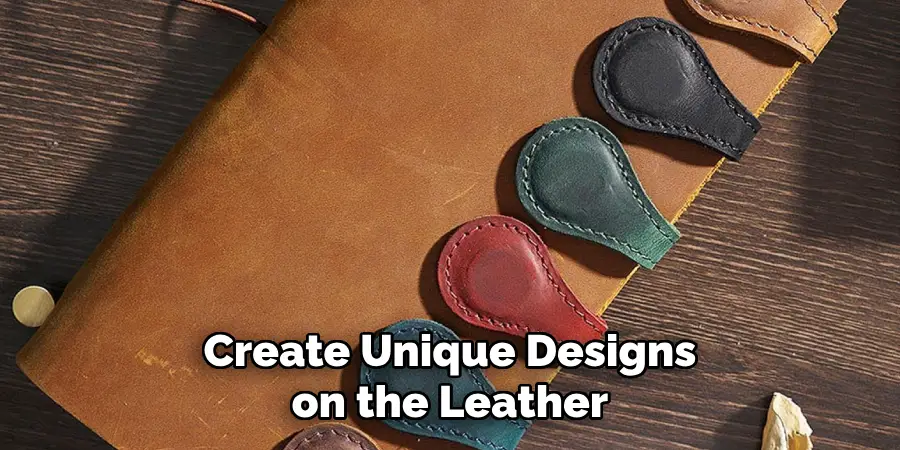
It’s best to decorate the bookmark before attaching the tassel or ribbon, as it will be easier to work on a flat surface. Allow the decoration to dry completely before proceeding to the next step.
Step 5: Smooth Out Any Rough Edges
After cutting the leather, you may notice rough or uneven edges. To give your bookmark a polished look, use sandpaper or an edge beveled to smooth out the edges. Gently rub along the edges with fine-grit sandpaper, ensuring you don’t damage the leather. If you prefer, you can also apply a small amount of edge finishing solution to seal and smooth the edges further.
This step not only enhances the appearance of your bookmark but also prevents it from fraying or wearing out prematurely. Once the edges are smooth, wipe off any residue with a clean cloth.
Step 6: Add the Tassel or Ribbon
Now that your bookmark is prepared and decorated, it’s time to attach the tassel or ribbon. Take your tassel or ribbon and thread it through the hole you punched earlier. If the hole is snug, you can use a small tool like a needle or tweezers to help guide the tassel or ribbon through.
Once threaded, secure it by tying a knot or creating a loop, depending on your preference. Make sure it is tight enough to stay in place but not so tight that it damages the leather. Adjust the length of the tassel or ribbon to your liking, and trim any excess material if needed. This final touch adds a practical and decorative element to your leather bookmark.
Step 7: Let it Dry
After completing all previous steps, allow your bookmark to dry thoroughly, especially if you’ve added any decorations or used edge finishing solutions. Place the bookmark on a flat surface in a well-ventilated area, away from direct sunlight or heat sources, as these can cause the leather to warp or crack.
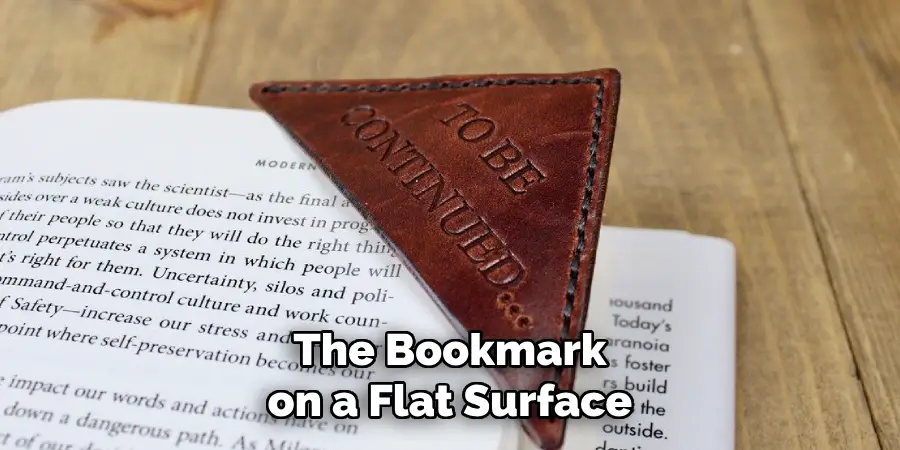
Depending on the type of decorations or finishes used, drying may take a few hours to overnight. Ensure it is completely dry before using or gifting it to prevent smudging or damage to the leather. Patience during this step will help your bookmark maintain its quality and finish over time.
Step 8: Enjoy Your Handmade Leather Bookmark
Congratulations, you have successfully made your very own leather bookmark! You can now use it for yourself or give it as a gift to friends and family. The possibilities are endless with the different colors, textures, and designs you can create using this tutorial. Experiment with different materials and techniques to make each bookmark unique.
Leather bookmarks not only add a touch of elegance to your reading experience but also serve as practical gifts that will last for years to come. With proper care, your handmade leather bookmark will become even more beautiful over time, adding character and charm with every use. So go ahead and enjoy your new creation! Happy crafting!
Additional Tips
Choose Quality Leather:
Using high-quality leather will ensure your bookmark is durable and has a polished look. Thinner leather works best for bookmarks and is easier to cut and manage.
Test Tools on Scrap Leather:
Before working on your main piece, test your cutting tools, hole puncher, and stamps on scrap leather to get comfortable with the process and avoid mistakes.
Use a Cutting Mat:
Protect your work surface and ensure clean cuts by using a cutting mat under your leather.
Practice Patience:
Rushing the process might lead to uneven cuts or poorly finished decorations. Take your time with each step to achieve the best results.
Personalize Thoughtfully:
If you’re making a bookmark as a gift, consider adding initials, favorite colors, or designs that hold meaning for the recipient to create a truly unique and personal item.
Keep Edges Sealed:
Using an edge finishing solution or wax will prevent the leather from fraying and give your bookmark a professional look.
Store Properly:
When not in use, store your leather bookmark in a cool, dry place to maintain its shape and prevent wear over time.
By keeping these tips in mind, you’ll be able to craft a leather bookmark that is not only visually appealing but also durable and long-lasting!
Frequently Asked Questions
Q1: What Type of Leather is Best for Making Bookmarks?
A: Thin, soft leathers like lambskin or goatskin are ideal for bookmark making as they are easier to cut and punch holes through. However, you can also use thicker leathers like cowhide or buffalo hide, as long as you have the right tools and techniques.
Q2: Can I Personalize My Leather Bookmark?
A: Yes, you can personalize your leather bookmark by stamping it with letters, symbols, or designs. You can also use paint or markers to create unique designs on the leather. This adds a personal touch and makes for a great gift.
Q3: How Do I Care for My Leather Bookmark?
A: To keep your leather bookmark in good condition, avoid exposing it to moisture or extreme heat. If it gets dirty, gently wipe it with a damp cloth and allow it to air dry. You can also apply a small amount of leather conditioner or oil to keep it soft and supple.
Q4: Can I Add Multiple Tassels or Decorations?
A: Yes, you can add multiple tassels or decorations to your leather bookmark. Just make sure to plan and mark the spots for the additional holes beforehand to ensure they are evenly spaced. This will prevent any tearing or damage to the leather.
Conclusion
Creating a leather bookmark is a rewarding and enjoyable craft project that blends functionality with creativity. With a few simple tools and materials, you can design a unique and elegant accessory to enhance your reading experience or to gift to loved ones.
Whether you prefer a minimalist design or a highly personalized creation, the steps outlined in this guide offer flexibility to cater to your style and preferences. By taking the time to smooth edges, decorate thoughtfully, and care for the finished product, you ensure that your handmade leather bookmark will remain a cherished item for years to come. Thanks for reading this article on how to make a leather bookmark.