When it comes to updating your home decor, painting a leather couch can be an effective and budget-friendly solution. Whether you want to revitalize an old piece or customize it to better fit your style, transforming your leather couch with paint offers a unique opportunity to breathe new life into your furniture.

This guide on how to paint a leather couch will walk you through the necessary steps to ensure a professional and lasting finish, from selecting the right materials to applying techniques that preserve the couch’s texture and comfort. With a little creativity and careful preparation, you can achieve a stunning result that enhances your living space.
Why Paint a Leather Couch?
Painting a leather couch can be a fantastic way to refresh your living space without the expense of purchasing new furniture. It offers a sustainable option for repurposing an old or outdated piece, allowing it to match a new color scheme or interior design trend.
Moreover, painting a leather couch provides an opportunity for customization, enabling you to express your personal style with unique colors and patterns.
Whether you’re aiming to cover up blemishes or simply desire a new look, painting can transform your couch into a centerpiece that reflects your taste and enhances the overall aesthetic of your home.
Needed Materials
A Leather Couch (Obviously!):
While this may seem obvious, it’s worth noting that this method is only suitable for genuine leather couches. Faux leather or vinyl will not absorb the paint and achieve the desired result.
Paint:
The type of paint you use will depend on the look and finish you want to achieve, as well as the texture and condition of your leather. For a smooth, modern look, consider using acrylic leather paint. If you prefer a softer appearance with more texture, opt for chalk paint or fabric paint designed for use on leather.
Leather Cleaner:
Before painting your couch, it’s crucial to clean its surface thoroughly. Choose a gentle cleaner specifically made for leather furniture to avoid any damage. Be sure to follow the instructions carefully, and test in a small, inconspicuous area before applying it to the entire couch.

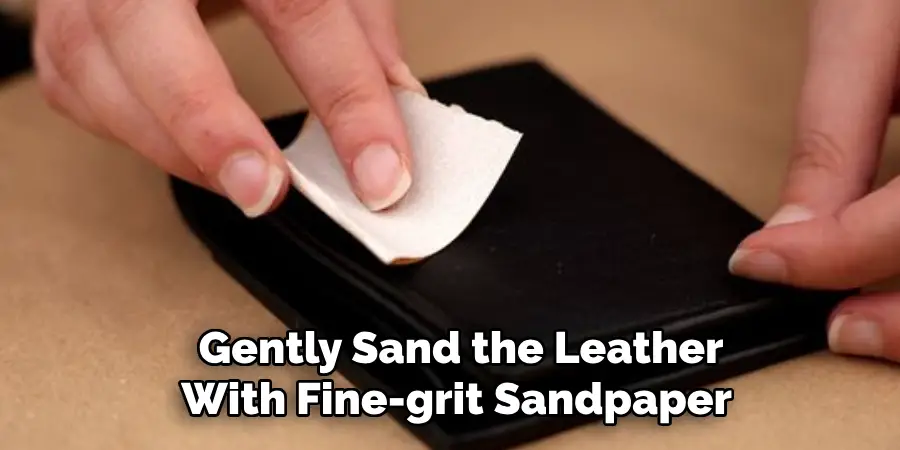
Fine Grit Sandpaper:
A light sanding can help create a better bond between the leather and paint. Use fine grit sandpaper (around 220-400) to gently scuff up the surface of your couch without causing any damage.
Primer:
If you’re using acrylic or chalk paint, a primer designed for use on leather can help ensure a smooth and even finish. It’s especially useful if your couch has any stains or discoloration that you want to cover up.
Paintbrushes/Rollers:
Choose high-quality brushes or rollers designed for the type of paint you’re using. It’s recommended to use a small brush for detailed areas and a larger one or roller for broader sections.
Drop Cloths:
To protect your floors and surrounding areas from any potential spills or drips, lay down drop cloths or old sheets underneath and around your couch.
8 Step-by-step Guidelines on How to Paint a Leather Couch
Step 1: Prep Your Couch
Begin by preparing your leather couch for painting to ensure the best possible outcome. Start by moving the couch to a well-ventilated area, preferably with ample natural light, to facilitate accurate color application and drying.
Remove any cushions or accessories that might obstruct the painting process. Next, thoroughly clean the entire surface of the couch using the leather cleaner, ensuring you rid it of dust, oils, and dirt.
It’s crucial to follow the cleaner’s instructions and test it on an inconspicuous area to prevent potential damage. Once clean, gently sand the leather with fine-grit sandpaper to create a slightly rough texture, which will help the paint adhere better. Take care to wipe away any dust residue with a soft, dry cloth before proceeding to the next step.
Step 2: Protect Your Surroundings
Before you begin painting, it’s important to protect the area around your leather couch to prevent any unwanted paint splatters or spills. Lay down drop cloths or old sheets on the floor and surrounding furniture to catch any accidental drips.
If your couch is near a wall or other pieces of furniture that you can’t move, consider using painter’s tape to cover any exposed surfaces that might be at risk for paint transfer.
Ensure all plug sockets, if nearby, are covered and protected as well. Taking these precautions will save you time and effort in cleanup later, allowing you to focus on creating a flawless finish on your couch.
Step 3: Apply Primer (If Needed)
Applying a primer can be a crucial step, especially if you’re using acrylic or chalk paint to ensure even coverage and a professional finish. Begin by selecting a primer specifically designed for leather surfaces.
Pour a small amount of primer into a paint tray for easier application. Using a high-quality paintbrush or roller, apply a thin, even layer of primer over the entire surface of the leather couch.
Take care to work the primer into any seams or crevices, ensuring thorough coverage. Allow the primer to dry completely before proceeding to the next step, as this will help the paint adhere better and last longer.

Depending on the primer’s instructions, a second coat may be necessary for optimal adhesion. Once the primer is fully dry and cured, you’re ready to move on to the next stage of painting your leather couch.
Step 4: Begin Painting
With all your preparations complete, it’s time to start painting! Start by mixing or shaking your chosen paint well, as this will help ensure an even color distribution. Using a small brush, begin painting the edges and detailed areas of your couch. For larger sections, opt for a roller for faster coverage.
Take care to work in small sections at a time, applying thin coats of paint with smooth and even strokes. Avoid overloading your brush or roller with too much paint to prevent drips or clumps from forming. Allow each layer of paint to dry completely before adding another coat until you achieve your desired level of coverage.
Step 5: Create a Textured Look (Optional)
If you’re aiming for a more textured or artistic finish on your leather couch, consider incorporating this optional step. Once the base layer of paint is dry, use a sponge or a stippling brush to apply a lighter or darker shade of your chosen color.
Dab the sponge or brush lightly onto the leather surface, creating a mottled effect that adds depth and interest to the paint job. For a more pronounced texture, use a coarse sponge or a crumpled-up piece of fabric.
This technique can be particularly effective if you are aiming for a vintage or rustic look. Be sure to work gradually and step back occasionally to assess the overall effect, ensuring it aligns with your vision. Allow the textured layer to dry completely before moving on to any additional finishing steps.
Step 6: Add Finishing Touches
Once your couch is painted to your liking and has fully dried, it’s time to add any finishing touches. This could include using a fine-tipped brush and another color of paint to add intricate details or designs, such as stripes, patterns, or lettering.
You can also use stencils for more uniform designs. Allow the finishing touches to dry completely before moving on to the final step.
It’s also essential to seal your couch with a clear topcoat to protect the paint and ensure its longevity. A water-based polyurethane or a clear acrylic sealer can work well for this purpose, providing a protective barrier against wear and tear.

Step 7: Dry Completely
Allow your couch to dry completely before using it again. This will ensure that the paint has fully cured and adhered to the leather surface for long-lasting results. Depending on the type of paint used, this process can take anywhere from 24-48 hours.
The couch will still be usable during this time, but it’s best to avoid placing heavy objects or sitting on it for extended periods until the paint is fully cured.
Step 8: Enjoy Your Newly Painted Couch!
Congratulations, you’ve successfully transformed your old leather couch into a beautiful piece of furniture that reflects your personal style! With proper care and maintenance, your newly painted couch should stay looking vibrant and fresh for years to come.
Remember to follow any instructions provided by the paint and sealer manufacturers for best results. And don’t be afraid to get creative and experiment with different colors and techniques in the future.
Following these steps on how to paint a leather couch and using high-quality products will help ensure a successful painting project that will refresh your leather couch and give it a new lease on life. With the right tools, techniques, and a little bit of patience, you can transform any old or worn-out leather furniture into a stunning centerpiece in your home. Happy painting!
Frequently Asked Questions
Q: Can I Paint Any Type of Leather Couch?
A: It is best to check with the manufacturer or do a patch test on a small, inconspicuous area before painting an entire leather couch. Some types of leather may not take paint well or may require additional preparation steps.
Q: What Type of Paint Should I Use for My Leather Couch?
A: Acrylic or chalk paint is recommended for painting a leather couch, as they provide good coverage and adhere well to the surface. Make sure to choose a high-quality, specially formulated paint designed for use on leather surfaces.
Q: Do I Need to Use a Primer Before Painting?
A: While not necessary, using a primer can help ensure even coverage and better adhesion of the paint. It is especially recommended if you are using acrylic or chalk paint.
Q: How Long Will It Take for the Paint to Dry?
A: This will depend on the type of paint used and environmental conditions. It is best to follow the instructions provided by the paint manufacturer, but in general, it can take 24-48 hours for the paint to dry completely.

Conclusion
Painting a leather couch is a rewarding and creative project that can transform your furniture into a unique and stylish centerpiece for your home.
By following the outlined steps on how to paint a leather couch—choosing the right materials, preparing the surface thoroughly, and applying the paint with care—you can achieve a professional and long-lasting finish. Remember, patience is key, particularly during the drying and curing process, to ensure the paint adheres properly and remains durable over time.
Whether you opt for a sleek and sophisticated look or a more artistic and textured finish, a painted leather couch can breathe new life into your living space. Enjoy the satisfaction of customizing your furniture to reflect your personal style and relish the compliments that are sure to follow from your beautifully transformed piece.