
Are you tired of having to constantly replace the magnetic clasp on your favorite handbag? Don’t worry, you’re not alone. A faulty or broken magnetic clasp can be frustrating and potentially ruin a perfectly good bag.
Magnetic clasps on handbags are not only functional but also add an element of sleek convenience to the design. However, it can be frustrating and inconvenient when they start to lose their magnetism or become detached from the handbag itself. Fortunately, repairing a magnetic clasp is a straightforward process that does not require professional help.

In this guide, we’ll walk you through the steps on how to repair magnetic clasp on handbag, ensuring your handbag is as good as new. Whether you’re dealing with a weakened magnet or a clasp that has come loose, our instructions will help you secure your possessions with ease and confidence.
What are the Causes of a Faulty Magnetic Clasp?
Before we jump into the repair process, it’s essential to identify the possible causes of a faulty magnetic clasp. This will help you determine the best course of action for repairing your clasp and prevent future damage.
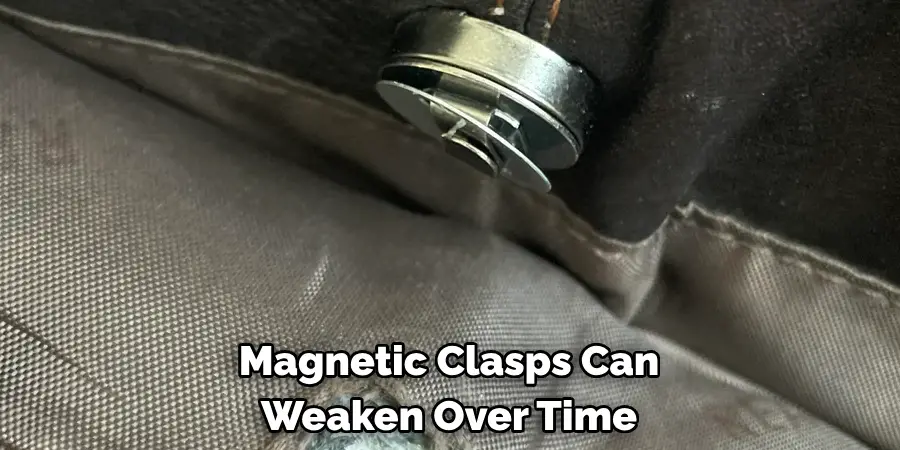
- Normal Wear and Tear: Like any other component on a handbag, magnetic clasps can weaken over time due to frequent use. The constant opening and closing of the clasp can cause the magnet to lose its strength or become detached from the bag.
- Excessive Weight: If you tend to pack your handbag with heavy items, it can put pressure on the magnetic clasp, causing it to weaken or break over time.
- Accidental Damage: Sometimes, the clasp can become damaged due to accidental bumps or drops. This can cause the magnet to become loose or break altogether.
- Moisture and Dirt: Moisture, dirt, or debris exposure can also cause the magnetic clasp to malfunction.
Now that you know the possible causes of a faulty magnetic clasp, let’s repair it.
What Will You Need?
Before you start repairing your magnetic clasp, make sure you have the following items handy:
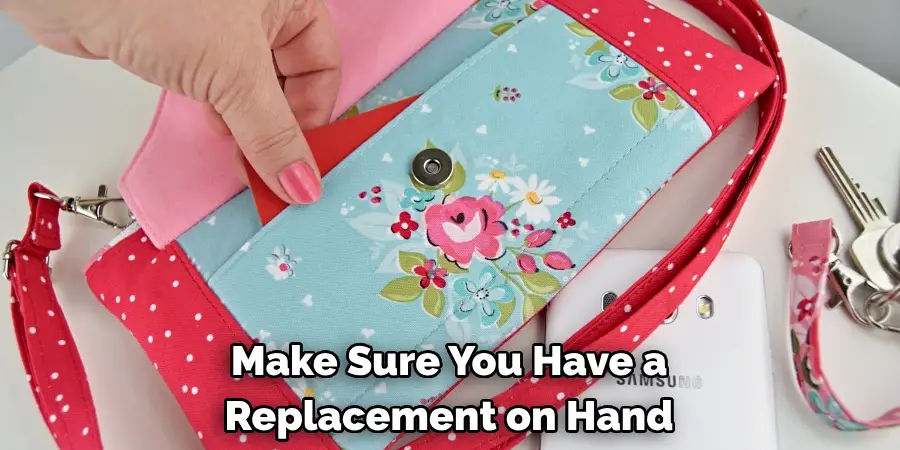
- Magnetic Clasp: Before you start repairing your magnetic clasp, make sure you have a replacement on hand in case your current one is irreparable.
- Scissors: You may need scissors to trim any frayed or damaged edges on the fabric.
- Thread and Needle: If the clasp has become detached from the handbag, you’ll need a needle and thread to reattach it securely.
- Super Glue: For minor issues, super glue can be used to secure a loose magnet or fix any cracks in the clasp.
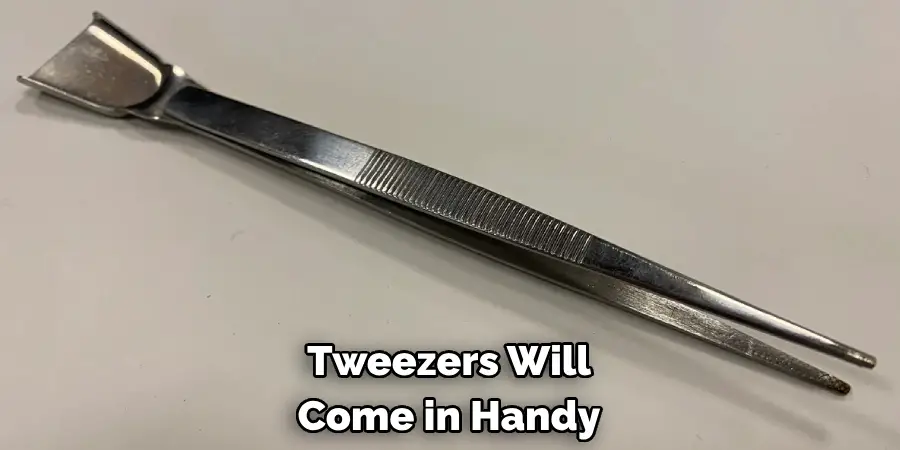
- Tweezers: If the magnet has become dislodged from the clasp, tweezers will come in handy for repositioning it correctly.
With these items on hand, you’re ready to start repairing your magnetic clasp.
10 Easy Steps on How to Repair Magnetic Clasp on Handbag
Step 1. Remove the Old Clasp:
If your current clasp is broken or damaged beyond repair, carefully remove it from the handbag. Use scissors to trim any frayed edges or threads that may be attached to the fabric. Additionally, if the clasp is still attached to the bag, use tweezers to gently remove it.
Step 2. Clean the Area:
Once the old clasp has been removed, preparing the area for the new replacement is important to ensure a secure attachment. Begin by thoroughly cleaning the area where the new clasp will be attached. Use a damp cloth to wipe away any dirt, moisture, or residue that may have accumulated over time.
Allow the area to dry completely before proceeding. This step is crucial as any debris or moisture can interfere with adhesion, potentially weakening the bond between the clasp and the handbag fabric. Ensuring the area is clean and dry will increase the longevity of the repair, making your handbag as functional and stylish as it was when new.
Step 3. Attach the New Clasp:
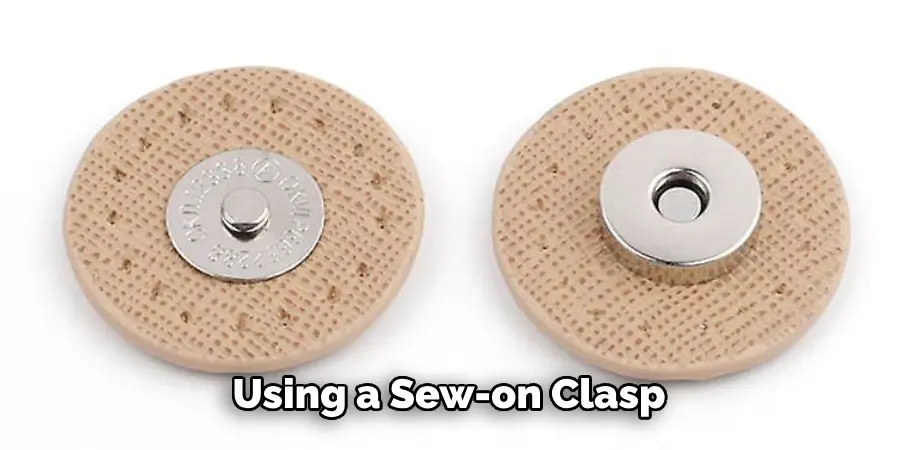
After cleaning the area, attaching the new magnetic clasp is time. If you’re using a sew-on clasp, thread your needle and carefully sew the new clasp onto the handbag, ensuring it is aligned correctly.
For clasps that require gluing, apply a small amount of super glue to the back of the clasp and press it firmly onto the designated spot on the handbag. Hold it in place for a few minutes to ensure a strong bond. If your clasp has separate pieces for both sides of the handbag, repeat this process on the other side, making sure both parts of the clasp align perfectly when the handbag is closed.
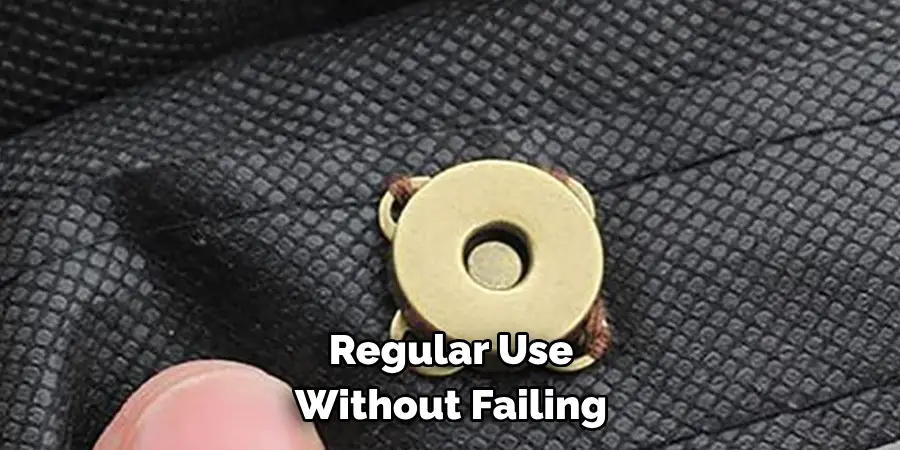
Step 4. Test the Clasp:
Once the new clasp is securely attached to your handbag, testing its functionality is important. Gently pull the handbag’s opening apart to ensure the clasp engages and holds securely. Also, try carrying the handbag with varying weights inside to simulate day-to-day use.
This step is crucial to confirming the repair was successful, and the clasp is capable of withstanding regular use without failing. Ensure the clasp opens and closes smoothly without excessive force, which could indicate improper alignment or a weak bond. If you encounter any issues, review the attachment process to ensure everything was done correctly and make any necessary adjustments.
Step 5. Secure and Reinforce the Clasp:
To ensure the longevity of your repair, consider reinforcing the clasp’s attachment to the handbag. If you’ve sewn the clasp on, repeat the stitching with a strong, durable thread to reinforce the connection. For glued clasps, apply a second layer of glue around the edges of the clasp for additional security.
Allow any glue used in this step to fully dry and set before using the handbag again. This precaution helps to minimize the risk of the clasp detaching prematurely due to everyday wear and tear or the weight of items within the handbag. Reinforcing the clasp not only extends the life of your repair but also ensures the handbag remains a reliable accessory for your daily needs.
Step 6. Maintain Regular Checks:
To prevent future issues with your handbag’s magnetic clasp, it’s wise to incorporate regular inspections into your routine. Periodically check the clasp for signs of wear and tear, such as loosening, rusting, or weakening of the magnet. Early detection of potential problems can allow for prompt repair or replacement before the clasp fails entirely.
Additionally, consider the amount of weight you’re placing in your handbag, as excessive strain can expedite the wear process. By taking these preventative measures, you can extend the lifespan of your handbag and ensure the clasp remains functional and reliable.
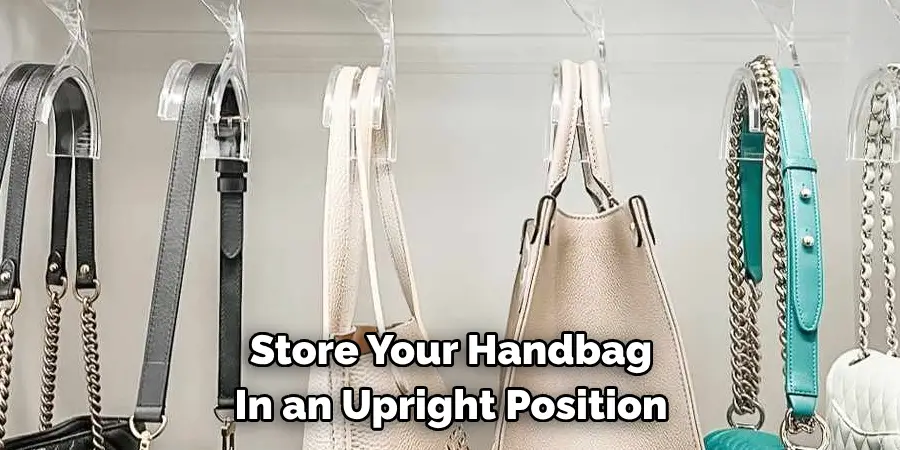
Step 7. Store Your Handbag Properly:
Proper storage of your handbag when not in use is key to preserving the integrity of the magnetic clasp and the handbag itself. Avoid hanging your handbag by its straps, as this can place undue stress on the clasp and fabric, leading to premature wear or detachment. Instead, store your handbag in an upright position on a shelf or in a drawer, ensuring that nothing heavy is placed on top of it.

Consider stuffing the handbag with soft material like tissue paper to maintain its shape and prevent the sides from pressing too firmly against the clasp, which could weaken it over time. This simple yet effective practice can greatly contribute to the longevity of your magnetic clasp and handbag.
Step 8. Apply Protective Coatings if Necessary:
Consider applying a protective coating to the clasp if your handbag is frequently exposed to harsh conditions such as rain or high humidity. Certain products on the market are designed to shield the metal from moisture and reduce the risk of rust or corrosion, which can impair the magnet’s effectiveness.
Follow the product instructions carefully, applying a thin, even layer to the clasp while avoiding the fabric of the handbag. Allow the coating to dry completely before using the bag again. This preventive action can significantly enhance the durability of the magnetic clasp, ensuring it continues to function optimally despite environmental challenges.
Step 9. Troubleshooting Common Clasp Issues:
You can take several troubleshooting steps if you encounter any issues with your newly attached magnetic clasp, such as difficulty in opening or closing or a weak grip. First, ensure that the clasp and its counterpart are correctly aligned; even a slight misalignment can affect functionality. If the clasp seems weak, check for any debris or dirt that may have accumulated, as this can also impact its strength.
For sewn-on clasps, check the stitches to ensure they haven’t loosened. Inspect the adhesive bond for any signs of failure in cases where the clasp has been glued. These simple checks often resolve common problems, ensuring your handbag remains both stylish and functional.
Step 10. Enjoy Your Revitalized Handbag:
After meticulously following the steps to repair and maintain your handbag’s magnetic clasp, it’s time to enjoy the fruits of your labor. With the clasp now secure and operational, your handbag is ready to accompany you on your daily adventures once more. Remember, your care and attention to maintaining your accessories can significantly extend their usability and appeal.
Whether heading to work, a night out, or a casual day around town, your handbag, boasting its newly repaired clasp, is not just a container for your belongings but a statement of your dedication to preserving the things you value.
By following these steps, you can successfully repair and maintain your handbag’s magnetic clasp, ensuring it remains functional and reliable for years to come.
5 Additional Tips and Tricks
- Use the Right Glue: Selecting the appropriate adhesive is crucial when attaching a magnetic clasp back onto a handbag. Opt for a strong, durable glue designed for leather or the specific material of your bag to ensure a lasting fix.
- Secure Clasp Placement: Before applying glue, precisely position the clasp pieces to ensure they align perfectly when the bag is closed. Misalignment could make closing the bag difficult or damage the clasp further.
- Protect the Bag’s Surface: Place a protective layer, such as wax paper or a thin plastic sheet, inside the bag beneath the clasp area. This prevents any excess glue from seeping through the material and damaging the interior.
- Apply Pressure: Press the clasp firmly in place for a few minutes after glue application. You can use a heavy book to maintain pressure without the need to hold it manually, allowing the glue to set effectively.
- Test the Repair: Once the glue has fully dried, gently test the clasp to make sure it opens and closes smoothly. Avoid putting too much strain on the clasp immediately after repair to give it time to fully bond.
With these additional tips and tricks, you can confidently repair a magnetic clasp on your handbag without the need for expensive professional help.
5 Things You Should Avoid While Repairing a Magnetic Clasp on a Handbag
- Using Inferior Quality Glue: Avoid using low-quality or the wrong type of adhesive. Glues not designed for your handbag or clasp material can result in a weak bond or damage to the fabric and leather.
- Ignoring Clasp Alignment: Take your time with the alignment process. Inaccurately aligned clasps affect functionality and can lead to wear and tear on the bag’s material over time.
- Overapplying Glue: Applying too much glue can cause it to ooze out around the edges of the clasp, creating a messy appearance and potentially damaging the bag’s exterior. Always adhere to the “less is more” principle.
- Skipping the Drying Time: Be patient and give the glue ample time to dry completely. Using the handbag too soon after the repair can cause the clasp to detach again or weaken the bond, making future repairs more difficult.
- Disregarding Interior Protection: Failing to protect the inside of your bag from excess glue can lead to aesthetic and structural damage to the lining. Always insert a barrier material between the clasp area and the rest of the bag during the repair process.
By avoiding these common mistakes, you can ensure a successful and long-lasting repair of your handbag’s magnetic clasp.
How Do You Remove a Magnetic Clasp From a Bag?
In some cases, the best solution for a damaged magnetic clasp is to remove it entirely and replace it with a new one. Here are the steps to safely remove a magnetic clasp from your handbag:
- Gather Supplies: You will need pliers, a small flathead screwdriver, and rubbing alcohol.
- Locate the Prongs: Most magnetic clasps have two prongs on each side that secure them to the fabric or leather of the bag.
- Use Pliers: Grip one end of the prong with pliers and gently twist back and forth until it breaks off. Repeat on the other side.
- Remove the Clasp: Once both prongs are removed, you should be able to easily pull the clasp off the bag.
- Clean the Area: Use rubbing alcohol on a cotton swab to clean any glue residue or dirt left behind by the old clasp.
- Attach New Clasp: Follow the steps outlined in our previous tips and tricks to securely attach a new magnetic clasp to your handbag.
By following these instructions and using the right tools and techniques, you can successfully remove a damaged magnetic clasp from your bag without causing further damage.
How Do You Attach Magnetic Snaps to Fabric?
Attaching magnetic snaps to fabric is a common method for adding a secure closure to bags, clothing, and other items. Here’s how you can easily attach them yourself:
- Choose the Right Snaps: Different types of magnetic snaps are available, including sew-on and glue-on options. Choose the type that best suits your project.
- Mark Placement: Use a pen or tailor’s chalk to mark where you want the snaps to be placed on your fabric.
- Create Slits: Using a small seam ripper, make slits in the fabric where you marked it. This will allow the snap prongs to pass through and secure properly.
- Insert Prongs: Push the prongs of one side of the snap through the fabric from the back to the front.
- Secure Backing: On the front side, place the backing piece over the prongs and bend them down using pliers to secure them in place.
- Repeat for the Other Side: Follow steps 4 and 5 for the other half of the snap, making sure they align correctly when the fabric is closed.
- Add Reinforcement: To ensure a strong bond, you can also add a small piece of interfacing or fusible webbing to the back of the snap before securing it in place.
With these simple steps, you can easily attach magnetic snaps to fabric for a professional and secure closure on your bags and garments.
Conclusion
How to repair magnetic clasp on handbag is a straightforward process that anyone can undertake with the right tools and a bit of patience. From ensuring the correct alignment of the clasp for seamless functionality to choosing the appropriate glue and allowing adequate drying time, these steps are crucial for a durable repair.
Additionally, understanding what to avoid during the repair process helps prevent common pitfalls that could lead to further damage. Remember, the goal is not only to fix the clasp but to restore the handbag’s functionality and aesthetic appeal without compromising its integrity.
With this guide, you have the necessary knowledge to confidently repair a magnetic clasp, ensuring your favorite handbag remains a staple in your collection for years to come.