Stretching leather sandals can make a significant difference in comfort, preventing painful blisters and ensuring your shoes fit perfectly. Leather is a natural material that adapts over time, but there are ways to speed up the process safely without damaging the material. Whether you’ve purchased new sandals that are a bit snug or your old favorites have tightened up after being stored, these techniques will help you get the perfect fit.

Taking the right steps to stretch your sandals ensures that the leather remains in good condition, providing long-lasting wear and style. Before you start, make sure you have the necessary supplies at hand and are ready to follow a careful, step-by-step process on how to stretch sandals leather. With a little patience and the proper methods, you’ll enjoy comfortable, well-fitted sandals in no time.
Why Stretch Your Sandals?
Stretching your sandals is essential for both comfort and durability. Over time, leather sandals can become tight due to changes in humidity, wear patterns, or improper storage. Tight sandals can lead to discomfort, blisters, or even foot pain, making them difficult to wear for long periods.
By stretching your sandals, you can ensure a better fit that conforms to the shape of your feet, reducing pressure points and allowing for a more enjoyable experience. Additionally, stretching helps maintain the integrity of the leather, preventing cracks or damage that can occur when the material is overly strained. Taking the time to stretch your sandals ensures you get the most out of your investment in terms of comfort, style, and longevity.
Supplies You May Need
- Thick socks
- Leather stretching spray or solution
- A hairdryer
- Shoe stretchers (designed for sandals, if possible)
- Plastic bags and water (for the freezer method)
- A clean cloth
- Petroleum jelly or leather conditioner
- Rubbing alcohol
- Ziploc bags
- Towel
10 Step-By-Step Guidelines on How to Stretch Sandals Leather
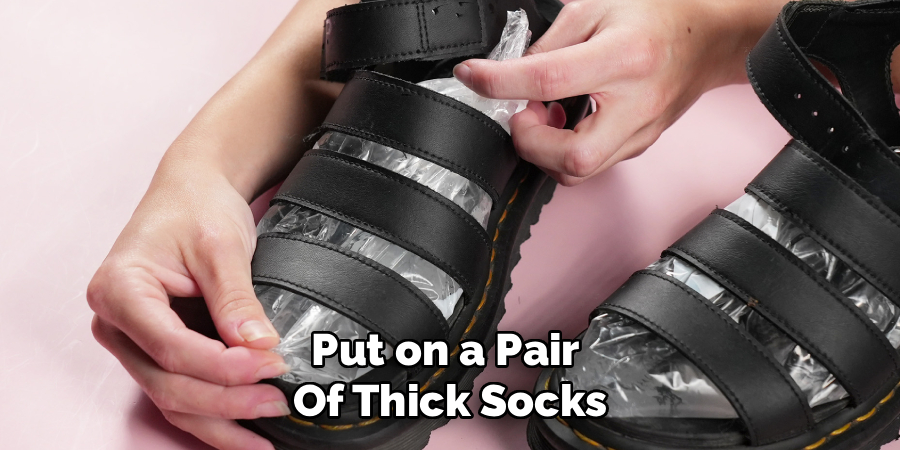
Step 1: Wear Thick Socks With Your Sandals
Put on a pair of thick socks, then slip your feet into the sandals. The socks add volume and create gentle pressure against the leather as you move. Spend about 15–20 minutes walking around your house in this setup.
You might find this slightly uncomfortable at first, but it is a safe method for expanding the leather gradually. It’s best to repeat this several times over a few days for optimal results, especially if the sandals are quite snug.
Step 2: Use a Leather Stretching Spray
Purchase a leather stretching spray or solution specifically formulated for shoe leather. Spray the inside of your sandals generously, focusing on the tightest areas. The spray softens the leather fibers, making them more flexible for stretching.
After spraying, wear your sandals (with or without socks, depending on comfort) for about 30 minutes. The combination of moisture and your foot shape will help better mold the leather to your size.
Step 3: Apply Heat With a Hairdryer
Set your hairdryer to medium heat and blow warm air onto the tight spots of your sandals for 2–3 minutes. Make sure to keep the dryer at a safe distance to avoid overheating the leather. Flex your foot and bend your toes to encourage movement.
Immediately wear the sandals after heating, as warm leather stretches better. Repeat this process a couple of times, allowing the material to rest in between heat applications.
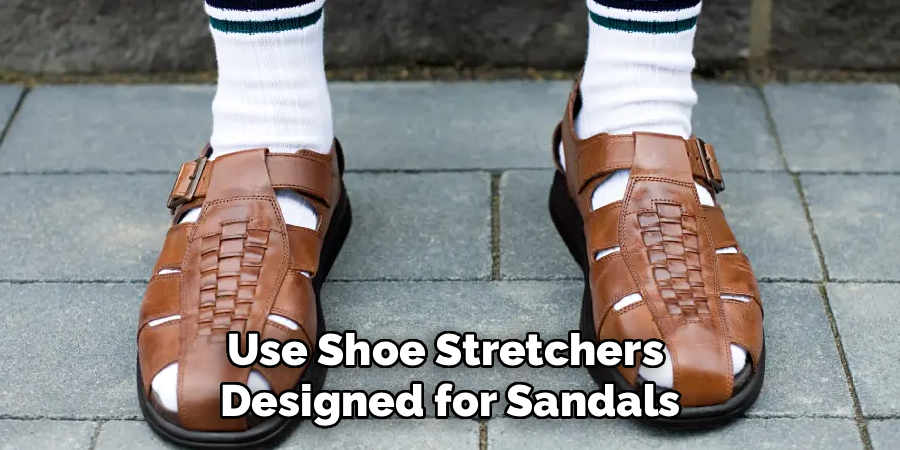
Step 4: Insert Shoe Stretchers
Use shoe stretchers designed for sandals, as they fit into open-toed styles more comfortably. Place the stretchers inside the sandals and slowly expand them to apply pressure where it’s most needed. Leave them in place overnight or for up to 24 hours.
This method is particularly effective for targeted areas causing discomfort. Check periodically to avoid overstretching or damaging the sandal structure.
Step 5: Freeze With Water Bags
Fill two small plastic bags with water, seal them tightly, and place them into the sandals. Put the sandals in the freezer overnight; as the water freezes, it expands, gently stretching the leather. Be careful that the bags are properly sealed to avoid leaks.
In the morning, let the sandals thaw before removing the bags. Try them on and repeat the process if necessary. This is a popular DIY option for mild stretching.
Step 6: Use Rubbing Alcohol
Mix equal parts rubbing alcohol and water in a spray bottle. Spritz the inside of your sandals lightly, then put them on and walk around your home until the solution dries. Alcohol helps loosen the leather fibers for easier stretching.
It’s important not to saturate the leather. Too much moisture can cause damage, so use this technique sparingly for small, tight sections.
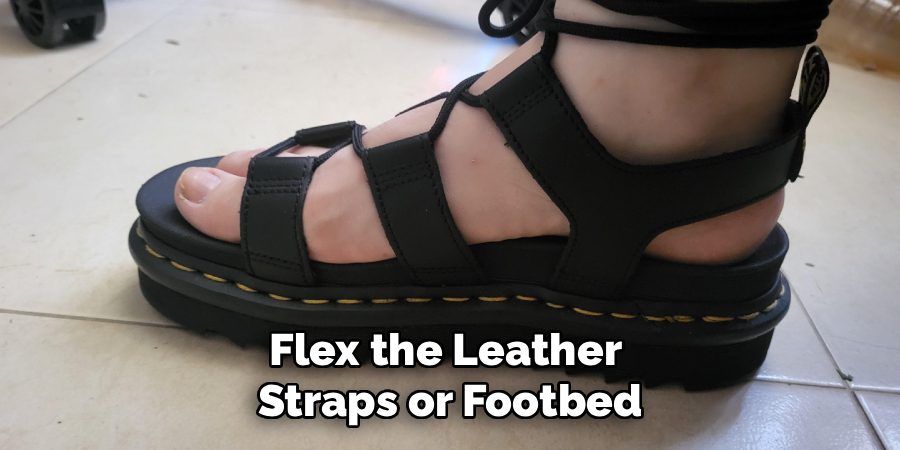
Step 7: Try Manual Stretching by Hand
With your hands, gently bend, twist, and flex the leather straps or footbed. Applying steady pressure can help loosen stiff areas, especially around the toe or heel. Do this for a few minutes at a time to slowly coax the leather.
Avoid pulling too hard, as this can break delicate parts or warp the sandal. This is best done in conjunction with other methods rather than as the only approach.
Step 8: Use a Leather Conditioner
Apply a small amount of leather conditioner or petroleum jelly to a clean cloth and rub it into the sandals. Conditioning keeps the leather supple and prevents cracking during stretching attempts. Let the conditioner absorb overnight.
Not only will this help the leather soften and stretch, but it also maintains the appearance and longevity of your sandals. Wipe off any excess residue before wearing.
Step 9: Try the Towel Roll Method
Take a small hand towel, roll it up tightly, and insert it into the sandal where you need stretching. Push the towel in so it applies firm pressure to the tight spots. Leave the sandals like this overnight.
When you remove the towel, you may notice the leather is more flexible in the targeted area. This simple method works well for both straps and footbeds.
Step 10: Repeat and Combine Methods as Needed
Sometimes, one stretching technique alone isn’t enough. Don’t hesitate to combine two or more methods, such as using a stretch spray and then applying heat or wearing socks. Monitor the fit after each attempt for incremental progress.
Continue the process until you achieve the comfort level you desire. Be patient—rushing or using excessive force could cause permanent damage to your sandals.
Following these steps on how to stretch sandals leather will not only increase comfort, but also prolong the life of your sandals.
Additional Tips
Use Professional Products
If home remedies don’t yield the desired results, consider investing in professional leather-stretching sprays or taking your sandals to a professional cobbler for assistance.
Avoid Overstretching
Stretch your sandals gradually, as overstretching can alter their shape or cause damage.
Condition the Leather
Regularly apply a leather conditioner to keep the material supple and prevent cracking during the stretching process.
Time of Use
Wear your sandals indoors for short periods before prolonged outdoor use to ensure the adjustments are comfortable.
Store Properly
Store your sandals in a dry, cool place to maintain their shape and avoid unnecessary shrinkage or warping.
By following these additional tips, you can ensure that your sandals remain both comfortable and in excellent condition over time.
Frequently Asked Questions
Q1: How Long Does It Take To Stretch Leather Sandals?
The process can take anywhere from a few hours to several days, depending on the method you choose and how stiff the leather is. Using a shoe stretcher overnight can bring quick results, while wearing thick socks may require several sessions. It’s important to allow adequate time between each attempt for the leather to recover, ensuring you don’t overstress it.
Q2: Will Stretching Damage My Sandals?
When done correctly and with the proper tools, stretching should not harm your sandals. Avoid over-soaking with sprays or stretching too aggressively with heat or force. Gentle, gradual stretching methods are recommended for preserving both comfort and durability. If unsure, start with less invasive techniques before progressing to others.
Q3: Can I Stretch Sandals Made From Synthetic Leather?
Many synthetic leathers do not stretch as easily as genuine leather, but some can still benefit from these methods. Use caution with heat and chemicals, as synthetics may react differently. Always check the care instructions provided by the manufacturer. If possible, test on a hidden area first before applying any product or technique to the whole sandal.
Q4: What If My Sandals Are Still Too Tight After Stretching?
If none of the stretching methods provide enough comfort, it might be best to consult a professional cobbler. Some stores offer professional stretching services or have advanced tools to modify footwear safely. You could also consider custom insoles or padding to improve the fit without forcing the leather. When all else fails, exchanging for a different size may be the most comfortable option.
Conclusion
Stretching leather sandals doesn’t have to be intimidating when you use the right methods and tools. Whether you try thick socks, stretching sprays, or clever home solutions, tackling tight sandals with patience will help you achieve a perfect fit. Remember, it’s always better to start slow and gently to maintain the quality of your leather.
Take time to care for your sandals, condition the leather, and repeat stretching as needed. Well-fitted sandals not only prevent discomfort but can also be a joy to wear for many seasons. With these guidelines, your favorite pair will feel better than ever! Thanks for reading this guide on how to stretch sandals leather.