Are you looking to take your DIY project up another notch? Kydex is an advanced material that offers an attractive and durable finish while allowing for great creative freedom. Cutting kydex isn’t as difficult as it may seem at first glance – with the right tools, techniques, and safety procedures, even novice makers can master the art of cutting kydex quickly and easily.
Whether you’re looking to create a unique holster, sheath, or casing for your tools, we’ve got the top tips on cutting kydex that will help you get the job done. Remember that this guide is only a starting point, and you should always take the necessary safety precautions when handling sharp tools. So read on to learn how to cut kydex like a pro!
What Will You Need?
The first step to cutting kydex is gathering the necessary tools. Kydex is a thermoplastic, so you’ll need heat-resistant tools to cut it properly. Here’s a quick list of what you’ll need:
- Kydex sheets
- Ruler
- Pen or marker
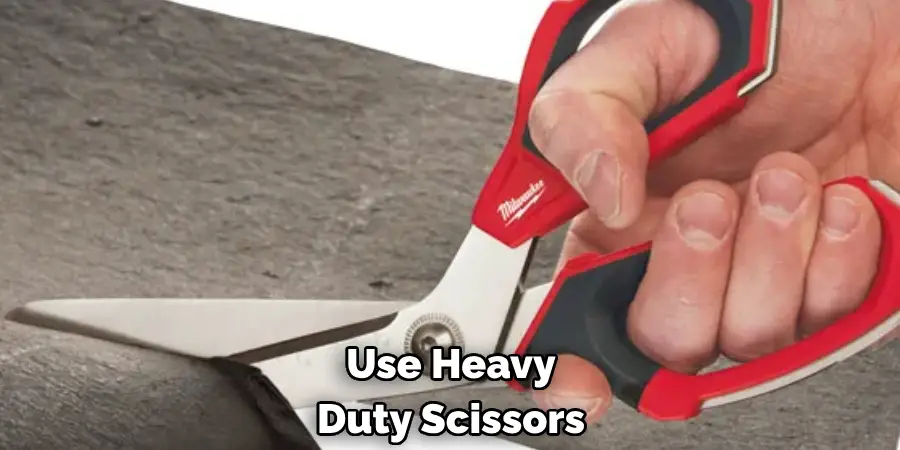
- Heavy duty scissors or shears
- Jigsaw with metal cutting blade
- Heat gun or hair dryer (optional)
Once you have your tools, it’s time to get started.
10 Easy Steps on How to Cut Kydex
Step 1. Measure and Mark:
Begin by deciding the size of your project. Use your ruler to measure the dimensions on the Kydex sheet and mark the cutting lines with your pen or marker. Ensure that your measurements are accurate and your lines are straight, as this will form the base of your project. This step is crucial because there’s no going back once you cut the Kydex. So, measure twice and cut once!
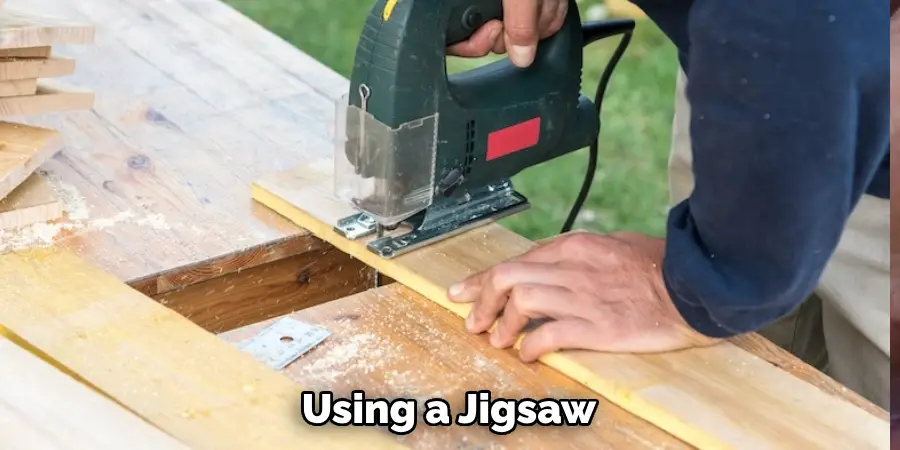
Step 2. Cut Along the Marked Lines:
To cut the Kydex, use heavy-duty scissors if the cut is small and straightforward. A jigsaw with a metal cutting blade is more suitable for larger or more complex cuts. Carefully follow your marked lines, keeping the tool steady to ensure a clean cut. Remember, your safety is paramount, so don’t rush this process. Once you have cut the Kydex, you can move on to the next step.
Step 3. Heat the Kydex:
Kydex is a thermoplastic, which means it becomes pliable when heated. Using a heat gun or hair dryer, carefully heat the cut piece of Kydex until it softens. Keeping the heat source moving is crucial to prevent the material from burning or bubbling. If you’re using a hair dryer, it may take longer for the Kydex to heat up. Remember to wear heat-resistant gloves to protect your hands during this process. Once the Kydex is flexible enough, you’re ready for the next stage.
Step 4. Mold the Kydex:
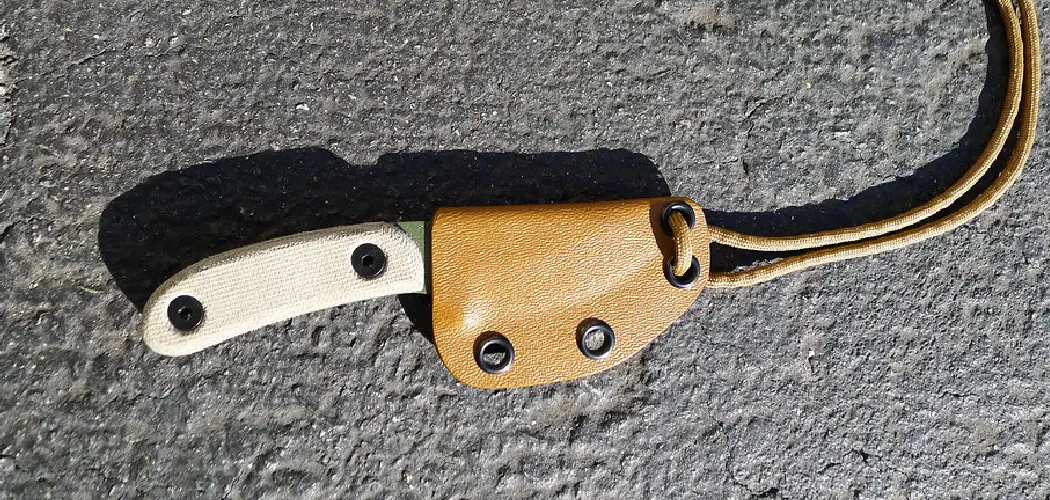
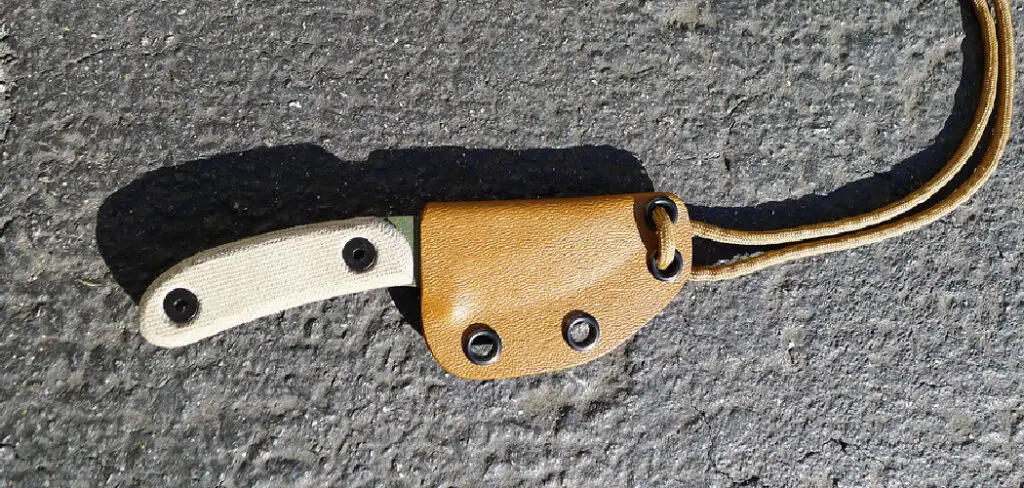
With the heat making the Kydex pliable, molding it into the desired shape is time. Place the heated Kydex over the object you want to mold it to, and carefully press it into place. You can use a molding press for this, but if you don’t have one, any hard, flat object will do. Remember to wear gloves during this stage, as the Kydex will still be hot. Once you’ve molded the Kydex, allow it to cool and harden before proceeding to the next step.
Step 5. Trim Excess Kydex:
Once the Kydex has cooled and taken your object’s shape, you may notice some excess material around the edges. This is normal and is a part of the molding process. To trim the excess, mark the unwanted parts with a marker, then use your heavy duty scissors or jigsaw to cut them off. Be careful not to cut into the molded area of your project – it’s better to cut off too little than too much. Once you’ve trimmed the excess, you can proceed to the next step.
Step 6. Sand the Edges:
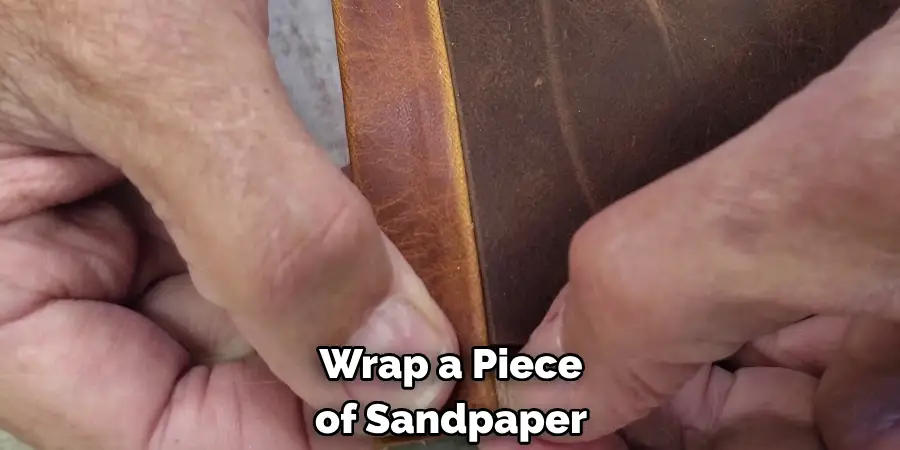
After trimming the excess Kydex, you might notice that the edges of your project are sharp or rough. For a smooth finish, use sandpaper to smooth these edges. Wrap a piece of sandpaper around a block of wood for better grip and control, then gently stroke the sandpaper along the edges of the Kydex in a back-and-forth motion. Start with a coarse grit sandpaper to remove the bulk of the material, then progress to a finer grit for a polished finish.
Step 7. Polish the Edges:
For a professional look, it’s recommended to polish the edges of your Kydex after sanding. You can use a rotary tool with a polishing wheel or fine grit sandpaper. If using a rotary tool, apply a small amount of polishing compound to the wheel and work it along the edges of the Kydex in a smooth, consistent motion. If you are using sandpaper, wrap the fine grit sandpaper around a block of wood for better grip and control, and gently stroke it along the edges until they shine.
Step 8. Drill Holes:
Now that your Kydex piece is molded and polished, it’s time to add any necessary holes for attachments or fastenings. Determine where you want your holes to be and mark the spots with your marker. Carefully drill the holes using a drill fitted with a bit that matches the size of your rivets or screws. Be sure to drill straight down to avoid damaging the Kydex piece. Once your holes are drilled, remove any remaining debris with a soft cloth to ensure a clean finish.
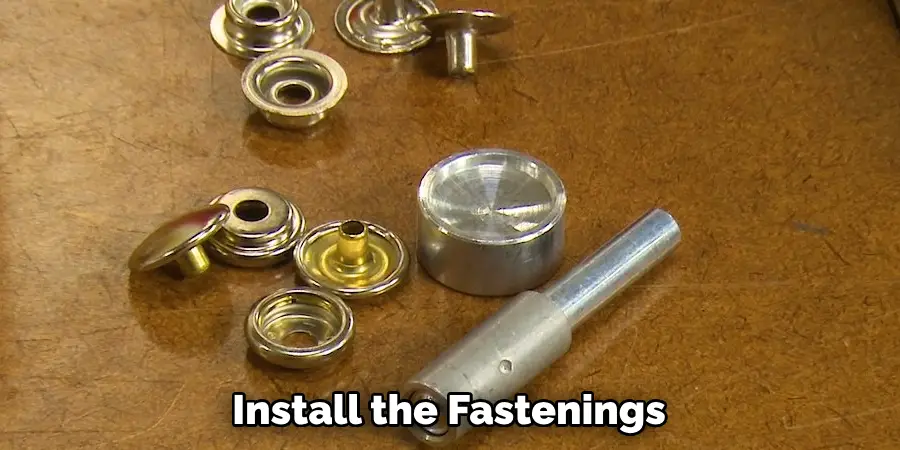
Step 9. Install Fastenings:
With your holes drilled, now comes the time to install the fastenings. Depending on your design, you might use rivets, screws, or a combination of both. If you’re using rivets, place them in the drilled holes and use a rivet gun to secure them. Ensure that the rivets are flush with the surface of the Kydex and firmly hold it in place. If you’re using screws, ensure they are the appropriate length and size. Place them in the holes and tighten them until secure, but be careful not to overtighten and damage the Kydex.
Step 10. Final Inspection:
The final step in the process is to inspect your Kydex piece thoroughly. Ensure all fastenings are secure, the edges are smooth and polished, and there are no rough or sharp areas. Ensure that the Kydex fits perfectly around the object it was molded to. Don’t hesitate to do some touch-up work if you notice any issues. After all, the goal here is a professional-looking, custom-made Kydex piece.
By following these 10 steps, you are now ready to enjoy your custom-made Kydex project. With the right tools and a bit of patience, you can create professional-looking pieces in no time! From knife sheaths to gun holsters – the possibilities with Kydex are endless. So don’t be afraid to get creative and start crafting!
5 Additional Tips and Tricks
- If you’re using a jigsaw, make sure to use the correct saw blade for cutting kydex and other thermoplastics. Use a minimum of 14 teeth per inch (TPI) for thicker sheets of material.
- Using an edge guide with your saw will help keep your cuts straight and even. As an added bonus, it will also protect the Kydex from getting scratched or damaged.
- If you’re using a router, choose a router bit with at least two flutes (the grooves in the cutting head). This will help prevent chipping and give you a better finish on your cut edges.
- When drilling holes in Kydex, use an appropriate drill bit for the material. Don’t be afraid to go slow, as drilling too quickly may cause chipping or cracking.
- Lastly, use a steady hand and avoid jostling the material while cutting or drilling. This will help ensure that your cuts are clean and precise.
By following these basic tips and tricks when cutting Kydex, you can ensure that your project is done right the first time. Remember, practice makes perfect!
5 Things You Should Avoid
- Never use a hacksaw to cut kydex; the saw blade won’t give you a clean, precise edge.
- Avoid using a drill bit that is too large for your material; this could cause it to crack or break during drilling.
- Don’t rush through the cutting process; take your time to get the best results.
- Always use an edge guide when cutting or drilling, which will help keep your cuts straight.
- Lastly, only attempt to cut kydex with proper safety equipment such as eye protection and gloves. Working with thermoplastics can be dangerous if you’re not careful!
These simple tips will help you get the most out of your Kydex project and ensure it’s done right. With a bit of patience, practice, and guidance, you can quickly become an expert at cutting kydex!
Conclusion
So, there you have four great methods for successfully cutting Kydex sheets. Whether you opt for a jigsaw, a table saw, a razor knife, or an angle grinder, all of these options can effectively deliver precise and professional results.
By taking time to prepare your work area appropriately – not forgetting protective equipment such as face masks and safety glasses – and following basic safety protocols while working with potentially hazardous power tools, success is within reach. Kydex may take some getting used to; however, cutting it doesn’t have to be daunting. All that’s left now is to get started!
Hopefully, this guide on how to cut kydex has given you the confidence and knowledge to begin your own Kydex cutting journey. Good luck, be safe, and have fun!