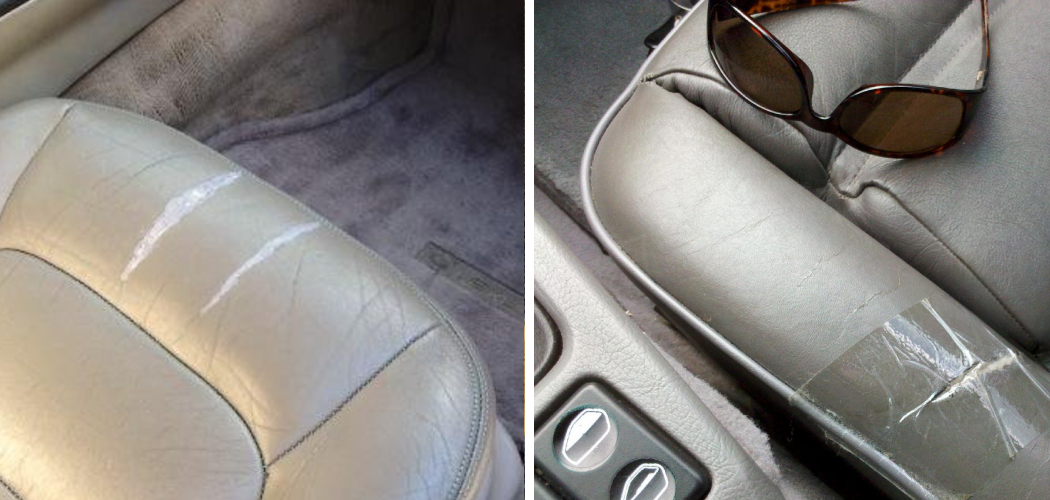
Are you dealing with a leather tear in your car that’s starting to look unsightly and become a safety hazard? Don’t worry – there are several easy ways to fix this issue and restore the beauty of your car’s upholstery.
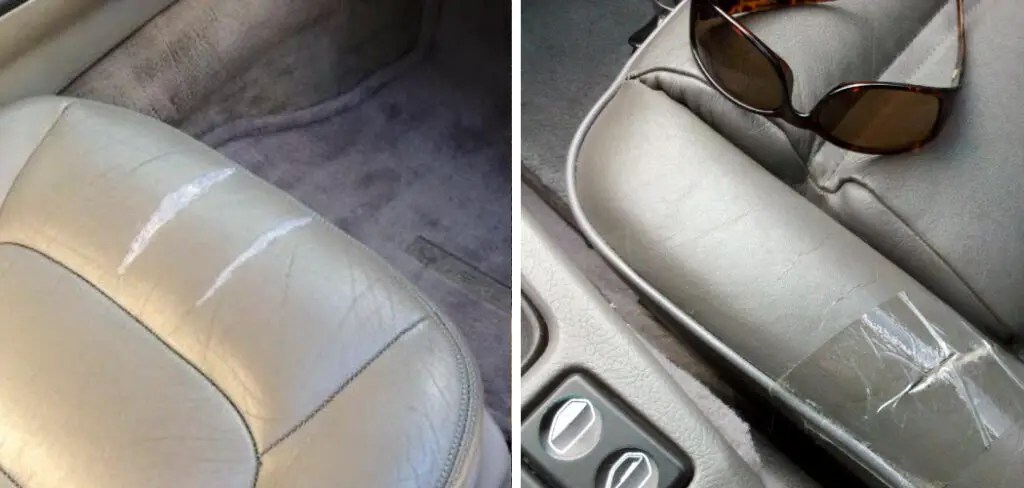
It can be frustrating and costly to fix when your car takes a beating and suffers from a leather tear. But with these simple steps, you can patch up that tear quickly and easily – and for far less than taking your car in for repairs.
Leather car seats are a luxurious option that can add comfort and value to your vehicle. Over time, however, leather can become torn or damaged. If this happens, don’t worry – there is a way to fix it! This blog post will show you how to fix leather tear in car using simple tools and materials. Read on for instructions.
What Can Cause a Leather Tear in a Car?
There are several common causes of leather tears in cars, including age, wear and tear, and accidents. Other factors that can contribute to leather damage include:
- Excessive sun exposure
- Chemicals or liquids that seep into the seat padding
- Extreme temperatures, such as those found in cold or hot climates
These factors can cause your leather seat to become dry, cracked, or discolored. Additionally, a tear in the leather can weaken that area of the car and make it more prone to further damage.
Fortunately, there are several methods you can try to fix this problem and restore your car’s upholstery to its original beauty.
What Will You Need?
To fix a leather tear in your car, you will need the following materials and tools:
- A heat gun or hair dryer
- Leather repair kit (available at most automotive stores)
- Scissors or utility knife
- Sandpaper or emery cloth
With these tools and materials, you can quickly and easily repair your car’s leather upholstery.
10 Easy Steps on How to Fix Leather Tear in Car
Let’s take a closer look at how to fix a leather tear in your car using each of these steps:
Step 1. Determine the Torn Area
First, use a heat gun or hair dryer to soften the leather. Then, gently examine the tear to determine how deep and wide it goes. Be careful not to stretch or damage the leather further as you examine it. Take note of any loose threads or other damage around the tear.
Step 2. Prepare Your Materials
Once you have identified the torn area, gather your repair kit and a clean work surface that can get dirty or damaged during the repair process. Make sure you have plenty of room to work and that any children or pets are kept out of the area. Because you will be using sharp tools and working with heated materials, it is also important to wear protective gloves and eyewear during this process.
Step 3. Remove Excess Leather
Next, use scissors or a utility knife to carefully trim away any loose or damaged leather around the tear. Be sure to keep these materials out of reach of pets and children. You can get rid of any loose threads or frayed edges at this time as well.
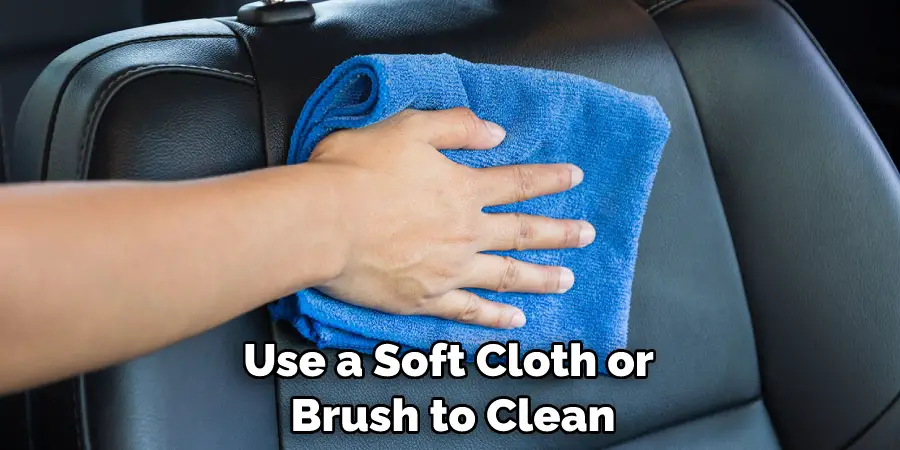
Step 4. Clean the Leather
Use a soft cloth or brush to clean the area around the tear gently. This will help ensure that your repair materials adhere properly. It is important to avoid using any chemicals or cleaners on your leather seat because they will damage it further.
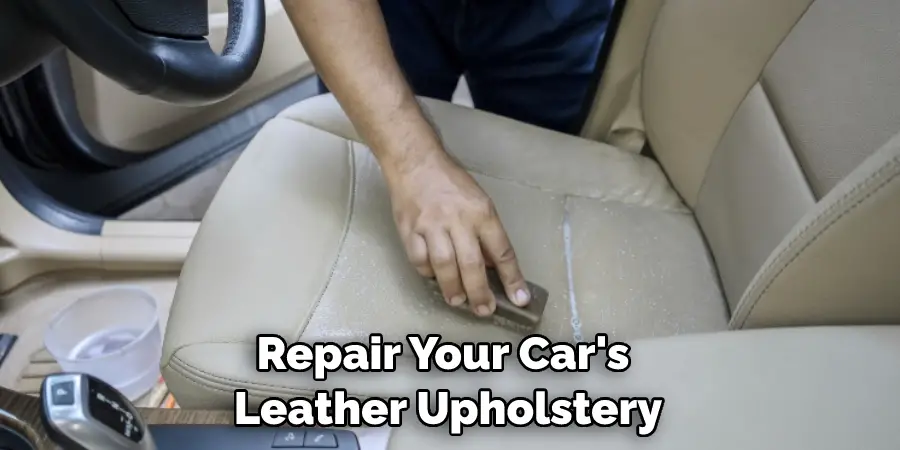
Step 5. Apply Leather Repair Material
Now, use a spatula or putty knife to apply leather repair epoxy or other material over the torn area of your car seat. Be sure to smooth and press it into place so that it completely covers the torn area without any gaps or bubbles between your patch and the existing leather surface. Don’t worry if the repair material is a slightly different color than your leather – this will be corrected in later steps.
Step 6. Sand Your Patching Materials
Once you have applied the leather repair material, allow it to dry completely according to the manufacturer’s instructions. Once fully dry, use sandpaper or emery cloth to buff away excess epoxy lightly. Now create a smooth transition with the rest of the leather seat.
Step 7. Apply Color to Your Patching Materials
Next, use a small paintbrush and the repair kit’s color matched touch-up dye to apply color to your patched area. This will help conceal any imperfections and give your car’s upholstery a more uniform appearance. So, carefully add color to your repair until it blends seamlessly with the rest of your car’s leather seats.
Step 8. Buff Away Excess Dye or Repair Material
After you have applied the touch-up dye, allow it to dry completely according to the manufacturer’s instructions. Then, use a clean cloth or brush to gently buff away excess repair materials or leftover dye from the patched area of your leather seat. It will give the finished repair a more uniform appearance.
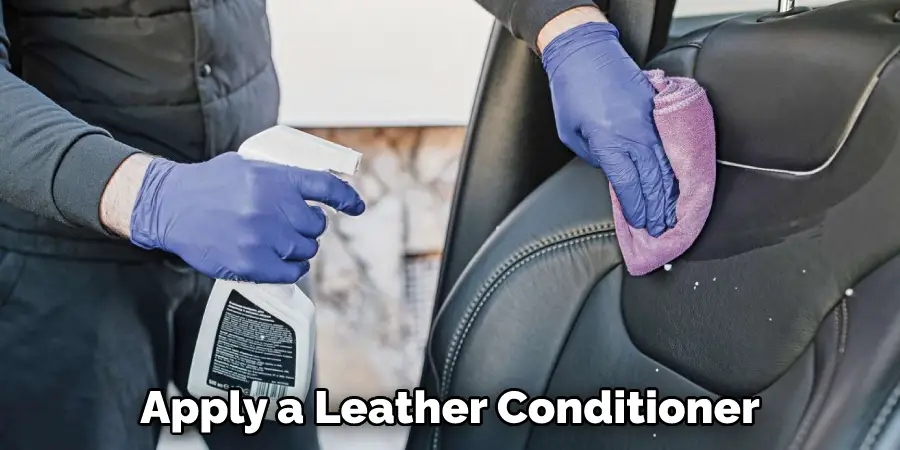
Step 9. Seal Your Patch With Leather Conditioner
Finally, once all excess materials and dye have been removed from the leather seat, use a clean cloth or brush to apply a leather conditioner or other sealant over the repair. This will help prevent the patched area from drying out and cracking over time. Don’t miss the recommended drying time for your specific repair product, and be sure to repeat this step each time you clean or use your car seat.
Step 10. Enjoy Your Newly-Repaired Leather Seat!
And with that, your leather seat repair is complete. Simply be sure to take good care of your car’s upholstery. Now enjoy the durability and beauty of your repaired leather seat for years to come.
While repairing a leather tear in your car can be a bit time-consuming and may require some trial and error at first, with patience and the right tools, you can quickly fix this common problem and restore your car’s interior to its original beauty. Good luck!
5 Additional Tips and Tricks
1. Use a leather repair kit. Several different types of kits are available, depending on the size and severity of the tear.
2. Use contact cement to secure the tear. If a leather repair kit isn’t available, you can use contact cement to patch up the tear yourself.
3. Use shoe polish to conceal the tear. If you have a small or cosmetic repair, applying a coat of matching shoe polish can help conceal the issue.
4. Use fabric glue for a quick fix. If you’re in a pinch and need to fix your leather car seat quickly, using a strong fabric glue like superglue is an easy and effective solution.
5. Consider professional repair services or replacements. If the tear is too large or severe, it’s often better to simply have a professional repair the seat or replace it altogether with a new or used part.
Whether your leather car seat has been damaged by wear and tear, an accident, or another issue, there are several effective ways to fix it.
5 Precautions You Can Take
1. Avoid exposing the damaged area to moisture or harsh chemicals, as this can further damage your leather and cause it to tear even more.
2. If possible, try to gently lift the edges of the tear with a pair of tweezers or a small needle to loosen any material that may be stuck in the crease of the tear.
3. Don’t use strong cleaners, as these can damage the leather and weaken its resilience. Instead, opt for a mild soap or saddle soap to clean and condition your leather.
4. Trim any fraying or rough edges of the tear with a pair of scissors to help minimize further damage.
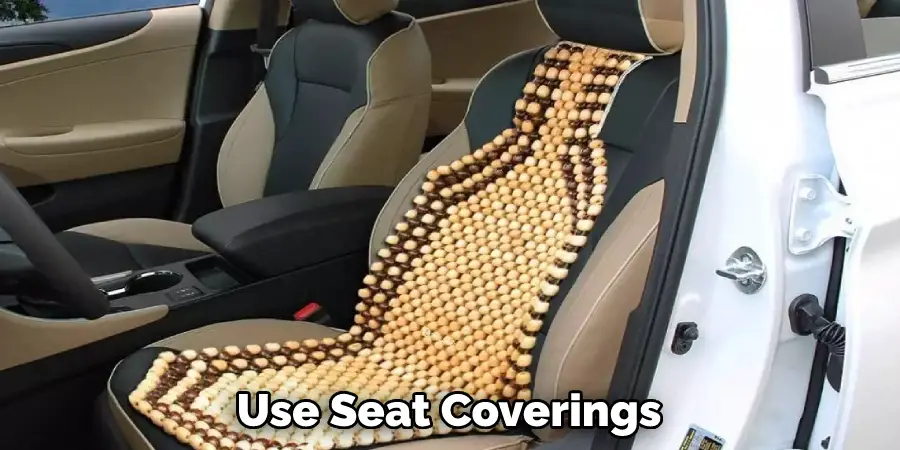
5. Use seat coverings or other protective layers to help prevent the leather from tearing again. Consider investing in a good car cover or seat cover if your car is frequently exposed to harsh weather conditions.
If you are experiencing a tear in your leather upholstery, there are some steps that you can take to help repair and protect it from further damage.
Is Gorilla Tape Good for Leather?
There is no definitive answer to this question, as the durability and effectiveness of gorilla tape can vary depending on several factors, including the type of leather, how severe the tear is, and how well it is being maintained.
When using gorilla tape for leather repair, it is important to be gentle and not press too hard or pull too tightly on the material. Additionally, you may want to consider applying a layer of protective coatings or sealants over the taped area once it has been repaired, as this can help prevent further damage and wear over time.
Ultimately, whether or not a gorilla tape is a good option for repairing leather depends on your circumstances and how much effort you are willing to put into maintaining the area.
Frequently Asked Questions
Can You Glue Leather Car Seats?
It depends on the type of adhesive and leather that is being used. Most adhesives are not suitable for leather, as they can damage the material. Additionally, many glues may not be strong enough to hold the leather in place and could simply peel away over time.
Why Does Leather Crack in Car’s?
Leather cracks in cars due to dryness. The cracking can occur in two different ways: by the leather shrinking and pulling away from the substrate (the wood), or by water seeping in and creating a wet environment that is difficult for the leather to tolerate.
Is Leather Damaged by Heat?
Leather is damaged by heat in a few different ways. The most common way is by heat, causing the leather to dry out and crack. Heat also causes the leather to shrink, which can lead to tears and other damage. In extreme cases, heat can even cause the leather to burn.
What is the Best Leather Treatment for Car Seats?
The best leather treatment for car seats will vary depending on the type of leather and the condition of the seat. However, some common leather treatments that may be appropriate for car seats include:
1. Leather conditioning treatment: This type of treatment can help to soften and protect the leather surface, making it easier to apply to future coatings.
2. Leather preservation treatment: This type of treatment can help to preserve the color and texture of the leather, protecting it from damage and aging over time.
3. Upholstery treatment: This type of treatment can help to reduce dust mites, bacteria, and other allergens that can cause damage to the leather surface.
4. Top coat: A top coat can help to protect the leather from scratches and other damage, giving it a longer lifespan and a better finish.
Conclusion
In conclusion, fixing a leather tear in your car’s interior is possible. While the process may be daunting, it is doable with time, patience, and the correct tools. If you follow the steps we’ve outlined above, you should have no problem repairing your car’s leather tear.
You now know how to fix leather tear in car. This is a simple repair that anyone can do with the right supplies. Be sure to practice on some scrap leather before you attempt to repair your car’s seats. With a little time and effort, you can have them looking like new again.
Hopefully, this information has given you the confidence and tools you need to repair a leather tear in your car successfully. Good luck!