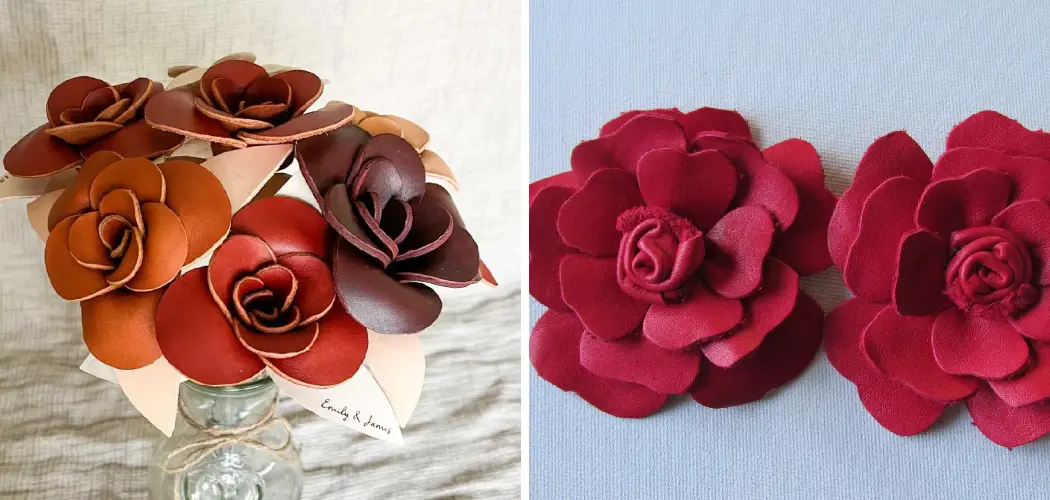
Leather flowers are a unique way to add a touch of elegance and beauty to any room. Whether you’re looking for an eye-catching piece to make your décor stand out or just want something special for yourself, creating leather flower arrangements is the perfect solution. Not only will you have something that no one else has, but it makes a great DIY project too!

In this blog post, we’ll cover all the basics – from what kind of leather to use right down to the details on how to make leather flowers – so that by the end, you can feel confident in taking your craftsmanship skills up a notch with these amazing creations. Let’s get started!
How Do You Stiffen Leather Flowers?
Leather flowers can be stiffened with a variety of products. The most popular way to stiffen leather flowers is to spray them with a fabric stiffener or glue. This will help preserve their shape and make them look neat and professional. Alternatively, you can use Mod Podge, white glue, resin glue, or any other fabric-stiffening product available in craft stores.
For the best results, lightly brush the front of the flower petals with the stiffening product before applying it more heavily on the backside of the flower petals. Allow each side of the petal to dry completely before flipping it over and repeating this process on the other side. If desired, you can spray a sealer over your leather flower to protect it from the elements.
When the stiffening process is finished, your leather flowers will be ready for any crafting project! You can use them in bouquets or other floral arrangements, make them into brooches, or even attach them to headbands and bags.
With a little creativity, you can find endless ways to decorate with leather flowers! Enjoy creating your own unique floral designs. Additionally, unlike real flowers, your leather creations will last much longer without any upkeep.
10 Methods How to Make Leather Flowers
1. Gather Your Supplies
You will need leather sheets in multiple colors, scissors, a pencil, a ruler, an awl tool and glue. When choosing leather sheets, be sure to pick soft and thin varieties because those are the best for making paper flowers.
However, if you want to make a bigger flower, thicker leather sheets can be used. Though leather sheets come in many colors, you can also dye them into different colors with fabric dyes for a more unique look. To make the flower, you need to cut out shapes from the leather sheets and prepare them for assembly.
2. Measure
Use a ruler to measure the size of the flower you want to make. Cut two pieces of leather with a pair of scissors according to the measurements taken. Make sure to follow the contours of the flower and make a rounded edge for the petals.
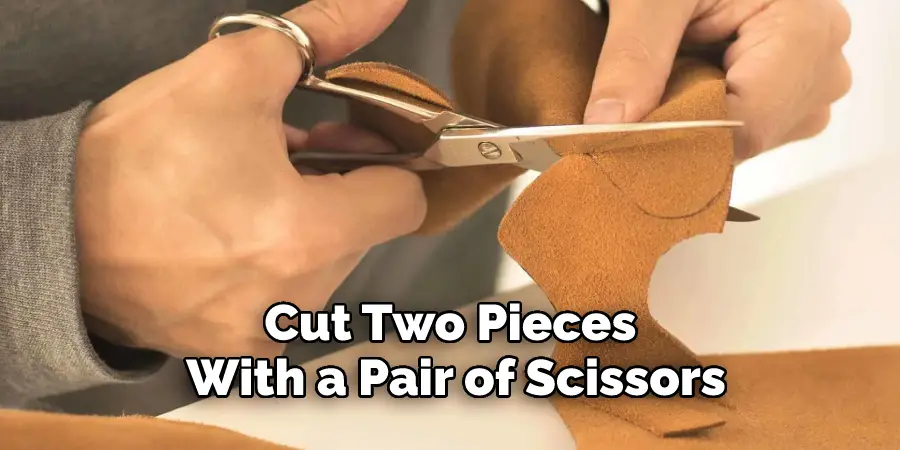
Although these flowers can be any size, some of the most popular sizes range between 2 and 5 inches in diameter. If you want to make a larger flower, use a template and lay it on the leather before cutting. While measuring, keep in mind that you don’t need to measure the stem of the flower.
3. Draw Your Petals
Using your pencil, carefully draw petal shapes on both cutouts of leather. Be sure to leave enough room for stitching at the bottom or top of the petal shapes. If desired, you can embellish the petals with hand-stitching.
If you’re using thin leather, try to draw the petals as thin as possible so that they don’t appear bulky. You can also use a leather punch to make holes in the petals if desired. Though this step is optional, it adds to the beauty of the flower. Try to make the petals uniform in size and shape.
4. Trace Outline
With an awl tool, trace out your petal outlines onto both pieces of leather by punching small holes along each tracing line. This will help guide where you should stitch when connecting these two pieces together. Make sure to trace each petal a few times if necessary so that your outline is clearly visible and easy for you to stitch. However, be careful not to make the holes too close together, as this could create an uneven effect when sewing.
5. Place the Pieces Together
Before stitching, place the two pieces of a leather back-to-back with their petal shapes facing each other. Make sure both pieces are facing the same direction and that the shapes line up correctly.
Stitch them together along their edge with a standard running stitch (one that goes in and out of the leather along the edge). Start at one end, go all the way to the other end, then back again for extra strength. Finally, tie off the thread at the end and trim any excess. However, if you are looking for a more natural look, leave the thread ends hanging.
6. Start Stitching
Using a needle and thread, begin to stitch along both sides of the petal shape outlines, making sure to secure firmly when you reach the bottom or top point of each petal shape. Make sure that you leave enough room for gluing at the end of your stitching line as well.
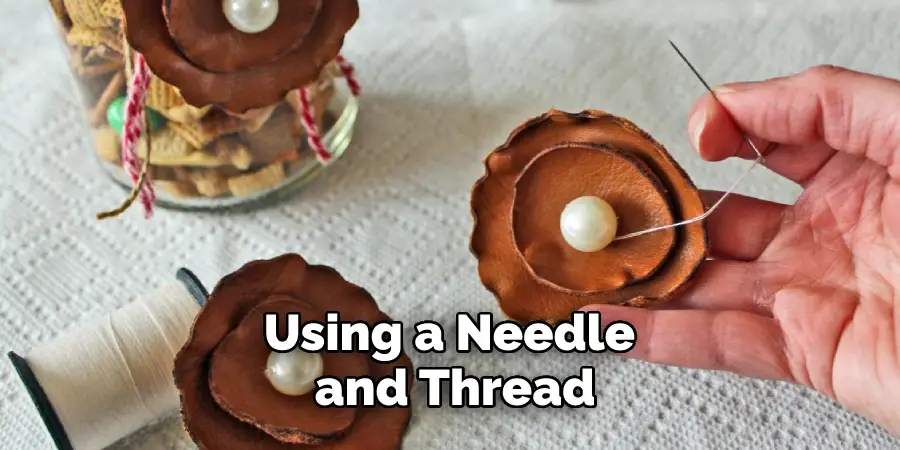
Take your time with this step as it will determine how your flower looks in the end. Continue stitching all five petal shapes, making sure to knot the thread at the end of each petal shape. When finished, you should have five separate petal shapes that have been stitched together.
7. Add Glue
Once finished stitching, apply a small amount of glue to one side of your flower in order to permanently secure it together. Most craft stores sell specialized fabric glue, which is best for this type of project. If you do not have any fabric glue on hand, basic craft glue or even a hot glue gun can do the trick.
Make sure to spread the glue evenly and not apply too much, as it may cause staining on your fabric. Allow the glue to dry completely before continuing with the next step. To speed up the drying process, you can use a hairdryer on a low setting to blow over the glue.
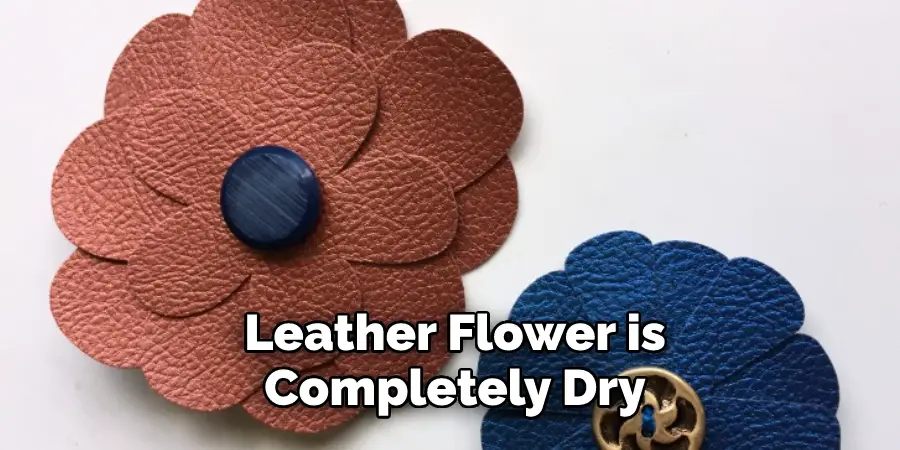
8. Let Dry
Allow your leather flower project to dry completely before proceeding with the next step. This may take a few hours, depending on the size and number of leather pieces used. If you have additional layers to add, such as leaves or petals, you can let them dry separately before attaching them.
Once your leather flower is completely dry, it should be a beautiful addition to any project! While it may be a bit of a labor-intensive process, the end result is often worth it. With patience and practice, you can create stunning leather flowers that will last for years to come.
9. Cut Out Leaves
Using your scissors, carefully cut out a few small leaves from the scrap pieces of leather you cut off earlier in the project. You can make your leaves as small or large as you’d like. You will be using these later to accent the flower petals.
Try to vary the shapes and sizes for a more unique look. Though the leaves are optional, they will add a nice touch of realism to your flower. Make sure to cut out more leaves than you think you will need, as the leather can be quite fragile and break while crafting.
10. Attach Leaves
Lastly, use glue to attach your cut-out leaves to the back of your flower and let it dry completely. There you go! You now have completed a beautiful leather flower DIY project! You can use it as decoration or attach it to clothing, handbags, and more. Enjoy your new crafty creation!
If you’d like, you can experiment with different colors and shapes of leather to create a variety of flowers. Another fun idea is to try cutting the petals in varying sizes for an even more unique look. Get creative and have fun! With time and practice, you’ll be able to create beautiful leather flowers that are perfect for just about any occasion.
How Do You Make a Real Bangle Flower?
Making a real bangle flower is quite different from making a leather flower. To make a bangle flower, you’ll need several thin metal bangles of various sizes. Start by measuring the size of your wrist and cutting out circles from the bangles that are slightly smaller than that measurement. Then stack the circles in order from largest to smallest, and begin to form the flower shape.
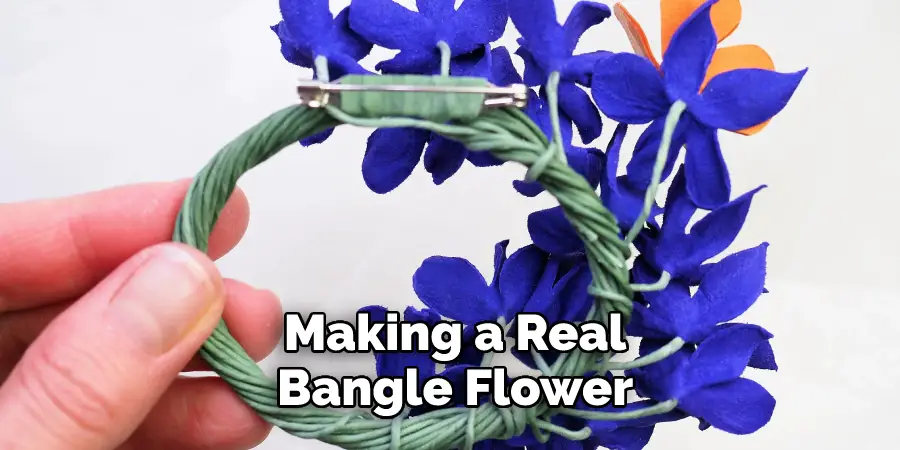
Start by overlapping one of the larger circles with a smaller one in order to create the first petal. Continue overlapping circles until all of your bangles have been used up. When you’ve finished constructing the flower, use pliers to bend and twist each petal into shape using your desired design.
Conclusion
Now that you know the basics of creating your own leather flower, it’s time to get creative! Whether you’re making flowers for a gift or for yourself, creating these leather masterpieces is sure to be an enjoyable experience.
So take some time out of your day and make your very own leather flower – You won’t regret it! If you’re feeling stuck, head to our site for tons of other great tips on how to make leather flowers. Happy crafting!