
Pleather, also known as faux leather or synthetic leather, is a popular and affordable alternative to real leather. It is made from a variety of materials including polyurethane (PU), polyvinyl chloride (PVC), and polyester. Not only does leather look and feel like real leather, but it also offers many advantages such as being more environmentally friendly and easier to care for. In this tutorial, we will guide you through the process of how to make pleather and provide tips for creating a high-quality product.
Understanding Pleather
Before getting started on making your pleather, it is important to understand what exactly the material is and how it differs from real leather. As mentioned earlier, pleather is a synthetic material made from various chemicals and fabrics.
Unlike real leather which comes from animal hide, pleather is man-made in a controlled environment. This means that there are no variations in texture or color like there are with natural leather. Additionally, pleather is generally more durable and resistant to water and stains compared to real leather. However, it may not have the same level of breathability as genuine leather.
Tools and Materials You Will Need to Make Pleather
- Polyurethane or PVC fabric
- Scissors
- Sewing machine (optional)
- Thread
- Iron
- Parchment paper
- Fabric glue or sewing needles
Step-by-step Guidelines on How to Make Pleather
Step 1: Preparing the Material
The first step in making pleather is to gather all necessary materials and prepare them. Begin by selecting your desired fabric, whether it be PU or PVC. It is important to note that both types of fabric have different qualities, so make sure to choose one that will best suit your needs. Once you have your fabric, lay it out on a flat surface and smooth out any wrinkles or creases.
Step 2: Cutting the Fabric
Next, use your scissors to carefully cut out the desired shape and size of your Pleather piece. Make sure to leave a small margin around the edges for sewing or gluing. If you are planning on making a garment, be sure to take accurate measurements before cutting. While PU fabric can be cut with regular scissors, PVC fabric may require sharper or specialized cutting tools. Make sure to test your chosen fabric before starting the project.
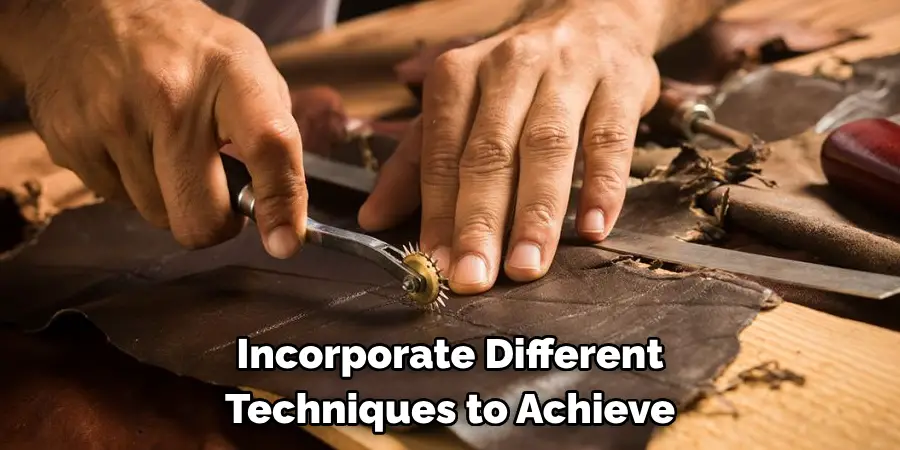
Step 3: Adding Texture (optional)
One unique aspect of pleather is that it can be made to mimic the texture of real leather by adding patterns and embossed designs. This step is optional but can add a more realistic look to your pleather piece. To add texture, you can use various tools such as stamps, stencils, or even a toothbrush to create different patterns on the fabric. Make sure to do this before moving on to the next step.
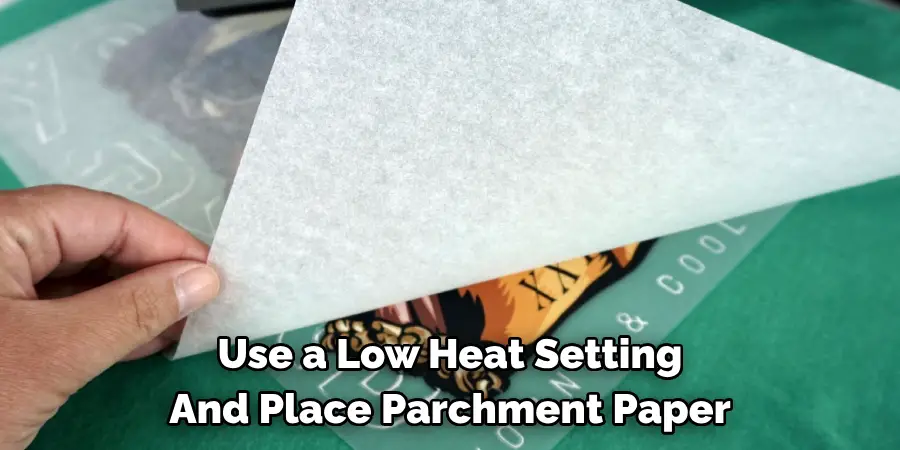
Step 4: Ironing the Pleather
After adding texture (or if you choose not to), it is important to iron your Pleather piece. Use a low heat setting and place parchment paper over the fabric before ironing to prevent any damage or melting. The heat will help smooth out any wrinkles and give your pleather a more polished look. If you are planning on sewing your pleather, this step will also make it easier to work with.
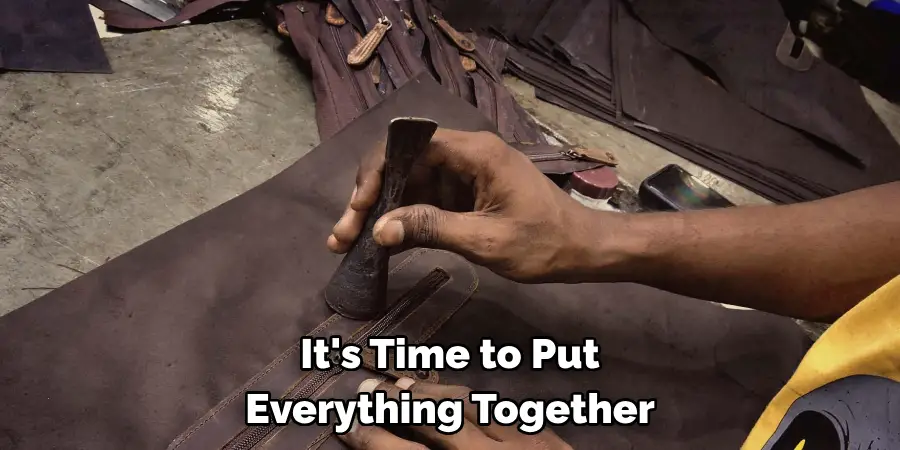
Step 5: Assembling and Finishing the Piece
Finally, it’s time to put everything together and create your finished product! If you plan on gluing your pleather, use fabric glue to carefully secure all edges. If you prefer sewing, use a sewing machine or hand-stitch with a needle and thread. Remember to leave small margins for any seams or hems. Once all edges are secured, your pleather piece is complete!
Following these simple steps, you can create a variety of Pleather items such as clothing, bags, or accessories. With practice and experimentation, you can also incorporate different techniques to achieve unique looks and textures. Whether for ethical reasons or personal preference, learning how to make pleather is a useful skill that allows you to create your own affordable and stylish faux leather products. So go ahead and give it a try, and see for yourself just how versatile and easy it can be to work with pleather! Remember, the possibilities are endless. Stay creative and have fun exploring all that pleather has to offer. Happy crafting!
Additional Tips and Tricks to Make Pleather
- 1Experiment with different types of fabrics and textures to create unique pleather looks. You can mix and match different materials, such as cotton or polyester, to achieve the desired look.
- Use a sewing machine with a leather needle when working with thicker or sturdier materials for your pleather. This will help prevent damage to your machine and ensure clean and smooth stitches.
- If you don’t have access to a sewing machine, hand stitching is also an option. Use a waxed thread or dental floss for stronger and more durable stitches.
- Consider using fabric glue instead of stitching for a no-sew pleather project. This is especially useful for small accessories like wallets or phone cases.
- Don’t be afraid to experiment with different techniques, such as distressing or painting your pleather, to give it a unique and personalized touch.
- When attaching hardware, such as zippers or buttons, consider using a leather punch to make clean and precise holes in your pleather.
- To remove wrinkles from your pleather fabric, place a damp cloth over the material and gently iron on a low heat setting. Make sure to test this method on a small, inconspicuous area first to avoid damaging the fabric.
- To clean your pleather, wipe it down with a damp cloth and mild soap. Avoid using harsh chemicals or abrasive cleaners as they can damage the material. Hang or lay flat to dry.
- If you plan on wearing your pleather clothing in hot weather, consider adding ventilation holes or lining with a breathable fabric to prevent discomfort and sweat buildup.
- Always store your Pleather items in a cool, dry place to prevent damage and discoloration. Avoid hanging them as this can cause stretching or distortion of the fabric.

Following these tips and tricks will help you create high-quality, durable pleather items that look and feel like the real thing. Whether you are making clothing, accessories, or home decor items, pleather is a versatile and affordable alternative to leather. So get creative and have fun with your pleather projects! Happy crafting!
Things You Should Consider to Make Pleather
- The first thing you should consider when making pleather is the type of fabric you want to use. Different types of synthetic materials can be used to make Pleather, such as polyurethane (PU) or polyvinyl chloride (PVC). Each material has its unique properties, so it’s important to research and choose the right one for your project.
- Another factor to consider is the coating or treatment of the fabric. This can affect the durability, texture, and appearance of the pleather. Some fabrics are coated with a layer of plastic to give it a glossy finish, while others may have a brushed or grained surface for a more realistic leather look.
- The thickness and weight of the fabric also play a significant role in the overall quality of Pleather. Thicker and heavier fabrics tend to be more durable and long-lasting, but they can also be more challenging to sew and work with. On the other hand, thinner and lighter fabrics may not have the same durability but can provide a more comfortable and flexible material.
- When choosing a fabric for pleather, it’s essential to consider its stretch and flexibility. Some fabrics may have more give than others, which can affect how they stretch and move with the body. It’s important to test out different fabrics and determine which one will provide the right balance of stretch and structure for your project.
- Carefully selecting the color and finish of your pleather is also crucial in achieving a realistic leather look. While black and brown are popular colors for pleather, there are also a variety of other options available, including metallics, pastels, and even prints. The finish of the fabric can also range from matte to shiny, giving you even more creative possibilities.
- It’s important to note that making pleather requires specific tools and techniques. Sewing with this material may require a heavy-duty or leather needle and a walking foot on your sewing machine to prevent slipping. You may also need specialized adhesives and scissors designed for cutting through synthetic materials.
- Another tip is to carefully plan out your project before starting, as pleather can be quite expensive compared to other fabrics. It’s essential to measure and cut precisely to avoid wasting material and potentially having to start over. You may also want to practice sewing with scrap pieces of pleather before working on your final project.
- Finally, consider the ethical and environmental impact of using synthetic materials for your pleather. While it may be a more affordable and accessible option than genuine leather, it’s essential to research the production process and potential harm to animals and the environment.
Following these considerations will help you create a high-quality and realistic pleather material that’s perfect for your next sewing project. With the right fabric, tools, and techniques, you can achieve all the benefits of leather without sacrificing your ethics or budget. So go ahead and get creative with pleather! Your options are endless. No matter what type of project you have in mind, pleather offers a versatile and durable alternative to traditional leather. Keep these tips in mind and get ready to make some stylish and ethical fashion statements! So go ahead, start your pleather project today! Happy sewing!
Troubleshooting Common Issues to Make Pleather
1. Difficulty in Achieving a Realistic Texture:
One of the main challenges when making pleather is achieving a realistic texture that mimics genuine leather. This can be caused by using the wrong type of fabric or not applying enough layers of coating.
To solve this issue, ensure you are using a high-quality fabric specifically designed for Pleather making. Cotton or polyester blends work best for this purpose. Additionally, make sure to apply multiple layers of coating and allow each layer to dry completely before applying the next one.
2. Peeling or Flaking of the Coating:
Another common issue when making pleather is the peeling or flaking of the coating on the fabric. This can happen due to inadequate preparation of the fabric or using a low-quality coating product.
To prevent this problem, make sure to properly prepare the fabric by washing and drying it before applying any coating. Additionally, invest in a high-quality coating product that is specifically designed for Pleather making.
3. Uneven Color or Texture:
Sometimes when making pleather, you may encounter issues with uneven color or texture on the fabric. This can be caused by poor application technique, using too much pressure while coating, or not allowing enough drying time between coats.
To fix this problem, make sure to apply the coating evenly and gently without applying too much pressure. Allow each layer to dry completely before adding another one. You can also use a heat gun or hairdryer to speed up the drying process, but be careful not to overheat the fabric.
4. Stiffness or Rigidity:
Pleather can sometimes become stiff or rigid, making it difficult to sew and work with. This can be caused by using too much coating or not allowing enough time for the fabric to dry between coats.
To address this issue, make sure to apply a thin layer of coating and allow it to dry completely before adding another one. If the fabric still feels stiff, you can try gently stretching it or using a fabric softener to restore some flexibility. However, be cautious not to overly saturate the fabric with softener as it can affect the final texture and appearance.
Following these troubleshooting tips can help you overcome common issues when making pleather and achieve a high-quality, realistic product. Don’t get discouraged if your first few attempts are not perfect – with practice and patience, you will master the art of pleather-making in no time. Remember to always use quality materials and take your time with each step for the best results. Happy pleathering!
Care and Maintenance of Pleather
1. Cleaning Pleather:
Cleaning Pleather is relatively simple and can be done using some of the most basic household items. Start by removing any excess dirt or debris from the surface using a damp cloth. For tougher stains, mix a small amount of mild soap with water and gently rub it onto the affected area. Avoid using harsh chemicals or abrasive cleaners as they can damage the pleather material.
Once you have cleaned the pleather, use a clean damp cloth to wipe off any soap residue. Make sure to thoroughly dry the surface with a dry cloth to prevent water spots from forming. If your pleather item has a strong odor, you can also lightly spray it with a mixture of equal parts water and white vinegar. This will help eliminate any unwanted smells.
2. Protecting Pleather:
To ensure your pleather item lasts for a long time, it is important to take preventive measures to protect it from damage. This includes keeping it away from direct sunlight and heat sources as the material can fade or warp when exposed to high temperatures. It is also advisable to avoid placing heavy objects on top of pleather items as this can cause dents or tears in the material.
Additionally, it is recommended to use a protective spray specifically designed for Pleather to create a barrier against stains and water damage. Be sure to test the product on a small, inconspicuous area first before fully applying it to your item.
3. Proper Storage:
When not in use, it is best to store pleather items in a cool, dry place. Avoid storing them in plastic bags or containers as this can cause the material to become brittle and crack. Instead, opt for a breathable storage bag or cover made from natural materials like cotton.
It is also important to avoid folding or creasing pleather items when storing them as this can cause permanent damage to the material. If necessary, stuff the item with tissue paper to help maintain its shape.
4. Removing Wrinkles:
If your pleather item becomes wrinkled, do not attempt to iron it as this can melt or burn the material. Instead, use a handheld steamer or lightly dampen the wrinkles and gently stretch and smooth them out with your hands. Allow the item to air dry completely before using or storing it. While some wrinkles may remain, they will become less noticeable over time.
5. Dealing with Scratches and Cracks:
Despite your best efforts, pleather items can still get scratched or develop small cracks over time. To fix this issue, you can use a colorless shoe polish or specialized pleather repair kit to fill in the scratches and restore the item’s appearance. Simply follow the instructions on the product and be sure to test it on a small, inconspicuous area first.
Following these simple care and maintenance tips can help extend the life of your Pleather items and keep them looking like new. With proper cleaning, protection, storage, and wrinkle removal techniques, you can enjoy your pleather products for years to come. Remember to always treat your pleather with care and avoid using harsh chemicals or abrasive cleaners to maintain its quality and appearance. So, go ahead and rock those trendy pleather jackets and bags without worry! Happy cleaning!
Conclusion
With the above outlined you can easily understand how to make pleather. This material is not only cost-effective but also eco-friendly as it does not involve the use of animal products. It can be used for a variety of purposes including clothing, accessories, and upholstery.
Pleather has been gaining popularity in recent years due to its versatility and sustainability. It provides an alternative to traditional leather which often involves the harmful practices of animal farming and tanning. Make sure to follow the steps carefully and experiment with different techniques to create unique and personalized pleather.