
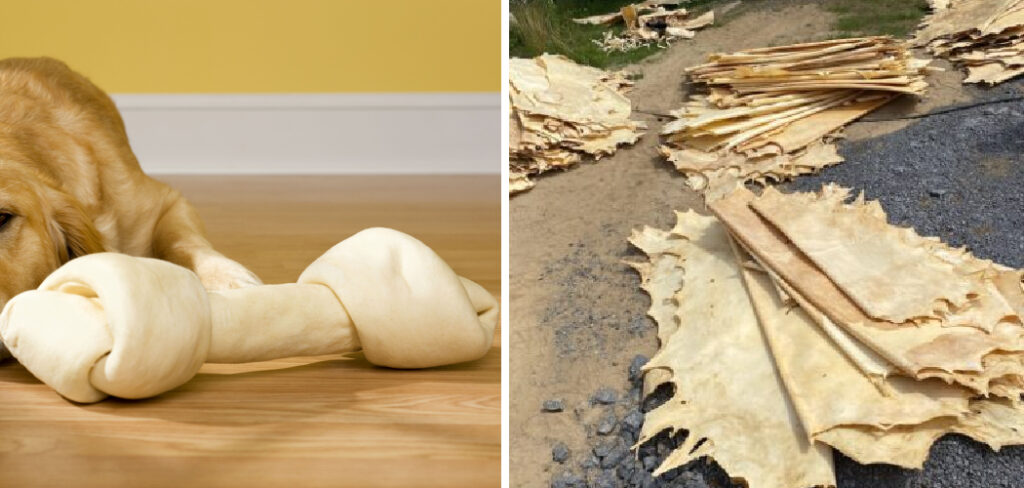
Are you searching for a homemade treat that not only will have your furry friend begging for more but will also keep their teeth and gums clean? Look no further than the classic dog treat – rawhide! Not only is it inexpensive and easy to make, but it’s also one of the most beloved treats around.
In this blog post, we’ll walk you through everything you need to know about how to make rawhide treats at home – from selecting the right ingredients to what equipment you’ll need!
You’ll even find some tips on how to customize your rawhide recipe so that your pup loves every batch! With this step-by-step guide, now everyone can become an expert in creating the perfect chewable treat with just a few simple steps.
Supplies You Will Need to Make Rawhide
- 4 cups of beef or chicken broth
- 2 tablespoons vegetable oil
- 2 lbs of rawhide strips (you can purchase them at pet stores or online)
- Large pot
- Cookie sheet lined with parchment paper
- Rolling pin
- Knife (optional)
- Measuring cup
Step-by-Step Guidelines on How to Make Rawhide
Step 1: Boiling the Rawhide Strips
The first step to making your dog treats is boiling the rawhide strips. This helps soften them up and makes them more pliable for shaping. Place the rawhide strips in a large pot and pour in 4 cups of beef or chicken broth. Add the vegetable oil and bring it to a boil over medium-high heat. Once boiling, reduce the heat to low and simmer for 45 minutes.
Step 2: Shaping the Rawhide Strips
Once the rawhide strips have finished boiling, remove them from the pot and place on a cookie sheet lined with parchment paper. Using a rolling pin, flatten each strip to your desired thickness (1/4 inch is common). If you want to get really creative, use a knife or cookie cutter to cut shapes into the strips.

Step 3: Letting the Rawhide Strips Dry
Once your rawhide treats have been shaped, it’s time to let them dry out. Place them back on the cookie sheet and place them in a warm, dry area (such as an oven that’s turned off or a sunny windowsill). Allow them to dry for 24-48 hours, flipping over once halfway through the drying process. Make sure the entire strip is dried before allowing your pup to enjoy it.
Step 4: Final Touches
Once your rawhide treats have fully dried, it’s time to give them the final touches! If desired, you can brush on a mixture of broth and oil to add flavor and shine. You can also sprinkle some additional seasoning such as garlic, parsley, or cumin if you’d like.
And that’s it! You’ve just successfully made some homemade rawhide treats for your pup to enjoy. Now all you need to do is give them a taste test and watch your furry friend beg for more! With this easy-to-follow step-by-step guide, now everyone can become an expert in creating the perfect chewable treat with just a few simple steps. Enjoy!
Additional Tips and Tricks to Make Rawhide
Making rawhide is an art that takes time and practice. Here are a few tips to help you get the most out of your rawhide-making journey:
- Make sure to purchase quality hides so that you have better luck with the final product. Low-quality hides can be difficult or impossible to work with.
- Have plenty of patience. Working with rawhide can take a lot of time and effort, and it’s important to be patient throughout the process.
- Don’t rush the drying process. The hides need to be completely dry before they can be worked with, so make sure you allow enough time for them to properly air dry.
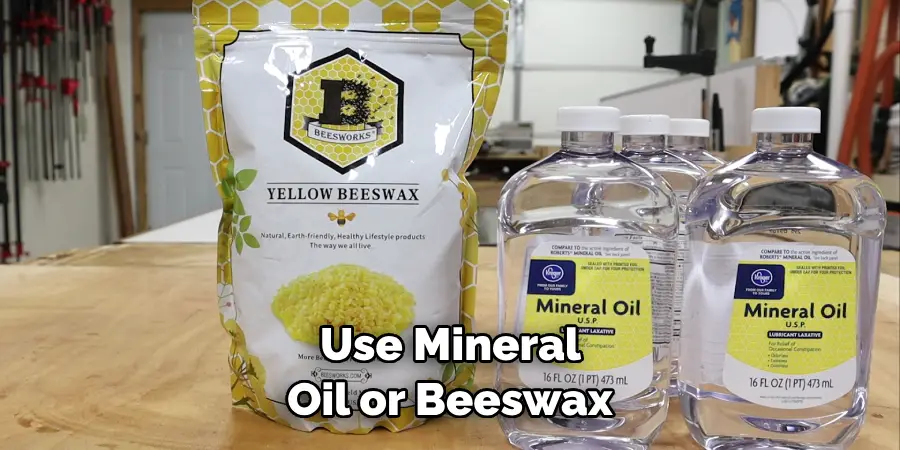
- Use mineral oil or beeswax to help preserve your finished rawhide pieces. This will help to prevent them from drying out and cracking over time.
- Have fun with it! Making rawhide is a great way to spend your time, and you can create some beautiful works of art that you’ll be able to treasure for years to come.
- Don’t be afraid to experiment! By trying different techniques and methods, you can create some truly unique pieces that are all your own.
Following these tips and tricks can help you get the most out of your rawhide-making experience. With practice, you’ll soon be creating amazing pieces that are sure to impress!
Storing and Caring for Rawhide
Once you’ve finished making your rawhide pieces, it’s important to make sure they’re properly stored and cared for. Here are a few tips on how to do just that:
- Store your rawhide pieces in a cool, dry place away from direct sunlight to help them last longer.
- Clean your rawhide pieces periodically with a mixture of mild soap and water to keep them looking their best.
- Make sure to avoid getting the rawhide wet, as this can cause it to become brittle and break apart.
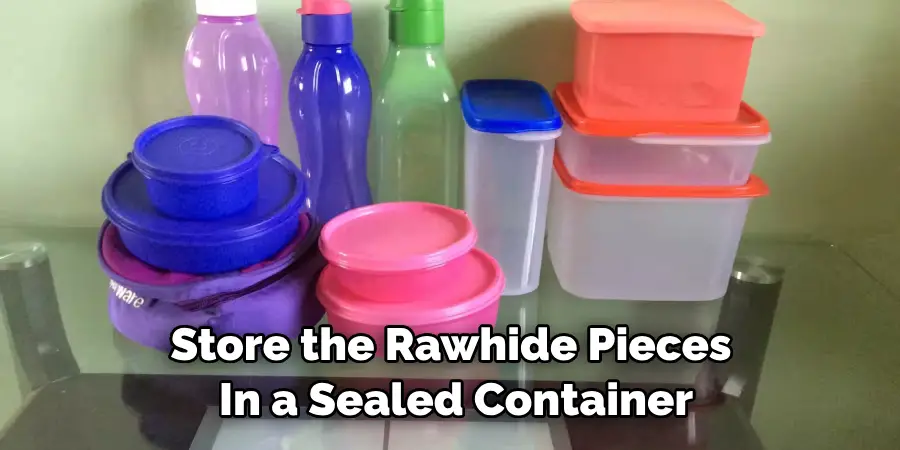
- If possible, store the rawhide pieces in a sealed container to help protect them from moisture and dust.
- When cleaning your rawhide pieces, avoid using harsh chemicals or solvents that could damage them.
By following these tips for storing and caring for your rawhide pieces, you can make sure they look their best for years to come. With the proper care and attention, you can enjoy your rawhide creations for a long time!
Precautions Need to Follow for Making Rawhide
- Ensure that the hide comes from a healthy animal. Do not use hides of animals that have died due to disease or other conditions as these may contain bacteria.
- Be sure to thoroughly clean the hide before beginning the process. You can do this by washing it in soapy water and rinsing it with clean, cold water.
- It is important to dry the hide completely before beginning the tanning process. The best way to do this is to hang it in a cool, dry place that does not receive direct sunlight.
- Make sure you are wearing protective gloves when handling the hide as it may contain sharp objects such as thorns or dirt which can cause cuts and infections on your hands.
- Be sure to wear protective clothing when handling the hide as it may contain chemicals that can be dangerous if they come in contact with your skin.
- After tanning, make sure you store the rawhide properly. It should be wrapped in a light-proof material and kept away from damp conditions or direct sunlight.
- If you are not sure of the safety procedures to follow when making rawhide, it is best to seek professional help.
- Finally, always keep in mind that the quality of your finished product will depend on how well you followed these steps and handled the hide during its preparation. Take your time and ensure that all precautions are taken for a successful outcome!
Following these precautions when making rawhide can help you create a safe and quality product that will last for years to come. Rawhide is an incredibly durable material and with proper care, it can last for many generations. Whether you are making rawhide for decorative purposes or functional use, taking the time to understand the process and following these steps will ensure your success!
Frequently Asked Questions
What Are the Benefits of Making Rawhide?
Rawhide offers many advantages for all types of crafters. It is a durable material that can be used to create items with great strength and flexibility, allowing you to make items that will last for years. The texture of the rawhide also makes it easy to manipulate into almost any shape or size, giving you the freedom to create unique items that stand out.
The natural lanolin in rawhide makes it water-resistant and helps keep its shape when wet, so you don’t need to worry about your creations becoming misshapen or losing their color. Finally, rawhide is an affordable material that can easily be acquired online, making it a great choice for someone who wants to make items without breaking the bank.
What Type of Rawhide Should I Use?
When deciding which type of rawhide to use for your project, there are several considerations you should take into account. The most important factor is the thickness and texture of the rawhide you need for your project; thicker leathers tend to be more durable, while thinner rawhides offer more flexibility in terms of manipulating them.
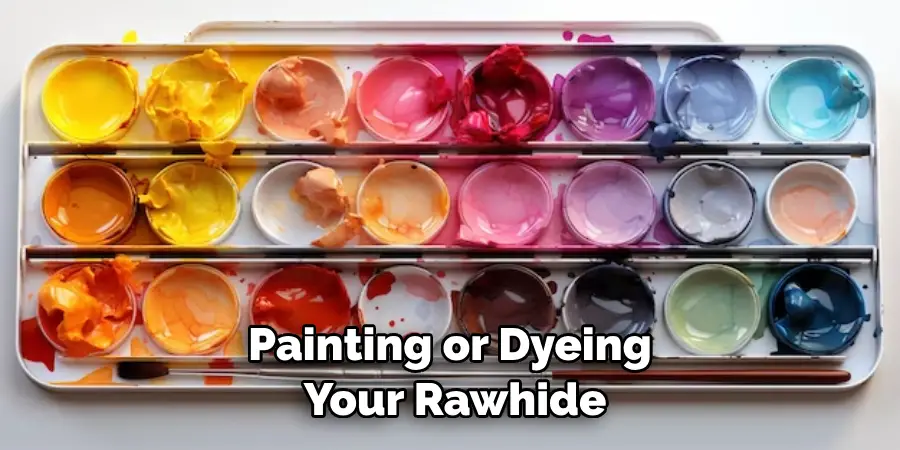
You should also take into account the color of the rawhide; white and yellow are good choices for dyeing or painting, while other colors such as black and brown may require additional treatments to make them suitable for crafting purposes. Lastly, it’s important to consider the source of your rawhide; many crafters prefer to hide from animals that have been humanely raised and harvested.
How Should I Treat My Rawhide?
If you’re planning on painting or dyeing your rawhide, then you should treat it prior to starting work. This will help seal and protect it from any moisture that could cause the colors to fade or run. You can treat rawhide using a mixture of oil, vinegar, and salt in equal parts; simply rub this mixture into your rawhide pieces and let them dry. Afterward, you can paint or dye the treated piece as normal.
Conclusion
Now you know how to make rawhide and the advantages it has, as well as what type of rawhide to use and how to treat it. With the right care and attention, you can make items that will last for years to come. Whether you’re making a hatband or a piece of furniture, rawhide is sure to give your project an extra special touch! Happy crafting!