There are a lot of different techniques for patinating fake leather, and it can be tricky to get the right look. In this article, we’ll show you how to patina fake leather. Faux leather is an excellent alternative to the real thing, and it’s often used in high-end garments and upholstery.

The downside of fake leather is that it can look cheap, especially when new. Fortunately, there are several DIY techniques you can use to improve the appearance of faux leather and make it look genuine! Read on for more.
What Is Patina?
Patina is the weathering process that occurs naturally when organic matter reacts with its environment over time, i.e., the aging or weathering of a surface through oxidation, reduction, or other chemical processes. In French, it simply means ‘patina.’
Patina plays a massive role in the history of an item’s worth, especially for those from hundreds of years ago. How old you want that piece to look is directly related to how much patina you give it. If your item already has some rust or oxidation, you can skip this step and go straight to applying the wax. Rust will speed up the aging process quite nicely on its own!
If you’re looking to age brand new leather (something less than six months old), continue reading below. Most fake leathers are made of polyurethane or PVC, which means they’ll need help developing their character if they aren’t already showing signs of aging.
Why Fake Leather Does Not Patina?
Depending on the type of fake leather, it may or may not be patina. In general, the synthetic fibers used in most types of fake leather prohibit natural patining from occurring.
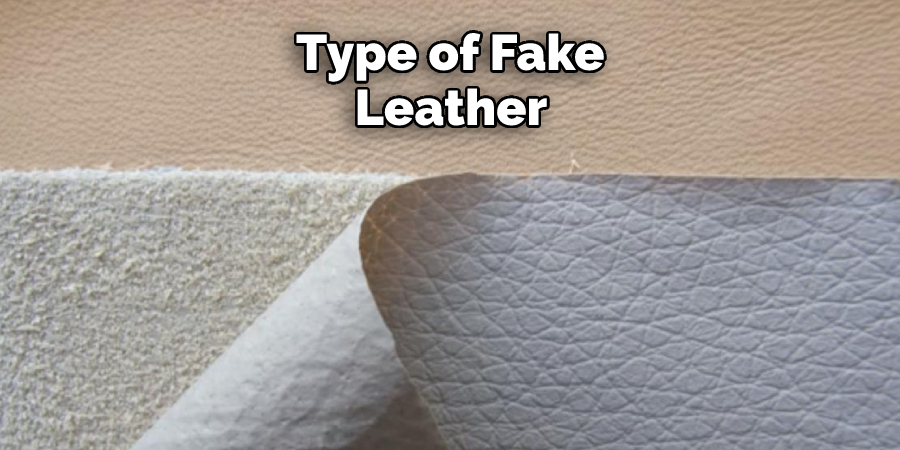
Fake leather is often composed of unnatural fibers such as polyvinyl chloride (PVC), polyurethane, polyethylene, polyester, and other synthetic materials. These artificial leathers are not porous enough to absorb the oil from natural skin that causes real chamois to develop a patina over time.
Even if the fake leather is made from natural fibers, it will still have a different composition than genuine leather. Fake leather is not as pliable as natural leather and feels more rigid. In addition, most types of fake leather are coated with a vinyl plastic coating that repels oil and resists aging. This makes it impossible for any patina to develop.
Over time, fake leather will fade or crack under direct sunlight. It can be faded by rubbing against abrasive surfaces such as concrete sidewalks. The sun shining on the material’s surface causes a chemical reaction that fades or cracks the material over time.
Even if genuine leather is made with synthetic fibers, your body’s natural oils will cause it to develop a patina. Natural oils create dark oxidation spots that are unique for each individual over time. Altering the color of the hide with artificial dyes or pigments creates an unnatural finish that Mother Nature cannot duplicate.
Some types of faux leather are more closely related to authentic leather than others. Because these two materials have different compositions, they can be mistaken for one another when, in fact, they are not at all alike.
While most fake leathers do not hold up under scrutiny, certain types of synthetic microfiber mimic real leather quite well. The most notable types of microfiber are called “pleather” and “vegan leather.”
How to Patina Fake Leather Detailed Guide
Method 1: Using Paint
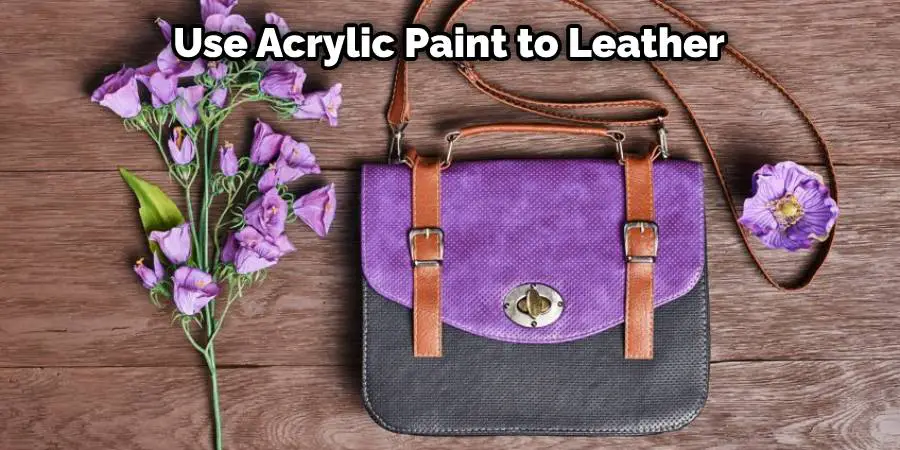
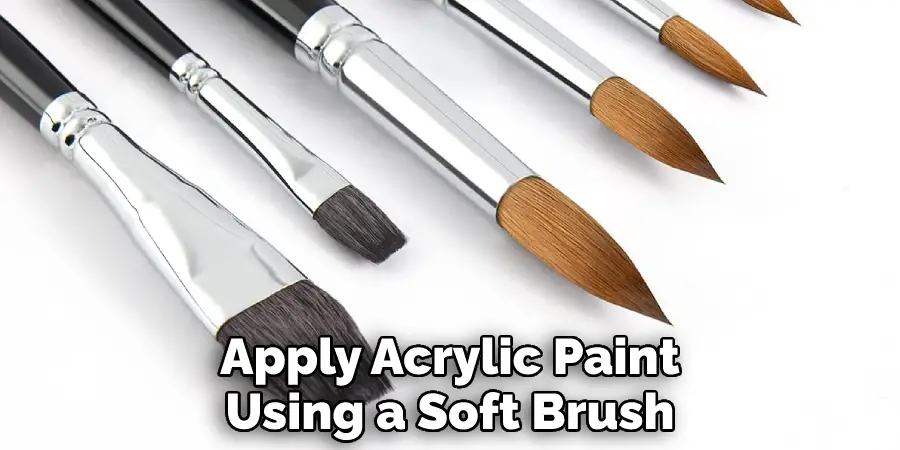
You can use acrylic paint to add a patina look to the leather. It works well with faux, plastic, and even genuine leather. This method is straightforward, especially if you’re trying it out for the first time.
Things You’ll Need:
- Dry cloth
- Acrylic paint in the color of your choice
- Soft paintbrush
- Hairdryer
Instructions:
1. Before you begin, clean the surface of the leather with a dry cloth or lint-free rag to remove any dust, grime, or debris that may be on it.
2. Take the paint color of your choice and dip your brush in it. If using acrylic paint, make sure it’s completely absorbed by the bristles so there will be no dripping off when applying onto the fake leather.
3. Gently glide your wet brush over faux leather grain to simulate creases and wrinkles, generally found on aged leather goods. Work along with every detail around the seams and rivets/hardware attachments for natural-looking results. You can use other tools like paints pens to create exciting designs for dramatic effects but make sure it’s dry before adding another layer.
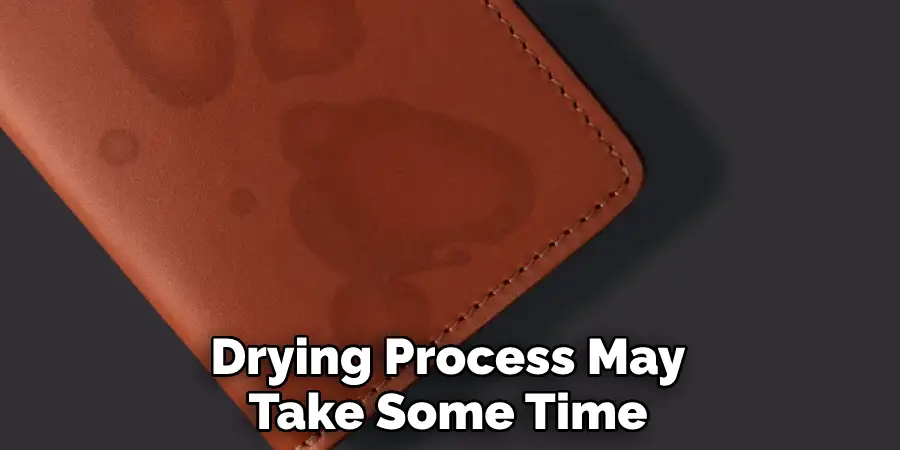
4. Use a hairdryer to set the paint into the leather by directing hot air into every crevice, but be careful not to overdo it since too much heat can cause damage. The drying time depends on how thick your layer of paint is, so give it enough time (about 1-2 minutes) before carefully checking if it’s already dry. You’ll know when you touch it and find that there are no longer wet paint spots on the surface.
5. To ensure that everything is well dried, flip the material over and do the same thing for the other side until completely done with both the front and back areas. Be patient because the drying process may take some time since you’re applying it with the grain.
6. To achieve a realistic patina result, repeat steps 2 to 5 using darker and darker colors for added texture and depth. For example, apply light brown, then dark brown, and finally black. If you want a brighter contrast, go from dark to light or white for even more dramatic effects, primarily on hardware attachments like locks and chains, as these usually are not exposed to dirt as frequently as other sections.
7. Once finished, set the paint by placing leather goods under direct sunlight or heat lamps until completely dry (about 30 minutes). If there’s no alternative way of drying it fast, use a hairdryer again, but this aims it away from the surface.
Method 2: Using Sandpaper
Like the first method, this is for people who want to achieve a more realistic patina. It can be used on natural or faux leather, but it is usually best suited when the material is plastic since it tends to hold up better against abrasive materials.
Things You’ll Need:
- Dry cloth
- Lightweight sandpaper (avoid heavy-duty sheets) in 120, 240, and 320 grits with no adhesive backings/coating
- Soft paintbrush for applying acrylic paint
- Paper plate or plastic container with lid
Instructions:
1. Clean the surface of the leather using a dry cloth, then place it on top of paper or plastic sheeting to avoid any mess or damage to surfaces. Leather grain should be facing down during this process.
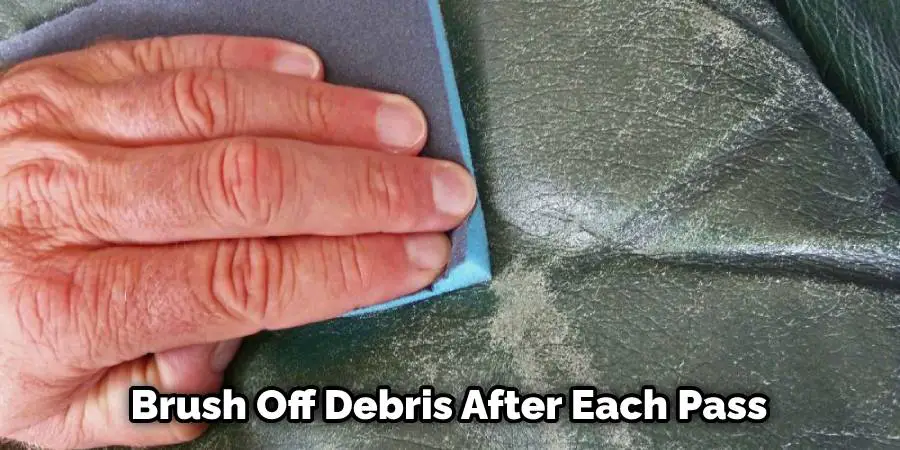
2. Using the 240-grit sandpaper, start from a corner and rub with medium pressure to create fine or deep scratches depending on your preferences (if you want subtle effects, use light pressure). Make sure to brush off debris after each pass, and don’t forget about the sides of faux leather since some creases can be found there.
3. Once done creating texture, go over it again with the 320-grit paper, then wipe everything down using dry cloths (don’t add more polish/conditioner if you intend to add paint on it later). Repeat steps 2 and 3 until reaching desired look (which should be around three passes for more realistic results).
4. To add a color finish on fake leather, apply acrylic paint on texture using a soft brush, then wipe excess with a dry cloth (be light-handed when applying paint since you only need a thin layer for this method).
5. Set the color by placing leather goods under direct sunlight or heat lamps until completely dry (about 30 minutes). If there’s no alternative way of drying it fast, use a hairdryer again, but this aims it away from the surface. This is a crucial method in how to patina fake leather.
Method 3: Using Rubbing Alcohol
This is best suited for real leather since faux leather tends to absorb too much of the chemical, leaving only a sticky, moist surface that needs polishing afterward. It can be used on light or dark colors but keep in mind that you’re more likely to get blotchy results if using white paint.
Things You’ll Need:
- Clean cotton cloths
- Acrylic paint (for the color finish)
- Rubbing alcohol
Instructions:
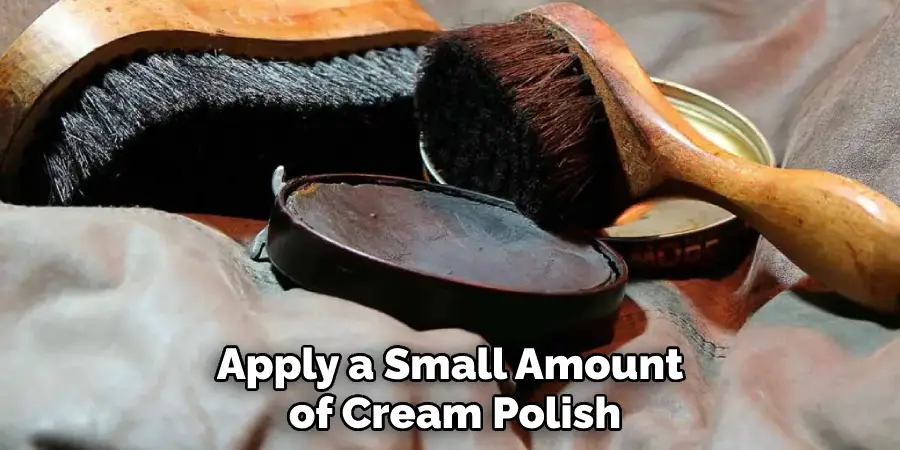
1. Clean the surface of the leather using a dry cloth, then place it on top of paper or plastic sheeting to avoid any mess/damage to surfaces. Leather grain should be facing down during this process. Allow it to dry completely before continuing with the next steps. For a cleaner finish, apply a small amount of cream polish on the area and let it sit for a couple of minutes before wiping off excess.
2. Using a cotton cloth, soak part of it in rubbing alcohol. Then gently swipe over desired areas (use circular motions) until creating light or dark patches depending on your preference (for more dramatic results, use straight strokes). Make sure to adjust pressure and angles as you go to avoid flattening out one side.
3. Once finished patina-ing, allow leather goods to dry completely, then apply acrylic paint using a soft brush. Wrap up by allowing it to set under direct sunlight or heat lamps according to package instructions or around 30 minutes if no alternative drying method is available. If there’s no other way of drying it fast, use a hairdryer again and point it away from the surface.
Method 4: Using Wax Paper
Things You’ll Need:
- Lightweight sandpaper (avoid heavy-duty sheets) in 120, 240, and 320 grits with no adhesive backings/coating
- Dry cloths
- Wax paper (translucent may be preferred for specific applications)
Instructions:
1. Clean the leather using a dry cloth, then place it on paper or plastic sheeting to avoid any mess/damage to surfaces. Grain should be facing down during this process. Allow it to dry completely before continuing with the next steps. For a cleaner finish, apply a small amount of cream polish on the area and let it sit for a couple of minutes before wiping off excess.
2. Using 120-grit sandpaper, gently rub until reaching the desired look, then wipe away debris using dry cloths. For more dramatic results, use 240-grit paper first but be careful not to create too deep scratches since these tend to be visible even after adding paint on top of the leather.
3. Once finished texturing, go over everything again with 320-grit sandpaper, then wipe everything down with dry cloths until reaching desired texture/finish (should only take light passes for this process). Next, apply wax paper to selected areas, then scratch cones at angles around 45 degrees using end corners of your fingernails or back edge of ballpoint pen caps. This is an essential step in how to patina fake leather.
4. Continue scratching until desired depth, color/darkness, and pattern (repeat previous steps until wholly finished). Finish with wax paper for extra protection or leather paint for more defined results.
Frequently Asked Questions
How Do You Change the Color of Pu Leather?
The color of pu leather can be changed by a few simple steps. The first step is to soak the pu leather in a bath of cool water and white vinegar. This will help to remove any dirt, dust, or other particles that may be coloring the leather. Once the leather is soaking, add hydrogen peroxide to the water and vinegar mixture and stir until the peroxide is fully dissolved. Pour the solution over the pu leather and allow it to soak for several hours or overnight. The next day, rinse the leather with cold water and dry it off. You can then apply your desired colorant using a spray bottle or brush.
Can Faux Leather Patina?
Yes, faux leather can be treated with a patina. Patinas are available in a variety of colors and styles, so you can create the look that you’re looking for.
Does Faux Leather Develop Patina?
Faux leather develops a patina over time as it accumulates exposure to air, moisture, and oils. This is due to the fact that faux leather is made from a mixture of polyurethane and fabricating chemicals. Over time, these chemicals will react with one another to create small layers of finish on the surface of the material.
What Can Ruin Faux Leather?
Faux leather can be ruined by a number of different things, which is why it’s important to take care when using it. Some of the most common causes of faux leather damage include acidic foods, direct sunlight exposure, sweat, and water.
Acidic foods (such as tomatoes) will cause the polyurethane coating on faux leather to peel off. Direct sunlight can also cause fake skin to become discolored and brittle. Sweat and water can weaken the fabric and make it susceptible to tears or pilling. In order for your faux leather items to last longer, be sure to take care of them properly!
Conclusion
We hope you have gone through the article on how to patina fake leather. Fake leather can be a great way to save money and get the look of genuine leather. With a few easy methods, you can give your phony leather furniture, accessories, or clothing an antique patina that will make them look like they’ve been around for years. Try this simple patination process on your next project and see how beautiful faux leather can be!
You may also like – How to remove stains from faux leather