
When your leather gloves start to look dry, stiff and worn out, it’s time to give them some TLC. Do you want to make sure your leather goods stay looking their best for years to come? The leather balm is the perfect way to keep them protected and conditioned. The Hestra leather balm has become a premier choice for maintaining, softening, and preserving high-end leather goods.
This post on how to print on faux leather at home will guide you through the easy steps of applying Hestra leather balm so that you can ensure your items remain in excellent condition over time. If you maintain your investment with occasional treatments like this one, they’ll take care of you all season long while providing warmth and comfort in harsh conditions along the way!
What is Faux Leather?
Faux leather, also known as “leatherette” or “vegan leather,” is a material made from synthetic fibers that look and feels like real leather. It’s used in many items, such as furniture, clothing, and accessories. Faux leather has become increasingly popular due to its durability and affordability. It is also much easier to print on than traditional leather due to its smooth and even surface.
Is Painting Faux Leather Possible?
Yes! Painting faux leather is possible, but it can be a bit tricky. You’ll need to make sure you have the right type of paint and primer for the job. Acrylic-based paint works best for painting on faux leather because it adheres easily and won’t crack or peel off after drying. Primer is also important, so make sure it’s specifically made for faux leather surfaces.
Choosing the Best Paint for Faux Leather
When choosing paint for faux leather, you should look for an acrylic-based paint that is specifically designed for this type of material. Make sure the label states that it’s suitable for use on faux leather and other synthetic materials. Once you have selected the right type of paint, make sure to test it on a small area first before applying it to the entire surface.
How to Prep Faux Leather for Painting
Preparing the surface of faux leather is essential before painting, just as it is with any other type of material. Start by cleaning the area with a damp cloth and mild detergent or soap. Once dry, sand the area lightly with fine-grit sandpaper in order to create a smoother surface. Once the area is adequately prepped, use painter’s tape to secure any areas that you don’t want painted, and apply a coat of primer specifically designed for faux leather surfaces.
Required Items
- Acrylic-based paint
- Primer specifically made for faux leather
- Painter’s tape
- Fine-grit sandpaper
10 Tips on How to Print on Faux Leather at Home
1. Choose Suitable Paint
Always use acrylic-based paint when printing on faux leather. It will adhere better and provide a more even finish. Don’t use any type of water-based paint, as it won’t stick to the surface.
2. Test Samples
Before committing to a design, make sure you first test samples on scraps or small areas of faux leather. This will help you determine if the paint color and coverage are suitable for your needs.
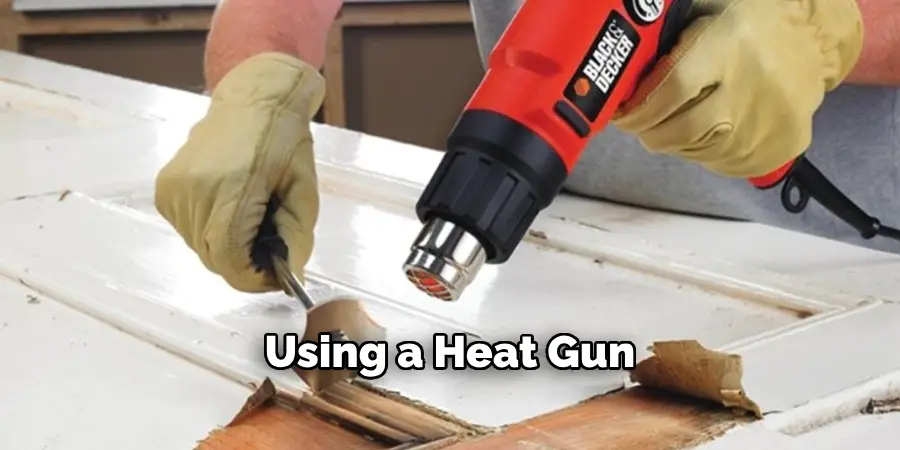
3. Heat Gun
Using a heat gun will help ensure that the paint dries quickly and evenly. If you don’t have a heat gun, you can use a blow dryer instead. It will have the same effect, just be sure to keep it moving so that you don’t overheat any areas.
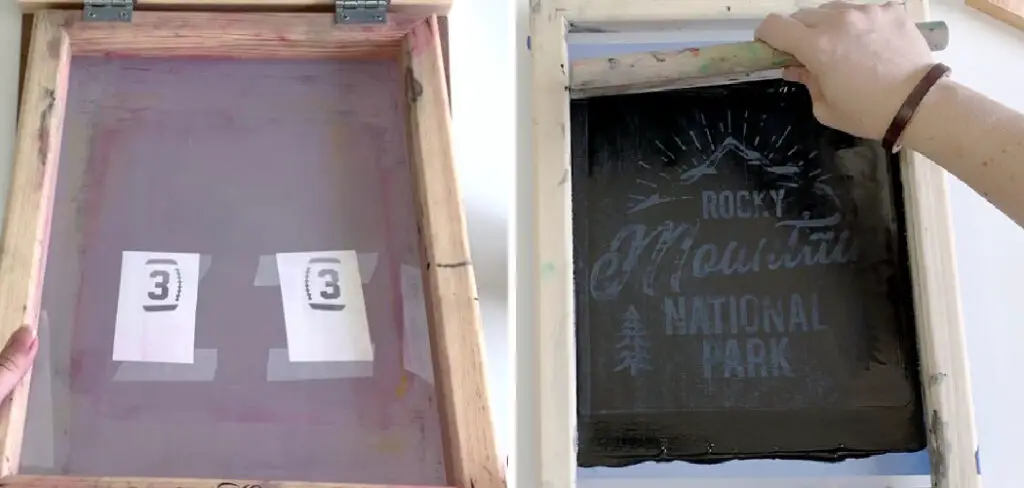
4. Faux Leather Stencils
Using stencils specifically designed for faux leather will make printing on surfaces much easier and more consistent. These stencils usually come in a variety of sizes and shapes, so you can find one that works with your project.
5. Practice Makes Perfect
Before printing on the actual surface, practice on scrap pieces of faux leather to get the hang of it. This will help you determine how much pressure and paint coverage are needed for the best results.
6. Use a Soft Brush or Sponge
Using a soft brush or sponge will help you apply the paint evenly without creating any streaks. This is especially important when printing on smaller areas or intricate designs.
7. Multiple Coats
When printing on faux leather, it’s best to use multiple coats of paint in order to achieve an even finish. Allowing ample time between each coat will ensure that the paint doesn’t run or smudge.
8. Allow Plenty of Drying Time
Allow plenty of time for the paint to dry before adding another coat or moving on to a new area. If you don’t, you risk smudging the design and having to start over from scratch. Drying times will vary depending on the type of paint used, so make sure to read the instructions for the best results.
9. Blot Excess Paint
If you’re having difficulty with applying too much paint or getting streaks, try blotting off any excess with a damp cloth before it sets. This will help even out the coverage and give you a more professional-looking finish.
10. Seal the Design
After the paint has had ample time to dry and cure, use an acrylic sealer or varnish to protect your design from scratches and fading. Make sure to apply several thin layers of sealer for the best results.
By following these steps, you can easily print on faux leather at home and achieve professional-looking results. If you’re still unsure of how to go about it, there are plenty of online tutorials or videos available that can help guide you through the process.
8 Maintenance Tips for Faux Leather at Home
1. Clean your faux leather regularly to prevent dirt and dust build-up. Use a damp cloth with mild soap and water, taking care not to soak the material. Dirt and dust build-up can damage the faux leather’s surface and reduce its longevity.
2. Avoid using harsh cleaners or solvents on your faux leather items, as these will strip off the protective coating that is meant to preserve the material. The cleaner should always be mild, and the cloth used to clean should not be abrasive.
3. Avoid placing your faux leather items in direct sunlight, as this can cause the material to fade and crack over time. Prolonged exposure to ultraviolet light will inevitably damage the faux leather’s surface.
4. Keep your faux leather away from sources of moisture, such as steam or water. Water can cause the material to swell, and the protective coating could deteriorate quickly.
5. Condition your faux leather regularly with a quality conditioner designed specifically for this type of material. This helps to keep it soft, supple, and clean while preventing cracking or fading over time.
6. Avoid using sharp objects on your faux leather, as these can damage and tear the surface. This includes knives, scissors, and any other sharp tools.
7. If you are storing your faux leather items for an extended period of time, make sure to keep them in a dry place, away from direct sunlight and moisture. For best results, wrap the items in a cloth or other breathable material before storing them.
8. For tough stains on faux leather, use a mild cleaning solution and blot gently with a soft cloth to remove any residue without damaging the surface of the material. Keep in mind that some types of faux leather are more sensitive than others and may require special care.

These tips can help you preserve the look and feel of your faux leather items for years to come. Remember to take extra care with cleaning and maintenance, as this will ensure that your faux leather remains in pristine condition despite regular use. With the right amount of care and attention, you can enjoy your faux leather items for a long time.
Frequently Asked Questions
How Often Do You Need to Paint Faux Leather?
It is not necessary to paint faux leather, as it already has a protective coating. However, you may choose to add some color or pattern by painting the material in desired shades. How often this needs to be done depends on the type of faux leather and its use. Generally speaking, regular maintenance and cleaning should be sufficient to keep your faux leather looking great.
How to Remove Stains from Faux Leather?
If you have a tough stain on your faux leather, use a mild cleaning solution and blot gently with a soft cloth. Be careful not to rub too hard, as this could damage the surface of the material. If necessary, seek advice from a professional cleaner for more specific instructions.
Conclusion
Printing on faux leather at home can be a great way to customize and personalize your leather items. With the right materials, such as a laser or color inkjet printer, and the correct type of faux leather, you can achieve amazing-looking results. Don’t forget to use transfer paper if you’re looking for a realistic finish!
Remember that when printing on faux leather, patience is key – no two attempts will ever be the same due to the surface being so irregular. It’s best to practice with scrap pieces of the material beforehand so that you get comfortable with the process. Finally, there are tons of possibilities when it comes to crafting with this amazing material – take some risks, follow the tips on how to print on faux leather at home, and have fun pairing colors, shapes, and patterns for an awesome personalized look that nobody else has!