
Are you looking for a way to remove an unwanted patch or other accessory from your leather jacket? It can be a tricky task, but the good news is that with the right tools and techniques, it’s quite straightforward. By following some simple steps, you can quickly take off patches and decorations from your trusty leather jacket without damaging its material.

Leather jacket patches can often be a way to express your style, but sometimes, you may want to remove them for a more streamlined look. Perhaps you’re changing up your style, or the patch no longer holds the same meaning for you.
Read on to learn more about how to remove a patch from a leather jacket in just a few easy steps!
What Will You Need?
Before you begin, ensure you have all the necessary tools and materials. This will ensure a smooth and successful patch removal process. Here’s what you’ll need:
- A seam ripper or small pair of sharp scissors
- Rubbing alcohol or leather cleaner
- A clean cloth or cotton swab
Once you have everything ready, let’s get started!
10 Easy Steps on How to Remove a Patch From a Leather Jacket
Step 1: Preparing the Patch
Before removing the patch, it’s important to prepare the patch and the surrounding area. Use rubbing alcohol or leather cleaner to clean around the edges of the patch gently.
This will help loosen any adhesive and make it easier to remove. Then, use a seam ripper or small pair of scissors to carefully trim away any excess threads or backing material from the patch’s edges. This will prevent any damage to your jacket when removing the patch.
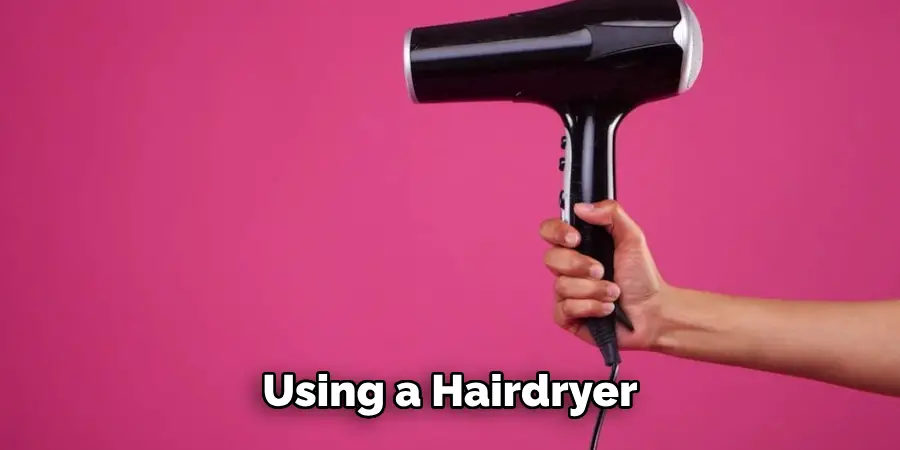
Step 2: Heat the Patch
If the patch is ironed on, using a hairdryer on high heat can help loosen the adhesive and make it easier to remove. Hold the hairdryer a few inches away from the patch and move it around to heat up the area. If the patch is sewn on, skip this step.
Step 3: Start Removing the Patch
With the patch adequately heated or prepared, gently insert the seam ripper or scissors under the edge of the patch. Be careful not to scratch or cut into the leather of the jacket.
Once you grip the edge, carefully start pulling it back. If the patch is iron-on, the heat should have loosened the adhesive, making it easier to peel off. If the patch is sewn on, use the seam ripper or scissors to cut the stitches without damaging the jacket. Continue this process until the patch is completely removed.
Step 4: Clean the Area
Once the patch is completely removed, there will likely be some residual adhesive or thread left on the jacket. If the adhesive is rejected, apply some rubbing alcohol or leather cleaner to a clean cloth or cotton swab and gently rub the area until the adhesive is gone. If thread is left, use your seam ripper or scissors to cut and remove it carefully. Clean the area thoroughly to prevent any damage or staining to the leather.
Step 5: Condition the Leather
After removing the patch and cleaning the area, it’s essential to condition the leather to prevent it from drying out or cracking. Apply a small amount of leather conditioner to a clean cloth and gently rub it into the area where the patch was.
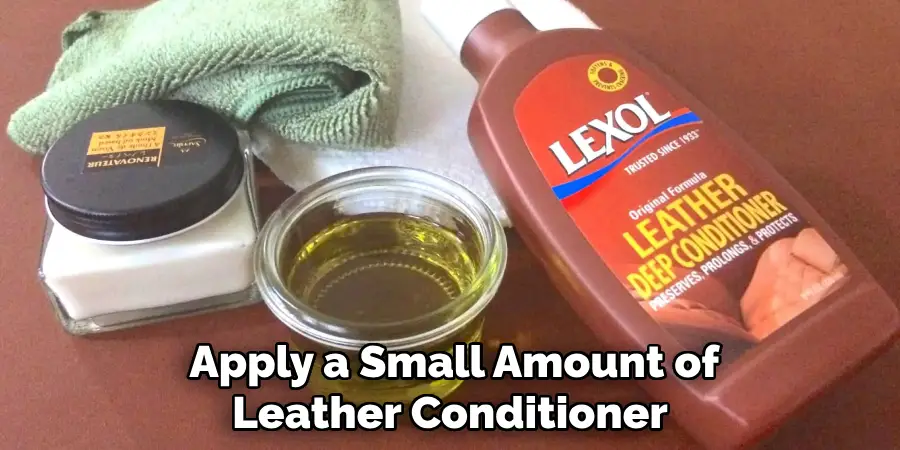
Follow the manufacturer’s instructions on the conditioner bottle for the best result. Let the conditioner soak in for a few minutes, and then wipe off any excess with a dry cloth. This step will help restore the natural moisture and shine of the leather, leaving your jacket looking as good as new!
Step 6: Dry the Jacket
Once you’ve conditioned the leather, let the jacket dry completely before wearing or storing it. It’s best to let the jacket dry naturally in an open, ventilated space away from direct sunlight or high heat, which might cause the leather to warp or crack.
This step ensures that the conditioner fully absorbs into the leather and any residual moisture from the cleaning process evaporates. Give it plenty of time to dry – it may take a few hours, but it’s worth waiting to preserve your leather jacket’s quality and longevity.
Step 7: Inspect the Jacket
After the jacket has dried thoroughly, it’s time to inspect it. Check the area where the patch was removed for any signs of damage, residual adhesive, or stray threads. If you notice any adhesive that didn’t come off in the earlier steps, gently rub it with a cloth dampened with a little more rubbing alcohol or leather cleaner. If everything looks good, congratulations – you’ve successfully removed a patch from your leather jacket!
Step 8: Maintenance
Proper maintenance is vital to preserving the look and quality of your leather jacket. After successfully removing the patch, regularly clean your jacket with a mild leather cleaner and condition it to keep the leather soft and supple. Avoid exposing your jacket to harsh weather conditions; always store it in a cool, dry place. Regular maintenance is the secret to a long-lasting and stylish leather jacket.
Step 9: Patch or Restyle
Now that you have successfully removed the patch from your leather jacket, consider replacing it with a new patch that better suits your current style, or you prefer the sleek, unadorned look.
If you decide on a new patch, ensure it’s correctly positioned and securely fastened, following the manufacturer’s instructions. If you leave it unpatched, enjoy your leather jacket’s renewed, classic aesthetic. Either way, it’s a fresh start to redefine your style statement.
Step 10: Reflect
Reflect on the process and the new look of your leather jacket. Did everything go as planned? Is the jacket now more aligned with your current sense of style? It’s important to remember that fashion evolves with time and personal style, and your leather jacket can evolve.

Whether you decide to add a new patch in the future or enjoy its unadorned style, you now know the steps to alter your jacket according to your taste. Personalizing your jacket can be a fun and rewarding way to express yourself. Enjoy your renewed and personalized leather jacket!
Following these simple steps, you can successfully remove a patch from your leather jacket without damaging the material.
5 Additional Tips and Tricks
- Use the Right Tools: Always ensure you use the correct tools. Scissors or seam rippers are best for cutting stitches, and a hairdryer is the best tool for heating patches. Using inappropriate tools can lead to unnecessary damage to your jacket.
- Patience is Key: Removing a patch from a leather jacket can be time-consuming, especially if the patch is sewn in. Be patient and take your time to avoid any accidental cuts or rips in the leather.
- Test Cleaning Products: Before applying any cleaning product or alcohol to the leather, it’s always a good idea to test it on an inconspicuous jacket area to ensure it won’t discolor or damage the leather.
- Quality of Leather Conditioner: While any leather conditioner may work, it’s best to invest in a high-quality one. A good leather conditioner will not only restore the leather’s moisture but it will also help maintain its longevity and luster.
- Professional Help: If you’re unsure or uncomfortable about removing the patch yourself, consider taking your jacket to a professional. They have the skills and experience to handle the task without causing any damage to your jacket.
With these tips and tricks, you can confidently remove a patch from your leather jacket and maintain its quality for years to come.
5 Things You Should Avoid
- Avoid Using Sharp Objects Carelessly: When removing the patch or any residual thread, be cautious not to scratch or pierce the leather with sharp objects accidentally. Any damage to the leather is usually irreversible.
- Avoid Excessive Heat: Do not use too much heat to loosen the patch adhesive. Excessive heat can discolor or warp the leather. Always test a small area first before applying heat to the entire patch.
- Avoid Using Harsh Chemicals: Using harsh chemicals to clean the leather or remove the adhesive can result in discoloration or drying out of the leather. Always opt for mild and safe leather cleaners.
- Avoid Quick Drying Methods: Avoid drying your jacket quickly by heating or sun drying. This can lead to the leather becoming brittle and cracking. Always allow the jacket to dry naturally.
- Avoid Neglecting Regular Maintenance: Pay attention to the regular maintenance of your jacket after the patch removal. Regular cleaning and conditioning are vital to maintaining the longevity and look of your leather jacket.

By following these tips, you can ensure a successful patch removal process and preserve the quality of your leather jacket.
Conclusion
In conclusion, you now know all the tips and tricks on how to remove a patch from a leather jacket quickly and efficiently. Whether you use the heat method, needle and thread method, or sandpaper to complete the job, follow the steps mentioned above for the best results.
Plus, always remember that adhesives weaken with age, so removing patches from very old jackets is much easier since patinas tend to form over time. Taking care of your leather jackets is essential if you want them to look brand-new. So, if ever in doubt about removing a patch or making any alterations, always consider reaching out to an expert tailor or cobbler who can help advise you on the best approach.
Be sure to practice these careful patch-removal methods today before your favorite leather jacket becomes unappealing or damaged anymore – practice these detailed patch removal methods!
