Do you own a bonded leather sofa that’s starting to peel away? It can be incredibly frustrating when this happens, and it doesn’t seem like there’s an easy fix. But don’t despair–with the right tools and materials, this problem can actually be remedied quite easily. In this blog post, we’ll teach you how to properly repair your peeling bonded leather sofa so that it looks as good as new!

We’ll walk you through the entire process step by step on how to repair bonded leather sofa peeling, so no matter your level of expertise with repairing furniture, you’ll have everything you need to get the job done in a timely manner. Read on to learn more–your once-peeling sofa won’t know what hit it!
What is Bonded Leather?
Bonded leather is a material commonly used in the manufacturing of furniture, particularly sofas. It’s made by bonding shredded leather scraps and fibers together with polyurethane or latex onto a fiber backing. The result is an affordable and aesthetically pleasing material that looks and feels like genuine leather.
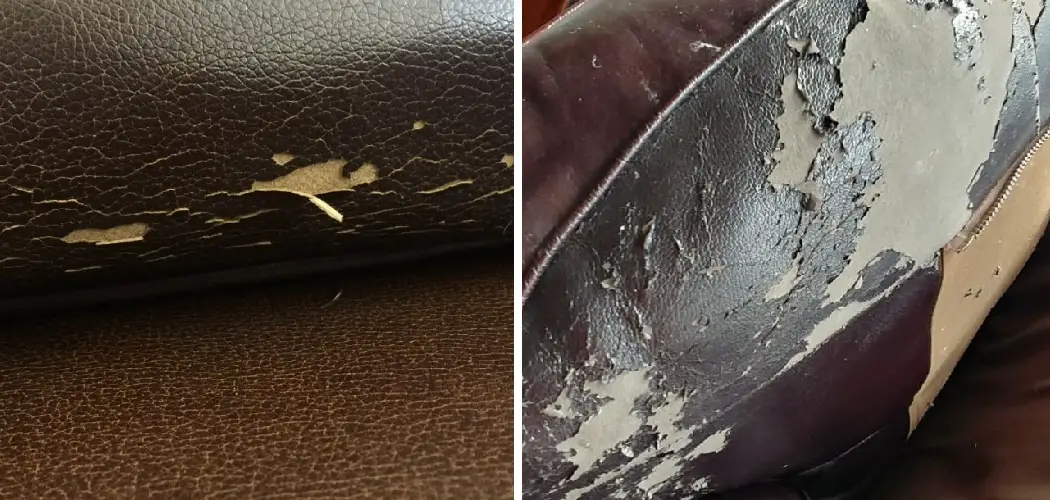
Why Does Peeling Occur?
Despite its name, bonded leather is not as durable as genuine leather. Over time, it can start to peel and crack due to wear and tear, exposure to sunlight, or improper cleaning and maintenance. While this may seem like a major issue that requires replacing the entire sofa, it’s actually quite easy to repair with the right techniques.
Materials You’ll Need
Before we dive into the repair process, it’s important to gather all the necessary materials. You’ll need:
- Leather Repair Adhesive
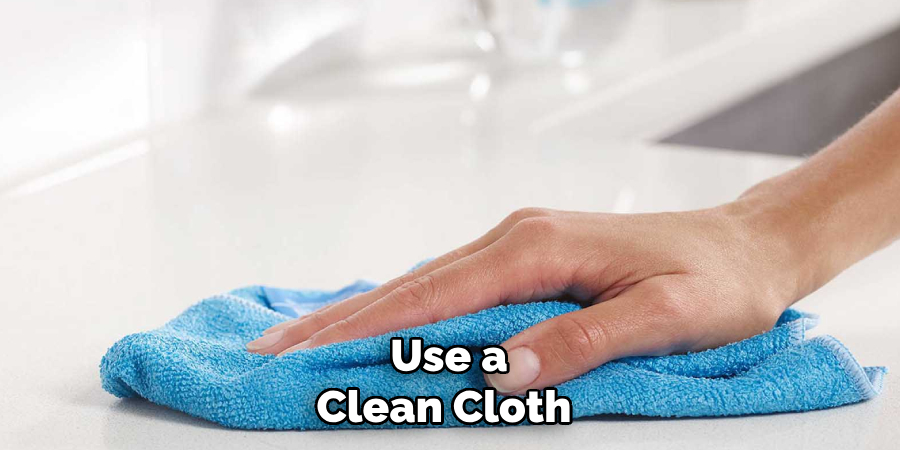
- A Clean Cloth
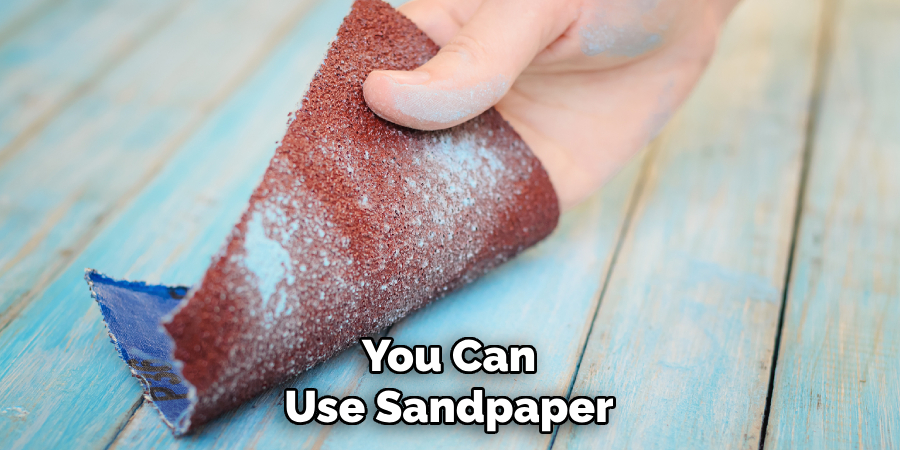
- Sandpaper (at Least 400 Grit)
- Filler Compound for Leather
- Sponge or Paintbrush
- Leather Dye (Matching the Color of Your Sofa)
- Leather Conditioner
11 Step-by-step Guidelines on How to Repair Bonded Leather Sofa Peeling
Step 1: Clean the Affected Area
Use a clean cloth and warm water to gently remove any dirt or debris from the peeling area. Let it dry completely before proceeding to the next step. It’s important to start with a clean surface before applying any adhesive or filler. If the area is stained, you can use a leather cleaner to remove any marks before proceeding.
Step 2: Cut Away the Peeling Edges
Using a sharp pair of scissors, carefully trim away any loose or peeling edges. This will create a smooth surface for the adhesive and filler to adhere to. You can also use sandpaper to clean up the edges and roughen up the surface for better adhesion. It’s important to be gentle during this step to avoid causing further damage. This step is especially important if the peeling area is large.
Step 3: Apply Adhesive
Using a leather repair adhesive, apply a thin layer to the exposed area. Make sure to spread it evenly with a sponge or paintbrush. Be careful not to apply too much adhesive, as it may seep through the layers and cause discoloration. It’s best to work in small sections at a time. You can also use a toothpick or cotton swab for more precise application.
Step 4: Press Down the Edges
After applying the adhesive, gently press down the edges of the bonded leather to reattach them to the backing material. Hold it in place for a few minutes to allow the adhesive to set. You can use a small roller or the back of a spoon to smooth out any air bubbles. This will help achieve a flat and seamless surface. But be careful not to press too hard, as this may cause the adhesive to seep through the edges.
Step 5: Let It Dry
Depending on the type of adhesive you’re using, it may take anywhere from 30 minutes to a few hours for it to dry completely. Read the instructions on the adhesive carefully and make sure to follow them accordingly. Waiting for the adhesive to dry is crucial in making sure that the edges stay firmly attached.
Step 6: Sand Down Excess Adhesive
Once the adhesive is completely dry, you can use sandpaper (at least 400 grit) to remove any excess adhesive and create a smooth surface. Gently sand the area in a circular motion until it feels even and flat. Be careful not to damage the surrounding area or expose the backing material.
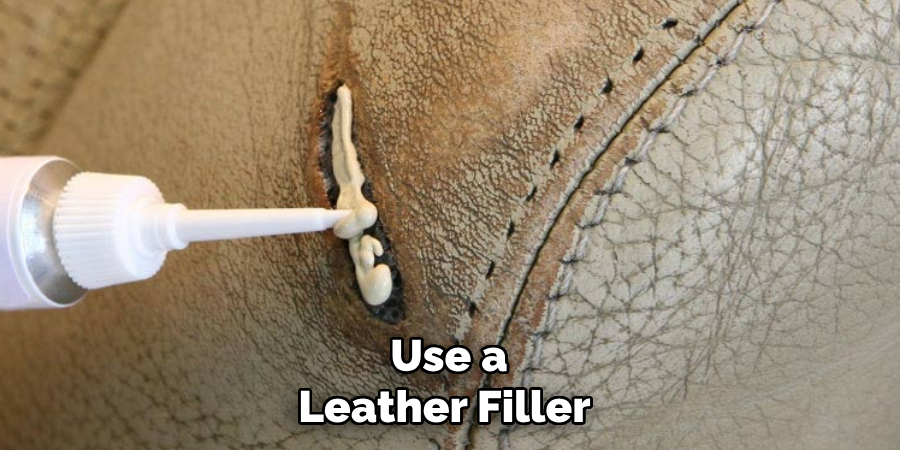
Step 7: Apply Filler Compound
Using a putty knife, apply a thin layer of filler compound to fill in any gaps or holes left by the peeling edges. Make sure to smooth it out evenly and let it dry completely. You can also use sandpaper to even out the surface if needed. It’s important to let the filler dry completely before proceeding. However, if the filler shrinks after drying, you may need to apply a second layer.
Step 8: Sand Down the Filler
After the filler has dried, use sandpaper to smooth out any rough spots and create a seamless surface. Start with a finer grit sandpaper (600-800 grit) and gradually work your way up to 1000-grit paper for a smooth finish. It’s important to be gentle during this step to avoid damaging the surface. But if you do end up sanding too much, you can always apply another layer of filler and repeat the process.
Step 9: Apply Leather Dye
Using a sponge or paintbrush, apply leather dye that matches the color of your sofa to the repaired area. Make sure to cover the entire surface evenly and let it dry completely. You may need to apply multiple layers for a more even color. It’s important to choose a dye that is specifically made for bonded leather to ensure a long-lasting finish. But if you can’t find a suitable dye, you can also use acrylic paint mixed with water as an alternative.
Step 10: Condition the Leather
Once the dye has dried, it’s important to apply a leather conditioner to keep the repaired area supple and prevent future peeling. You can use a store-bought conditioner or make your own by mixing equal parts vinegar and linseed oil. Apply it with a clean cloth in a circular motion and let it sit for about 10 minutes before wiping off any excess.
Step 11: Let It Cure
Finally, let your repaired bonded leather sofa cure for at least a day before using it. This will ensure that all the layers have dried completely and will help avoid any further damage.
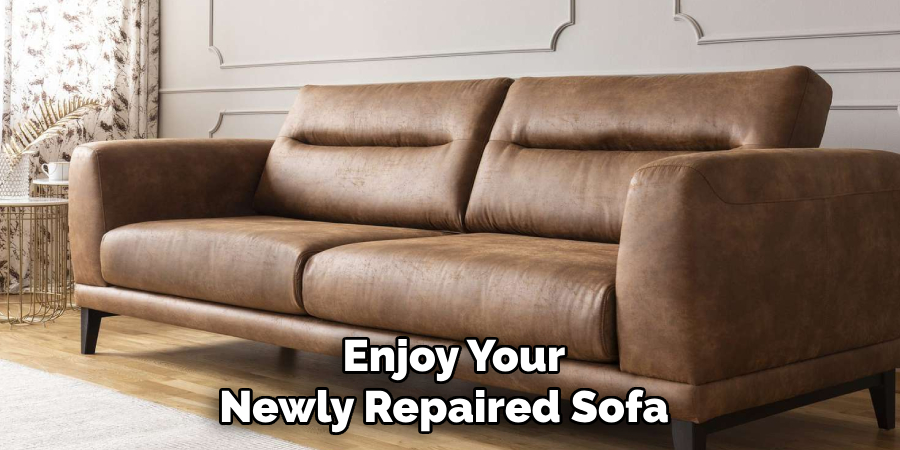
After that, you can enjoy your newly repaired sofa for years to come! Following these steps on how to repair bonded leather sofa peeling will not only save you money and time but also ensure that your sofa looks as good as new. Remember to clean and condition your furniture regularly to prevent any future peeling. With proper care, bonded leather sofas can last for a long time without an issue.
Frequently Asked Questions
Q: How Do I Know if My Sofa is Made of Bonded Leather?
A: Bonded leather sofas often have a smooth and shiny appearance, with visible seams and a different texture on the back. You can also check the label or ask the manufacturer for more information.
Q: Can I Use Glue to Repair Bonded Leather Sofa Peeling?
A: While there are many types of glue available, it’s best to use a leather repair adhesive specifically designed for bonded leather. This will ensure a strong and long-lasting bond without causing any discoloration or damage.
Q: How Long Will the Repair Last?
A: With proper care and maintenance, a professionally repaired bonded leather sofa can last for several years. However, it’s important to keep in mind that the durability of the repair also depends on the extent of damage and how well it was repaired. Regularly cleaning and conditioning your sofa can help prolong its lifespan.
Q: Can I Repair Deep Scratches on My Bonded Leather Sofa?
A: Yes, you can use a leather filler and dye to repair deep scratches on bonded leather. Follow the same steps mentioned above, but make sure to sand down the area before applying the filler for better adhesion. You may also need to apply multiple layers of filler for a smooth finish.
Conclusion
By following the steps outlined above, you can easily repair your bonded leather sofa peeling. You should see immediate improvements, and with good care and regular maintenance, you’ll be able to keep the couch looking great for years to come. If better results are desired, however, you can always hire a professional to do the repairs for you. Investing in quality products and tools is also paramount in achieving a successful outcome.
Repairing bonded leather furniture isn’t as hard as it may seem and with this guidance on how to repair bonded leather sofa peeling you’ll soon become an expert at it too! So go ahead, take charge of your furnishing repair needs, put those DIY skills to work and don’t let a damaged bonded leather sofa bring your confidence down ever again.