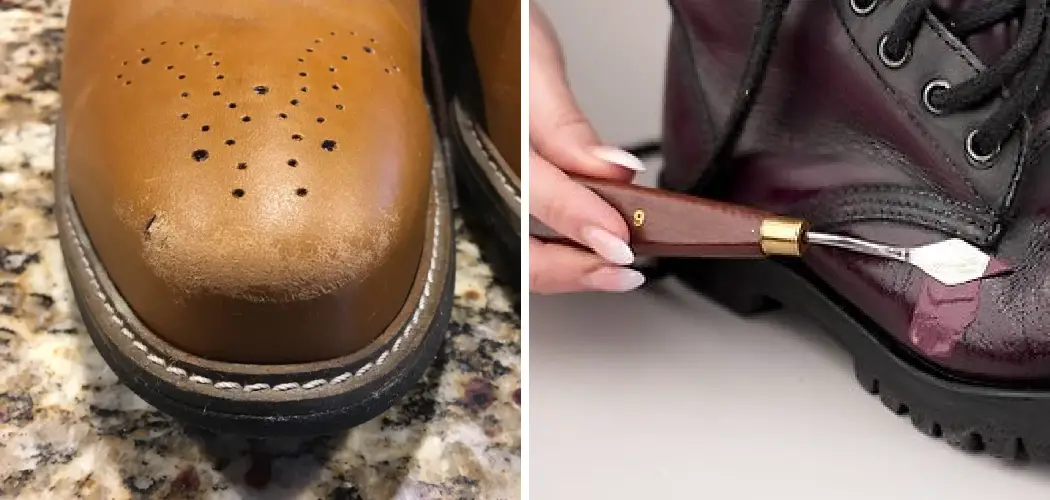
Have you ever looked down at your favorite pair of leather shoes only to see cracks, scuffs, and worn spots where the leather has become thin? It’s disappointing to see quality shoes show signs of wear after only a few years. But with a few simple supplies and some basic skills, you can breathe new life back into leather shoes that seem past the point of no return. With some sandpaper, leather conditioner or polish, and a little elbow grease, those shoes can look nearly new again instead of being thrown out.

In this post, I’ll give you an overview of common leather issues like scratches, cracking, and thinning and the step-by-step process of how to repair leather on shoes. By the end, you’ll have the confidence and know-how to keep your leather shoes looking stylish for many years to come through DIY repairs.
Supplies You Will Need to Repair Leather on Shoes
- Sandpaper (medium grit)
- Leather conditioner or polish
- Soft cloth
- Leather filler or glue (optional)
- Shoe shine brush (optional)
Step-by-step Guidelines on How to Repair Leather on Shoes
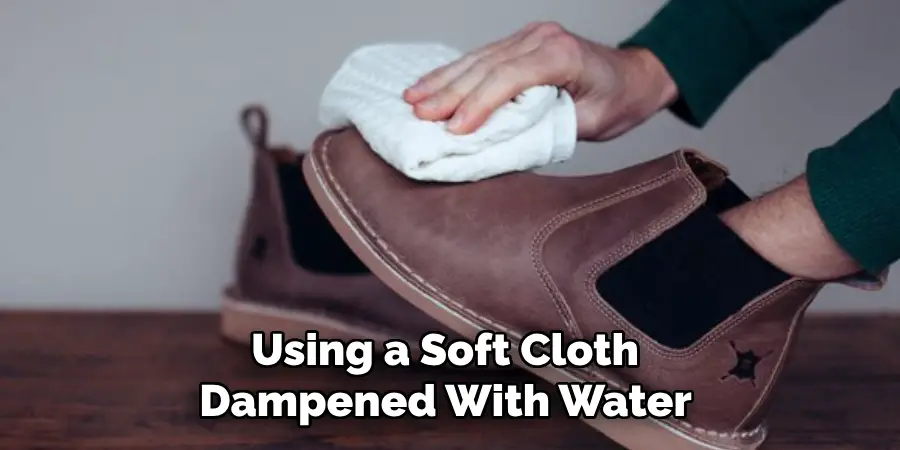
Step 1: Prepare the Leather Surface
Before you start repairing your leather shoes, it’s important to prepare the surface. This includes removing any dirt, dust, or debris from the surface of the leather. You can do this by using a soft cloth dampened with water or a gentle leather cleaner. Preparing the surface will ensure that the repair products adhere properly and give you a smooth, even finish.
Step 2: Sand Down Any Rough Spots
Using medium grit sandpaper, carefully sand down any rough spots or areas where the leather has become thin. This will help to smooth out the surface and create an even appearance. Be sure to only sand in one direction and avoid creating any additional scratches or damage. While sanding can be time-consuming, it’s a crucial step in achieving a professional-looking repair. This step is especially important for repairing cracks or scratches in the leather.
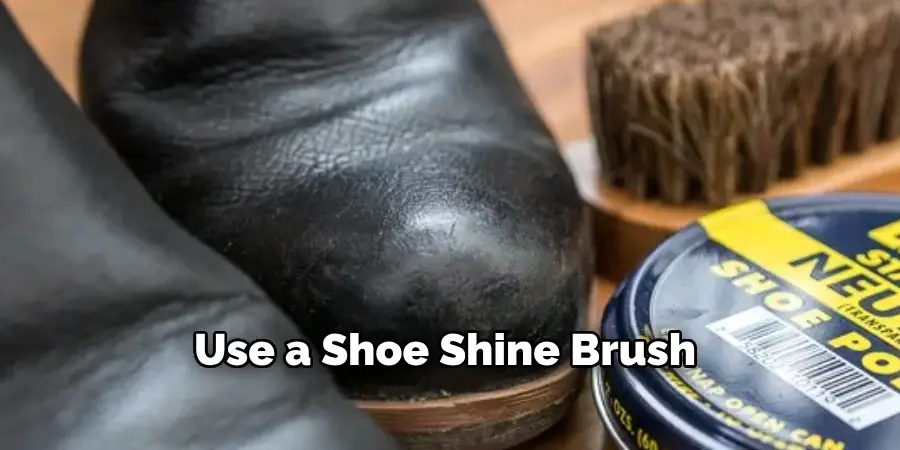
Step 3: Apply Leather Conditioner or Polish
After sanding, apply a small amount of leather conditioner or polish to the surface of the shoe. This will help to restore moisture and shine to the leather, as well as provide some protection against future wear and tear. Be sure to follow the instructions on the product and apply evenly, using a soft cloth. You can also use a shoe shine brush to buff the leather for an extra glossy finish.
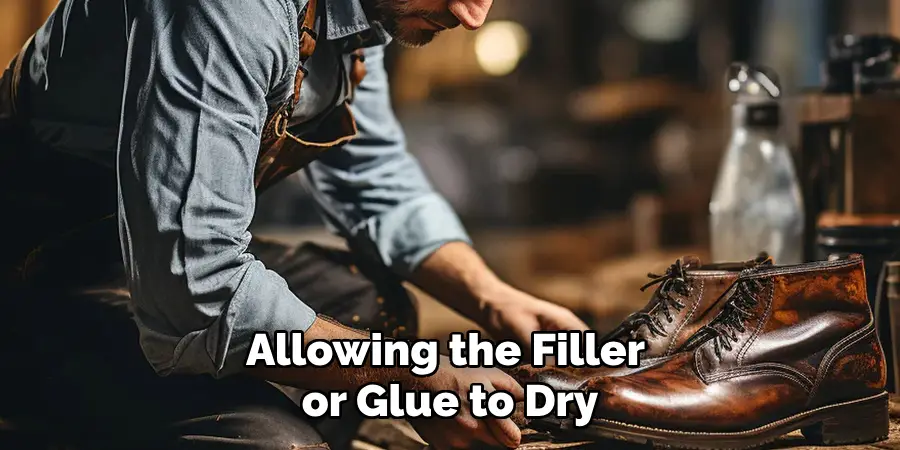
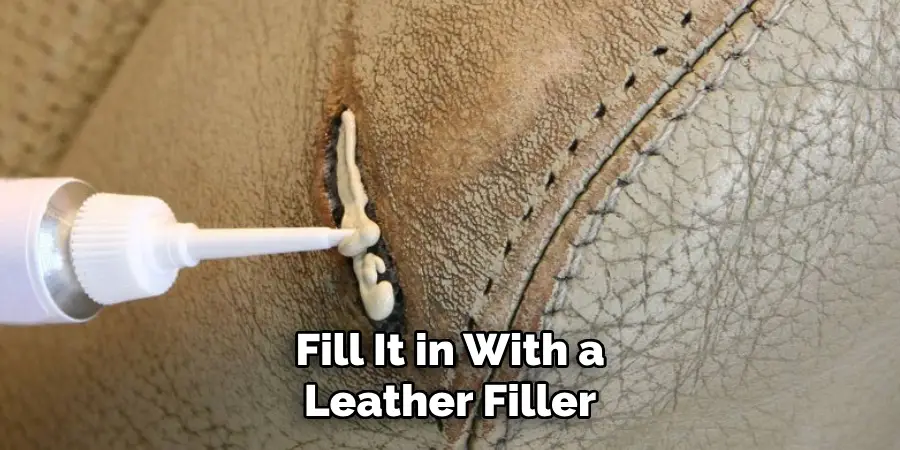
Step 4: Fill in Cracks or Tears (Optional)
If your leather shoes have any cracks or tears that are more than just surface-level scratches, you may need to use a filler or glue to repair them. These products can be found at most craft or hardware stores and are specifically designed for repairing leather. Follow the instructions carefully and apply the product to the affected area, smoothing it out with a damp cloth. Allow it to dry completely before moving on to the next step.
Step 5: Apply Another Coat of Conditioner or Polish
After allowing the filler or glue to dry, apply another coat of leather conditioner or polish to ensure a seamless finish. This will also help to blend in the repaired area with the rest of the shoe. Use a soft cloth and follow the instructions on the product for best results. This final step will give your leather shoes a polished and rejuvenated look.
Step 6: Let Shoes Dry Completely
Before wearing your repaired shoes, be sure to let them dry completely. This will allow all of the products to set and adhere properly, ensuring a long-lasting repair. It’s best to allow them to dry overnight before wearing them again. If you used a filler or glue, be sure to follow any additional drying time recommendations on the product. Make sure to also clean up any excess product from the surrounding areas before it dries.
Following these simple steps, you can easily repair the leather on your shoes and save them from being thrown out. Regularly maintaining and repairing your leather shoes will not only save you money in the long run but also help to keep them looking stylish and in good condition for years to come.
With a little effort, you can continue to enjoy your favorite pair of leather shoes without worrying about wear and tear. So, don’t be afraid to tackle those scuffs and cracks – with the right supplies and a little know-how, you can give your leather shoes a new lease on life. Happy repairing!
Additional Tips and Tricks to Repair Leather on Shoes
- If you notice a small tear or rip in your leather shoes, don’t wait until it gets bigger. Fixing the damage early on can prevent further deterioration and save your shoes from permanent damage.
- Before attempting to repair your leather shoes, make sure to clean them thoroughly. Use a soft cloth and warm water to gently remove any dirt, dust, or grime from the surface. This will make it easier to see the damage and work on the leather.
- If you’re dealing with a small scratch or scuff mark, you can use a leather conditioner or cream to cover it up. Simply apply a small amount of the product on a clean cloth and rub it into the damaged area until it blends in with the rest of the shoe.
- For larger tears or holes in your leather shoes, you will need to use a leather repair kit. These kits usually come with a patch of leather and adhesive that you can cut to size and stick onto the damaged area. Follow the instructions carefully and make sure to let the adhesive dry completely before wearing your shoes again.
- Another option for repairing small scratches or scuffs is to use a leather marker or pen. These are specially designed for repairing surface damage on leather and come in various colors to match your shoes. Simply color over the damaged area with the marker until it blends in.
- When dealing with colored leather, it’s important to test any products you’re using on a small, inconspicuous area first before applying them to the damaged area. This will ensure that the product doesn’t cause any discoloration or damage to your shoes.
- If you’re dealing with a deep scratch or gouge, you may need to fill it in with a leather filler before attempting to repair it. These fillers come in various colors and can be used to fill in deeper damage on leather shoes. Once the filler has dried, you can sand it down and apply a leather conditioner to blend it in with the rest of the shoe.
- To prevent future damage to your leather shoes, make sure to store them properly when not in use. Keep them in a cool, dry place and avoid exposing them to extreme temperatures or direct sunlight.
- Once you’ve repaired your leather shoes, make sure to regularly clean and condition them to keep them in good condition. This will not only maintain their appearance but also prolong their lifespan. A little maintenance can go a long way in preserving your leather shoes.
Following these tips and tricks can help you effectively repair the leather on your shoes and keep them looking great for years to come. Just remember to always take proper care of your leather shoes, and they will reward you with lasting durability and style. So, don’t wait until it’s too late – be proactive in protecting and maintaining your leather shoes! Happy repairing!
Things You Should Consider to Repair Leather on Shoes
1. The first thing to consider when repairing leather on shoes is the type of damage that needs repairing. Different types of damage require different repair methods and materials.
2. Before starting any repair work, it’s important to clean the area around the damaged spot thoroughly. Use a damp cloth or mild soap solution to gently clean the surface.
3. Make sure you have all the necessary tools and supplies before starting the repair process. This may include leather adhesive, patching material, sandpaper, and a leather repair kit.
3. If you’re dealing with a small tear or hole in the leather, using a leather patch is usually the best option. Make sure to select a patch that matches the color and texture of your shoes.
4. For more extensive damage such as deep scratches or scuffs, sanding down the area may be necessary before applying a leather repair compound. This will help smooth out the surface and ensure better adhesion.
5. Once you have prepared the damaged area, it’s time to apply the repair material according to the instructions on the product. Make sure to work carefully and evenly to avoid any lumps or bumps.
6. Allow the repair material to dry completely before sanding down any excess or uneven spots. You may need to repeat this step multiple times for a seamless finish.
7. To ensure the repaired area blends in with the rest of the shoe, use leather dye or paint to match the color and tone of your shoes. Apply in thin layers, allowing each layer to dry before adding another.
8. Finally, to protect the repaired area and prevent future damage, apply a leather conditioner or protector. This will help keep your shoes looking good as new for longer periods.

Following these considerations and taking your time to carefully repair the leather on shoes can help extend the lifespan of your favorite pairs. Remember to always use high-quality materials and follow instructions closely for best results.
With a little patience and effort, you can restore your shoes to their former glory and save money by avoiding costly replacements. So next time you notice damage on your leather shoes, don’t rush to replace them – try repairing them first! So next time you notice damage on your leather shoes, don’t rush to replace them – try repairing them first!
Precautions Need to Be Followed for Repairing Leather on Shoes
1. First and foremost, make sure you are working in a well-ventilated area. The fumes from the adhesive and dye can be harmful if inhaled directly.
2. Wear gloves to protect your hands from coming into direct contact with chemicals, especially if you have sensitive skin.
3. Use masking tape to cover areas of the shoe that do not require repairing. This will prevent any accidental damage and also help in creating clean lines.
4. Make sure the leather is free from dust, dirt, and oil before starting the repair process. Use a damp cloth to clean the surface well.
5. If you are using a leather repair kit, read the instructions carefully before use. Different kits may have different application methods.
6. Test the color of your leather repair product on a small, inconspicuous area first to ensure it matches the original color of your shoes.
7. Use a cotton swab or small brush to carefully apply the repair adhesive or dye in thin layers. This will prevent any excess product from ruining the final result.
8. For larger areas that need repairing, use a hairdryer to speed up the drying process between layers of adhesive or dye. This will also help to achieve a smoother finish.

By following these precautions, you can ensure a successful and safe leather repair process for your shoes. Now, let’s take a look at some additional tips for repairing specific types of damage on leather shoes.
Conclusion
In conclusion, learning how to repair leather on shoes can save you time, money, and the heartache of having to toss out your beloved pair. We have covered the main points of identifying and assessing damage, gathering necessary supplies, and walking you through step-by-step instructions on repairing different types of leather damage. You now have the tools and knowledge needed to revive any damaged leather shoe to its former glory.
So don’t be afraid to take on this task, with patience and determination, you can give your shoes a new lease on life. Remember to always take care of your leather shoes by regularly cleaning and conditioning them to prevent future damage. But if the day comes when they do need a repair, refer back to this guide for a quick and easy solution. Don’t let damaged leather get in the way of your perfect outfit or hinder your confidence. Now is the time to put those newly acquired skills into practice and show your shoes some love!