
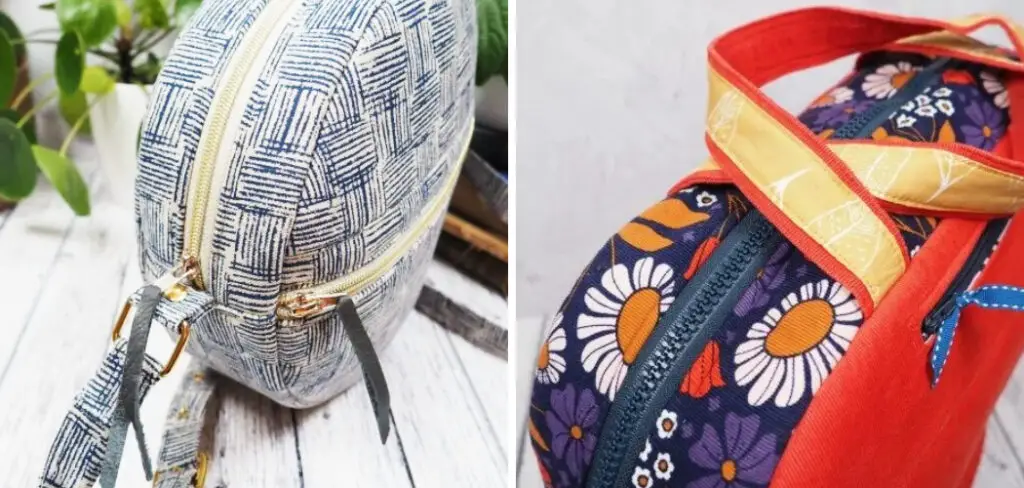
Do you have a passion for sewing and crafting? If so, learning how to sew a gusset in a bag is an essential skill anyone can master! Sewing a gusset adds structure, stability, and strength to any type of project – from purses and clutches to backpacks and totes.
With the proper guidance from this blog post, you’ll be able to sew your gussets with confidence easily. Not only will you learn the basics of stitching together fabric pieces correctly, but also how layering multiple layers of interfacing can strengthen your projects even more.
Let’s jump in and explore all there is to know about adding a beautiful gusset to any handmade creation.
What Will You Need?
Before we dive into the step-by-step instructions, here are some of the materials and tools you’ll need to gather beforehand:
- Fabric pieces for your bag (outer fabric, lining, and gusset)
- Interfacing (if desired for added stability)
- Pins or clips
- Sewing machine
- Thread
- Scissors
- Iron
Once you have all of these materials on hand, you’re ready to begin sewing a gusset in a bag.
10 Easy Steps on How to Sew a Gusset in a Bag
Step 1: Prepare Your Materials
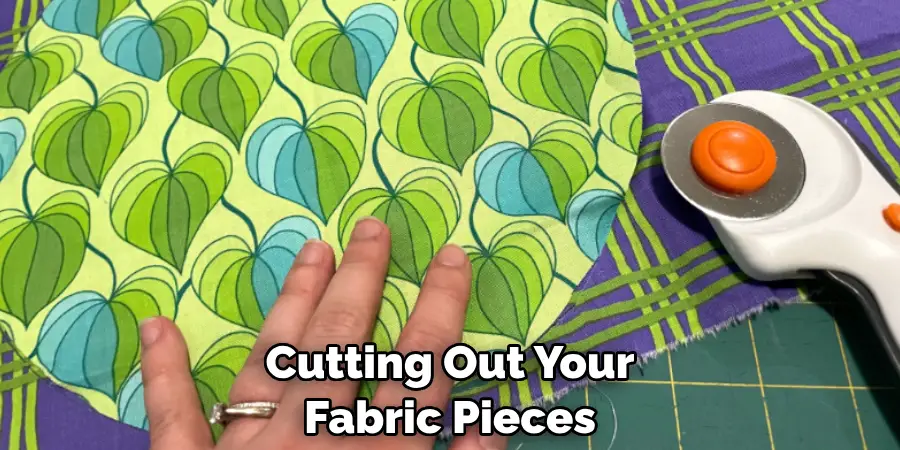
To start sewing a gusset in a bag, you’ll first need to prepare your materials. This includes cutting out your fabric pieces according to your desired bag size and shape. If using interfacing, cut it slightly smaller than your fabric pieces so it doesn’t show through when sewn together.
Step 2: Attach the Interfacing
If you’re using an interfacing for added stability, this is the time to attach it. Position the interfacing on the wrong side of your fabric pieces, ensuring it’s centered and not extending to the fabric’s edges. Using your iron, carefully adhere the interfacing to the fabric according to the manufacturer’s instructions. Remember, the interfacing should be attached to the gusset and the outer fabric of your bag.
Step 3: Pin the Gusset to the Bag
Next, it’s time to pin the gusset to your bag. Align the edge of the gusset with the edge of your bag’s outer fabric, right sides together. Use your pins or clips to hold the pieces together, ensuring that the gusset’s corners match the corners of your bag’s outer fabric. Proceed to pin around the bag. This step may require some patience to make sure the gusset is correctly aligned and pinned.
Step 4: Sew the Gusset to the Bag
With your sewing machine, sew the gusset to your bag’s outer fabric along the pinned path. Keep an even seam allowance as specified in your bag pattern, typically about 1/4 inch to 1/2 inch, and remove pins as you go. Be particularly careful when you reach the corners.
You may need to adjust the fabric and gusset to ensure they align correctly. Once you’ve sewn all the way around, you should end up where you started. Double check your stitches to ensure the gusset is securely attached.
Step 5: Trim Excess Fabric and Corners
After ensuring the gusset is securely attached, the next step is to trim any excess fabric and corners. This reduces bulk and allows the bag to have a cleaner finish. Using your scissors, carefully cut away excess fabric, leaving about a 1/4-inch seam allowance. Be sure to clip the corners, taking care not to cut through your stitches, to allow for sharper corners once the bag is turned right side out.
Step 6: Turn the Bag Right Side Out
Once you’ve trimmed the excess fabric and corners, it’s time to turn your bag right side out. Carefully push out the corners using a blunt tool to ensure they are fully extended. Then, use your iron to press the seams flat for a crisp and professional-looking finish. After this step, the gusset should be visibly and securely attached to your bag, adding dimension and structure.
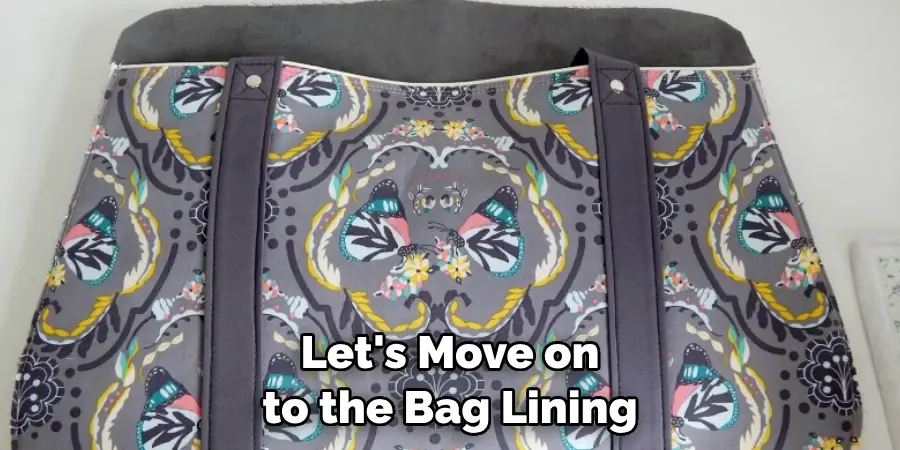
Step 7: Prepare and Attach the Lining
Now, let’s move on to the bag lining. Start by pinning the gusset to the bag’s lining fabric, similar to what we did with the outer fabric. Make sure the right sides are together, align the edges, and pin all the way around. Then, stitch the gusset to the lining, again maintaining an even seam allowance. Once done, trim any excess fabric, leaving a 1/4-inch seam allowance.
Step 8: Join the Outer Bag and Lining
Next, it’s time to join the outer bag and the lining. Turn the outer bag right side out and the lining wrong side out. Then, slip the outer bag inside the lining so the right sides are together. Align the seams of the gusset and pin the top edges of the bag and the lining together. Proceed to stitch around the top edge of the bag, leaving a gap for turning the bag right side out.
Step 9: Turn the Bag Right Side Out
After stitching, carefully turn the bag right through the gap you left in your stitches. Once the bag is fully turned out, push the lining inside the bag. Ensure the corners and edges are fully extended, and press the seams for a professional finish.
Step 10: Finish the Bag
Lastly, close the gap in the top seam that you used for turning the bag right side out. You can do this by hand stitching for an invisible finish or topstitching for a more pronounced seam. Once you’ve stitched the gap closed, give your bag a final press to ensure all seams are crisp. Congratulations, you’ve successfully sewn a gusset in a bag!
By following these easy steps, you can now confidently add a gusset to any bag project. Experiment with different fabric choices and patterns to create unique bags that showcase your newly acquired sewing skills.
5 Additional Tips and Tricks
- Preparation is Key: Before sewing your gusset, ensure you have accurately measured and cut your fabric. This will provide a neat and professional finish.
- Choose the Right Thread: Opt for a robust and durable thread that matches the color of your bag. This will not only ensure that your gusset is secure but will also maintain the aesthetic appeal of your bag.
- Use Pins or Clips: To keep the gusset in place while sewing, use pins or sewing clips. This will prevent the fabric from shifting and help you achieve a neat seam.
- Take Your Time: Sewing a gusset can be tricky, especially if you’re new to it. Don’t rush the process. Take your time to ensure that you’re sewing straight and even lines.
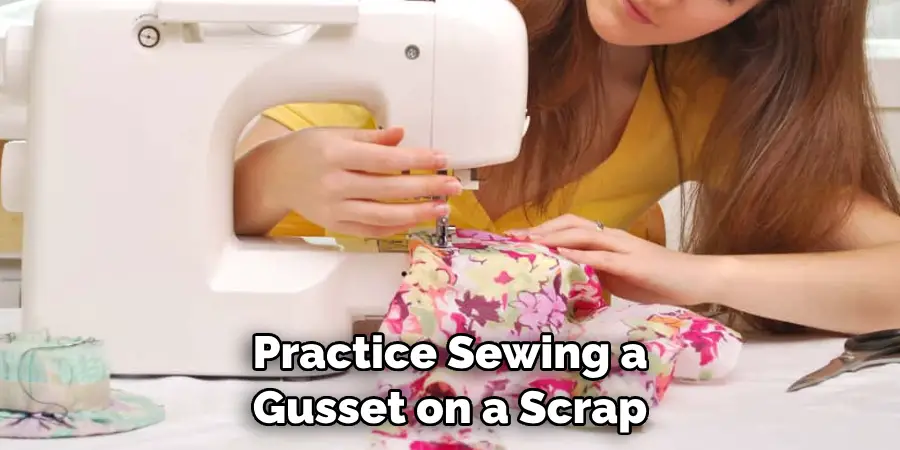
- Practice Makes Perfect: As with any new sewing technique, practice is crucial. If unsure, practice sewing a gusset on a scrap piece of fabric first. This will allow you to get the hang of it before you start on your actual bag.
With these additional tips and tricks, you can sew a gusset in a bag like a pro. Remember always to measure accurately, choose the right thread, use pins or clips, take your time, and practice for the best results.
6 Things You Should Avoid
- Avoid Using Cheap Thread: Low-quality thread tends to break easily, which can lead to your gusset coming undone. Invest in a good quality thread for the best results.
- Be Sure to Complete the Prep Work: Avoid rushing into sewing without proper preparation. Taking the time to measure and cut accurately will prevent future mistakes.
- Pay Attention to the Directions of the Fabric: Some fabrics have a grain line, and if ignored, the final product may look uneven. Always check the fabric’s grain line before sewing.
- Avoid Sewing Without Pinning: It’s tempting to skip pinning, especially when you’re confident in your sewing skills. However, pinning the gusset in place helps to avoid puckering or misalignment.
- Pay Attention to the Importance of Practice: You may want to jump right into sewing your bag, but practicing on scrap fabric first will help you familiarize yourself with the technique and avoid errors on your final product.
- Avoid Pulling on the Fabric as You Sew: It’s essential to let the machine do the work and avoid pulling or pushing the fabric through. This can result in uneven stitches and potentially damage your machine.
By avoiding these common mistakes, you’ll have a smoother sewing experience and achieve a professional-looking gusset in your bag.

Conclusion
In conclusion, stitching a gusset in a bag is simple if you follow the necessary steps. As with any sewing project, begin by collecting the materials and tools that are needed and ensure that your fabric is pressed and ready to go.
Draw the pattern on the wrong side of your fabric pieces and cut two parallel horizontal lines in each piece to mark where you need to insert the cloves. Place and pin the cloths together before inserting them together using a zigzag stitch along both sides. Trim off the excess material, press it out flat, and flip out for a finished look.
Now that you know how to sew a gusset in a bag, why not take your new skills one step further? Try adding some extra details like pockets or appliques—the possibilities are endless! Whatever you choose to do, have fun with it!