
Are you looking for a way to add some extra speed and style to your winter boot collection? Speed hooks are a great solution; they can help your boots stand out from the crowd while also making them more comfortable and secure.
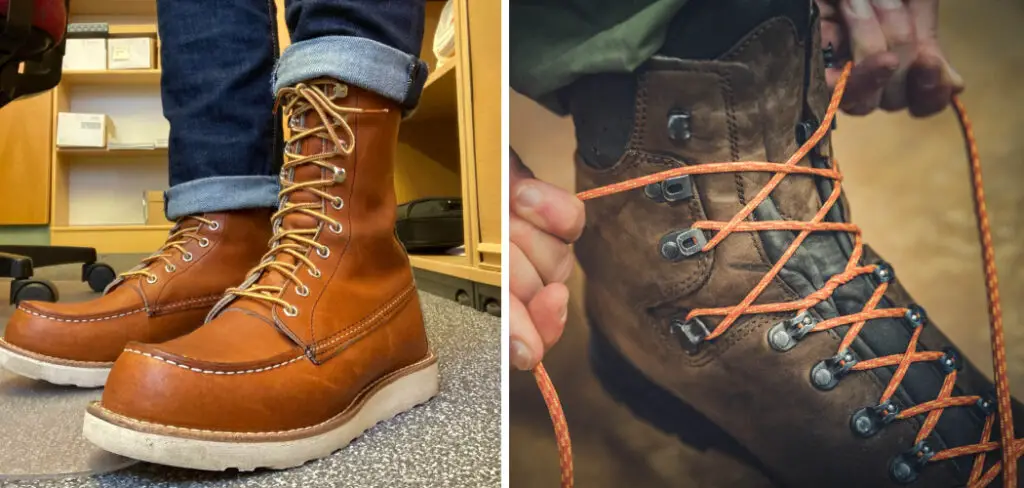
In this blog post on how to add speed hooks to boots, we’ll show you how you can easily install speed hooks on any type of footwear with just a few simple tools and materials. You’ll be pleased with the end results – not only will it look great but it’ll give your favorite winter kicks an extra measure of durability that’s sure to keep them around for years to come!
Needed Materials
Given below are the required materials you’ll need to add speed hooks to your boots:
- Speed Hooks (Available at Most Shoe Repair Shops or Online)
- A Hammer
- A Screwdriver
- Leather Punch Tool (Optional)
- Pencil or Marker
- Measuring Tape
- Gloves (Recommended)
11 Step-by-step Guidelines on How to Add Speed Hooks to Boots
Step 1: Preparation
Before beginning the process of adding speed hooks, it is important to gather all the necessary materials in one place and have them ready for use. This will ensure a smooth installation process. It is also recommended to use a workbench or table in a well-lit area for better visibility and stability.
But don’t worry, this process can also be done on the floor if needed. You may also want to wear gloves during this process to protect your hands from any sharp edges.
Step 2: Identify the Placement of Speed Hooks
Start by identifying where you would like to place the speed hooks on your boots. Generally, they are placed along the laces in a symmetrical pattern but feel free to get creative and experiment with different placements. Using a pencil or marker, make small markings on the boot where you would like to install the speed hooks. It is best to measure and mark the same distance on both sides for consistency.
Step 3: Prepare the Speed Hooks
If you have purchased standard speed hooks, they will come with screws attached. However, if not, you’ll need to insert a screw into each of the holes at the back of the hook. Make sure to tighten them well so that it doesn’t slip during installation.
But be careful not to over-tighten as it may cause the speed hook to break. You may also use a drop of glue on the screws for added security. It is important to have everything ready beforehand as the installation process must be done quickly before the glue dries.
Step 4: Make Holes for Speed Hooks
Using a leather punch tool or screwdriver, make small holes in the markings you made earlier. This will help guide the screw into the boot. If you are using an electric drill, make sure to use a very small drill bit to avoid making the holes too big. This step is crucial as it will prevent the leather from tearing. This process is much easier if you have a leather punch tool, but it can also be done using a screwdriver.
Step 5: Install the Speed Hooks
With the holes made, take your speed hooks and line them up with the holes. Make sure that the screws are facing outwards before placing them into the holes. Once they are aligned, use your hammer to gently tap the speed hooks into place. Make sure they are flush with the leather but be careful not to hit them too hard as it may damage the screws. Otherwise, you may need to realign them.
Step 6: Continue Installing Speed Hooks
Repeat the same process of making holes and installing speed hooks along the laces until you have reached your desired number. Remember to keep everything symmetrical by using the first set of markings as a guide.
It is recommended to use an odd number of speed hooks for better stability and balance. But again, feel free to experiment with different placements. It’s all about personal preference.
Step 6: Tightening the Screws
Using a screwdriver, tighten each screw until it feels secure. Be cautious of over-tightening, as this can cause the hook to break or strip the screw. If you feel that the speed hooks are not tightly secured, use a drop of glue to reinforce them. You may also use a small piece of leather or fabric between the hook and screw to prevent them from loosening. This step is important as it ensures that the speed hooks will not come off easily.
Step 7: Adding Laces
Now that your speed hooks are installed securely on your boots, it’s time to add laces. Start by lacing them through the bottom eyelets and work your way up. Don’t forget to lace both sides evenly for a clean and balanced look. With speed hooks, you can easily adjust the tightness of your laces without having to retie them every time. Simply pull the laces through the hooks for a quick and easy fix.
Step 8: Test Them Out
Once you have finished installing speed hooks and lacing your boots, it’s time to test them out. Put them on and take a walk or run around to see how they feel. You should notice that your boots are more secure, comfortable, and easy to tighten or loosen the laces. If you feel that they are too tight, simply adjust the laces through the speed hooks for a better fit. Congratulations, you have successfully added speed hooks to your boots!
Step 9: Maintain Your Speed Hooks
To keep your speed hooks in good condition, it is recommended to clean and oil them regularly. Use a damp cloth or brush to remove any dirt or debris that may have accumulated on the hooks. Then, use a small amount of leather oil or conditioner to keep them moisturized and prevent them from drying out. This will ensure that your speed hooks remain in good condition for years to come.
Step 10: Experiment with Different Lacing Techniques
Now that you have successfully added speed hooks to your boots, why not experiment with different lacing techniques? You can try the traditional criss-cross pattern or even a diagonal lace-up for a unique and stylish look. With speed hooks, you have the freedom to mix and match lacing techniques for a personalized touch.
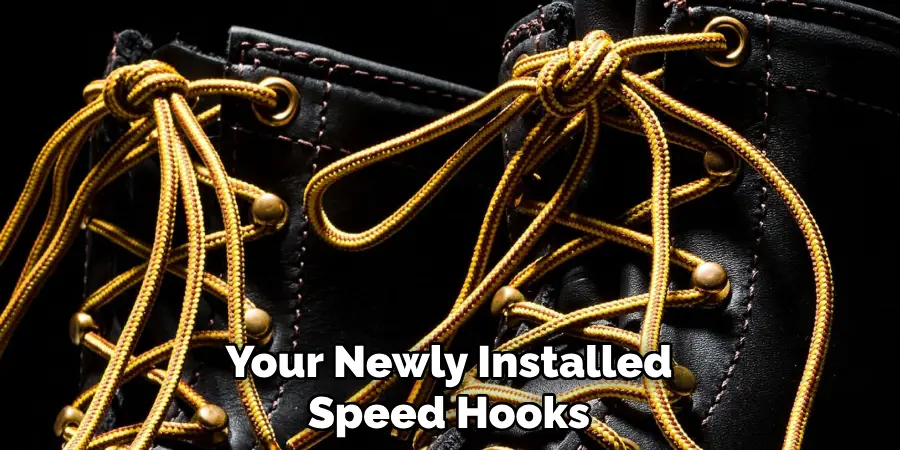
Step 11: Share Your Experience
Finally, don’t forget to share your experience of adding speed hooks to your boots with others. You can show off your newly installed speed hooks or even teach others how to do it themselves. Who knows, you might even inspire someone to try it out and enhance their own boots. Sharing knowledge and experiences is what makes the world a better place, so spread the word about this useful skill. Happy lacing!
Follow these steps on how to add speed hooks to boots and you’ll soon have a pair of boots with speed hooks that are not only stylish but also practical. Whether it’s for hiking, running, or everyday wear, adding speed hooks to your boots will make your life easier and more comfortable.
And remember, don’t be afraid to experiment and find the perfect placement and lacing technique that works for you.
Frequently Asked Questions
Q: How Many Speed Hooks Should I Add to My Boots?
A: It is recommended to use an odd number of speed hooks for better stability and balance, but you can always adjust according to your personal preference. It’s best to start with the basic number of six and add more if needed. It’s all about finding what works best for you.
Q: Do I Need Special Tools to Add Speed Hooks?
A: While it is helpful to have a leather punch tool, it is not necessary. You can use a screwdriver or even an electric drill with a small drill bit to make the holes for the speed hooks. The most important thing is to take your time and be careful not to damage the leather.
Q: Can I Use Speed Hooks on Any Type of Boots?
A: Yes, speed hooks can be added to any type of boots as long as they have enough space for them. Just make sure to measure and mark the placement before installing them. You can also use speed hooks on other types of footwear such as sneakers or dress shoes for added convenience and style. So, go ahead and give it a try!
Conclusion
With practice, you will soon be able to easily and consistently add speed hooks to your own boots. Do not give up and keep pushing yourself to customize your own boots to perfection. You can even experiment with different materials and colors for a truly unique look!
If you ever become stuck or find yourself running into an obstacle, look back at these simple steps on how to add speed hooks to boots – they are sure to help guide you in the right direction.
Adding speed hooks is a great way to take ownership of your style and express your creativity. So don’t wait any longer, put these steps into practice today and let the compliments start rolling in!