Burnishing leather with water is a process used to enhance the appearance and durability of the leather. The burnishing creates a hard, shiny surface that makes the leather less susceptible to scratches and scuffs. It also gives the leather a more polished look. This tutorial will show you how to burnish leather edges with water using a few simple steps. Keep reading to learn more.

What Causes Leather to Crack?
There are many reasons why leather can crack. Leather is a natural material that dries out over time. It can also be damaged by sunlight, heat, water, and chemicals. Cracks can also occur if the leather is not properly cared for or if it is exposed to extreme temperatures. Another common cause of cracking is dry rot, which is caused by a lack of moisture in the leather.
Additionally, leather can be damaged by insects, pets, and other animals. The other major cause of cracking is physical stress. This can be caused by folding, bending, or stretching the leather. Lastly, some leather products are more prone to cracking than others.
Why Is It Important to Burnish Leather Edges?
Burnishing leather edges is important because it helps to protect the leather from damage. The process of burnishing creates a hard, shiny surface that is less susceptible to scratches and scuffs. This can help extend your leather products’ life and keep them looking new for longer.
Burnishing also gives the leather a more polished look. Additionally, it can help seal moisture and protect the leather from drying out. Another benefit of burnishing is that it can help repair minor leather damage.
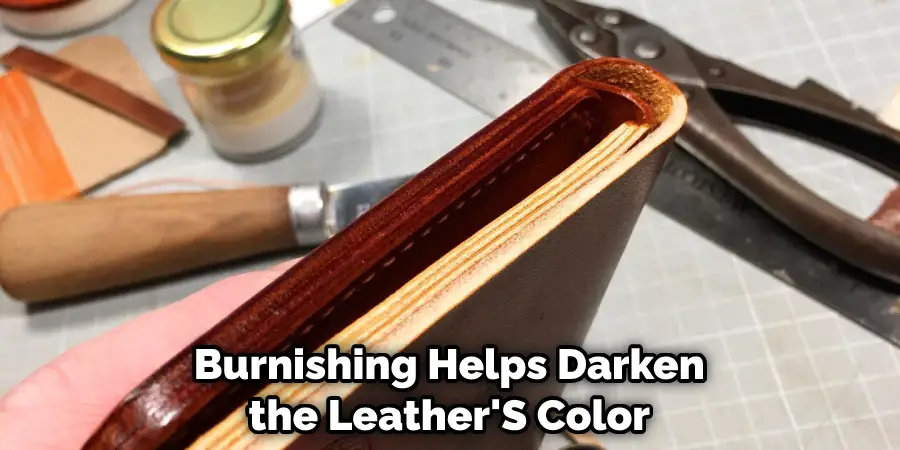
For example, if your leather has small cracks or scratches, the burnishing process can help to fill in and smooth these imperfections. Finally, burnishing can also help to darken the leather’s color. This can be beneficial if you want a specific look for your leather product.
Step by Step How to Burnish Leather Edges With Water
1. Gather Materials
The first step is to gather the materials you will need for the project. You will need a piece of leather, water, a sponge, and a burnishing tool. Gather these materials and have them within reach before you begin. If you do not have a burnishing tool, you can use a small piece of wood or a metal object.
2. Wet the Leather
The next step is to wet the leather. This is because water helps lubricate the leather’s surface and makes it easier to burnish. Use a sponge or cloth to wet the entire surface of the piece of leather. First, soak the sponge in water and then wring it out so that it is not dripping wet.
Then, use the sponge to wet the leather evenly. You can also use a spray bottle to wet the leather. Try to avoid saturating the leather so that it does not take too long to dry.
3. Apply Soap
After you have wet the leather, it is time to apply soap. The soap helps lubricate the leather’s surface further and makes it easier to burnish. You can use any type of liquid soap for this step. Apply the soap to the leather using a sponge or cloth. Rub the soap into the leather in a circular motion until the entire surface is covered. If you are using a sponge, make sure to wring it out so that it is not dripping wet.

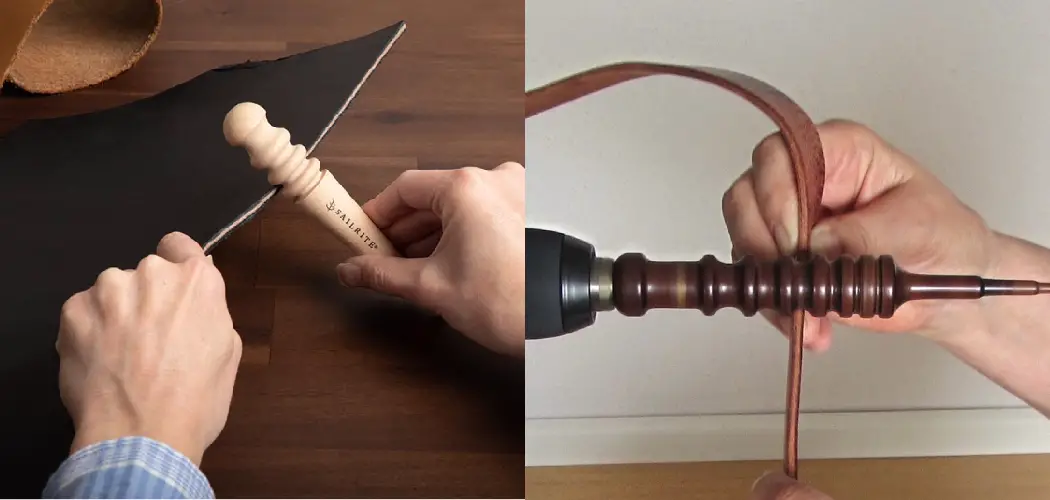
4. Start Burnishing
Once the leather is wet and soapy, you can start burnishing. First, choose the area of the leather that you want to burnish. Then, press the burnishing tool onto the leather and rub it in a circular motion. Apply firm pressure as you rub to ensure that the burnishing tool makes contact with the leather. Continue burnishing until the entire area is covered.
If you are using a piece of wood or a metal object, make sure to use a soft cloth to avoid scratching the leather. Try to burnish the leather in one smooth motion to avoid creating any lines or streaks. Avoid using too much pressure as this can damage the leather.
5. Wet the Burnishing Tool
As you burnish, the leather will start to dry out. This is normal and expected. To keep the leather lubricated, you must wet the burnishing tool periodically. First, dip the burnishing tool in water and then wring it out so that it is not dripping wet. Then, continue burnishing the leather. Repeat this step as necessary to keep the leather lubricated. If the leather starts to feel dry, you can also rewet the entire surface.
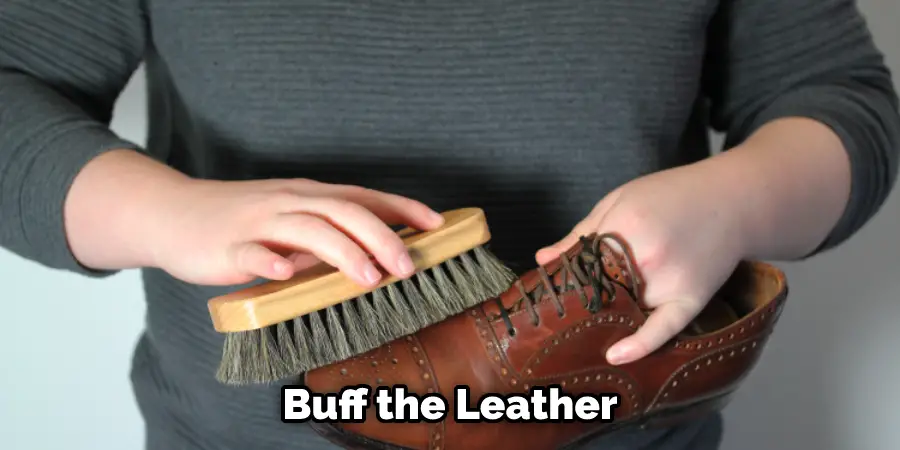
6. Buff the Leather
After you have finished burnishing the leather, it is time to buff it. This step helps to remove any soap residue and gives the leather a shine. To buff the leather, use a soft cloth or brush. First, wet the cloth or brush and then wring it out so that it is not dripping wet.
Then, rub the cloth or brush over the entire surface of the leather in a circular motion. Continue buffing until the entire surface is covered. You can rewet the cloth or brush if the leather starts to feel dry. If you are using a brush, make sure to use a soft-bristled brush to avoid damaging the leather.
7. Dry the Leather
After you have buffed the leather, it is time to dry it. Use a clean, soft cloth to wipe away any excess moisture. Then, allow the leather to air dry completely. Do not use a hairdryer or other type of heat source to dry the leather, as this can damage it. Once the leather is dry, you can apply a leather conditioner to help protect it.
8. Apply Leather Conditioner (Optional)
Leather conditioner is not required, but it can help to protect the leather. If you choose to apply leather conditioner, use a clean, soft cloth. First, apply the leather conditioner to the cloth and then rub it into the leather in a circular motion. Make sure to cover the entire surface of the leather.
Allow the conditioner to soak into the leather for a few minutes, and then buff it off with a clean, soft cloth. You can apply the leather conditioner as often as you like to help keep the leather in good condition.
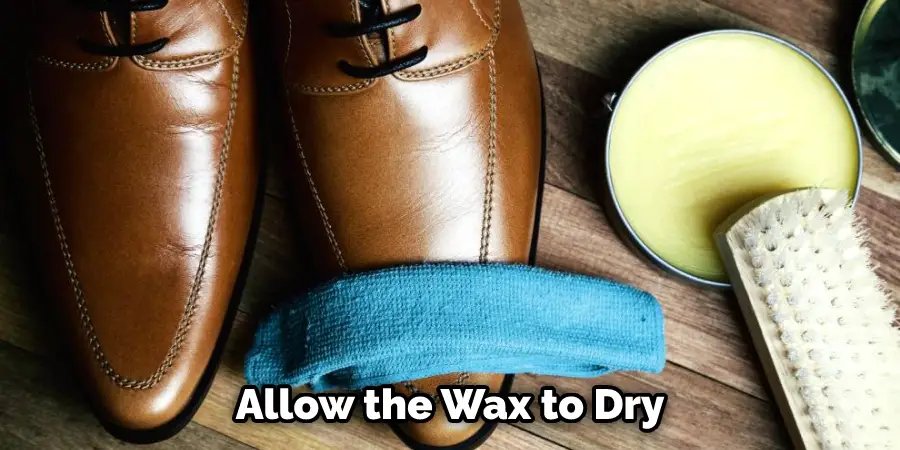
9. Apply Wax (Optional)
Wax is not required, but it can help to protect the leather. If you choose to apply wax, use a clean, soft cloth. First, rub the cloth over the entire surface of the leather. Then, buff the wax into the leather using a circular motion.
Allow the wax to dry completely before using the leather. If the leather feels sticky, you can buff it with a clean, dry cloth to remove the excess wax. Avoid using too much wax, which can make cleaning the leather difficult.
10. Enjoy Your Finished Product!
After you burn the leather, you can enjoy your finished product! Whether you are using leather to make a new purse, wallet, or piece of clothing, you can be proud of your work. With a little practice, you can burnish leather like a pro!
Tips and Warnings on How to Burnish Leather Edges With Water
Tips:
- Wet the leather with water before burnishing.
- Use a damp sponge to wet the leather if you’re working with closed edges.
- You can also use saliva on the leather, but make sure it’s your own!
- Start with a clean, dry cloth.
- Use a circular motion when burnishing.
- Be sure to apply pressure evenly.
- Keep the leather tight while you’re burnishing.
- Use a light touch at first, and then increase the pressure as needed.
- Don’t forget to clean your tools after each use!
Warnings:
- Don’t use too much water on the leather, making it difficult to burnish.
- Avoid using any chemicals on the leather.
- Don’t over-burnish the leather, or it will become brittle and break.
- If the leather starts to smoke, stop immediately!
- Always test a small area first to ensure the results are what you want.
How Much Does It Cost to Burnish Leather?
The cost of burnishing leather will depend on the type of leather you are using, the tools you need, and the time it takes to complete the project. Generally, you can expect to spend around $50 on materials and tools. The cost will be added if you need to purchase a new leather item.
Frequently Asked Questions
Should You Burnish Leather Edges Before or After Dying?
Patent leather is a type of leather that has a coating of wax or a similar material. This makes the surface difficult to sand, so it may require special care when refinishing the leather. In most cases, you can sand down patent leather with a standard sandpaper, but it may require more effort and time.
What Are the Steps to Burnish?
Burnishing is a technique used to add a finishing touch to a piece of furniture or other object. It involves quickly and lightly rubbing the surface of the object with a cloth, sandpaper, or other material to create a smooth and lustrous finish. Burnishing can be used to improve the appearance of wood furniture, stone surfaces, metal hardware, and other objects.
There are several steps involved in burnishing:
1. Preparing the Surface: The first step is to prepar the surface you are going to burnish by cleaning it with a cloth or dry sandpaper. This will remove any dust, dirt, or grease that may be attached to the surface.
2. Applying the Burnishing Material: The next step is to apply the burnishing material to the surface you have prepared. This material should be light enough so that it does not scratch or damage the object, but strong enough to create a smooth finish.
3. Stroking the Material: After applying the burnishing material, you should start stroking it gently with your hand or a brush. This will create a shine and lustre on the surface of the object.
4. Finishing Touches: Once you have finished stroking the material, you should clean off your hands and any excess material from the object using a cloth or dry sandpaper.
Can You Burnish With Water?
Yes, you can burnish with water. Just be sure to use a milder solution (such as distilled water) and to apply it slowly and carefully to avoid damage to the surface. Burning with water is a technique used to create a high-gloss finish on wood, metal, and other surfaces. It works by creating a hot, dry surface that is then quickly polished with a wet cloth or brush. The heat and friction created by the burning process seals the pores in the surface of the material, allowing the paint or lacquer to flow more easily and create a smooth, glossy finish.
How Many Layers Before Burnishing?
The number of layers of paint that need to be applied will vary depending on the type of paint being used, the condition of the surface being painted, and the painter’s experience and skill level. Some painters may apply as few as two or three layers of paint, while others may require up to six or seven. Ultimately, the number of layers will depend on a variety of factors, including the technique and application method being used, the quality and consistency of the paint, and the overall finish desired.
Conclusion
So there you have it! Now you know how to burnish leather edges with water. Follow these steps and tips to help you get the best results. With a little practice, you’ll be able to burnish leather like a pro. We hope you found this article helpful. If you have any questions, please feel free to contact us. We would be happy to help!