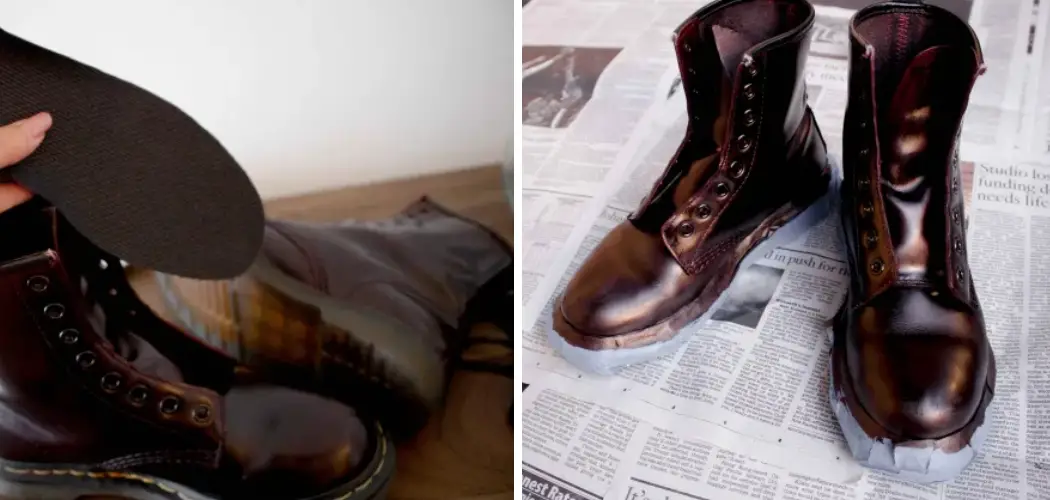
Are you tired of the brown leather items in your wardrobe and want to give them a new look? Dyeing them black is an easy and affordable way to transform their appearance. In this guide, we will discuss how to dye brown leather black.

It’s one of the most dramatic color makeovers you can do with leather and a popular way to inject dark drama into any room. Whether you want to borrow from gothic styling or simply bring something new to life, dyeing your light-colored leather accessories in a deep blue-black shade can get stunning results.
In this blog post, we’ll look at dyeing brown leather black successfully, including picking the right type of product for the best results and essential advice on prepping and caring for it afterward. So if you’re ready for your interior design project – let’s begin!
What Will You Need?
Before we jump into the steps, here are the supplies you will need to dye brown leather black:
- Leather Dye: You can choose a liquid or cream dye in your desired shade of black. Make sure the product is specifically designed for leather and not fabric.
- Leather Prepping Agent: This helps in removing any dirt or finish on the leather surface, allowing for better dye absorption. You can find prepping agents at most craft or leather supply stores.
- Sponge or Brush: These will apply the dye onto the leather.
- Gloves: To protect your hands during the process.
- Protective Clothing: Wear old clothes or an apron to avoid staining your clothes with dye.
- Plastic Wrap: This is optional but can help keep the dye in place while it sets.
- Leather Finish: After dyeing, you must seal and protect the leather with a finish. You can choose between matte or gloss finishes, depending on your preference.
Now that you have all the necessary supplies, let’s dive into how to do dye brown leather black.
10 Easy Steps on How to Dye Brown Leather Black
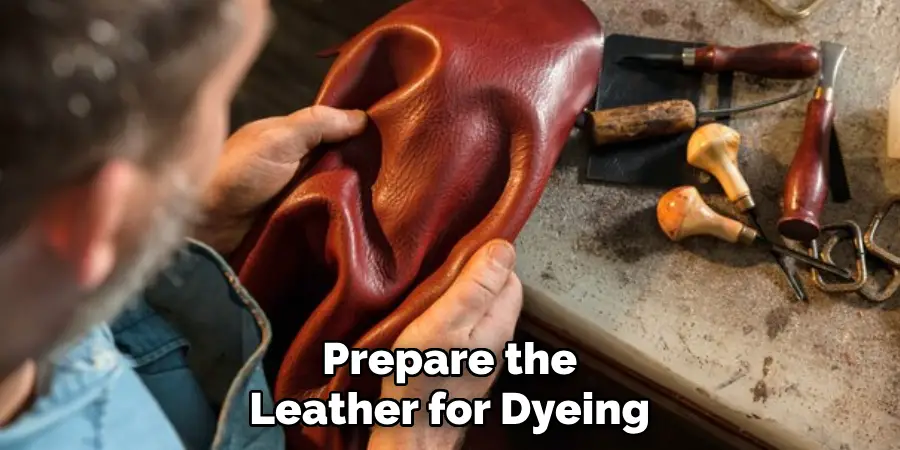
Step 1: Prepping the Leather
The first step is to prepare the leather for dyeing. This involves cleaning and prepping the surface to absorb the dye evenly. Begin by wiping down the leather with a damp cloth to remove any dust or dirt. Then, use a prepping agent according to its instructions. This will help remove any existing finishes or coatings that may prevent the dye from being absorbed.
Step 2: Protecting the Surrounding Area
The dye can easily stain surfaces, so protecting your working area is important. Lay down plastic sheets or old towels to cover your workspace. Also, wear protective clothing such as an apron or old clothes.
Step 3: Mixing the Dye
If you are using a liquid dye, follow the instructions on the bottle to mix it with water. If you are using a cream dye, mix it with rubbing alcohol according to its instructions. Make sure to use gloves and mix the dye in a well-ventilated area.
Step 4: Applying the Dye
Start by applying a thin, even layer of dye over the surface of the leather using a sponge or brush. The goal is to cover the brown color completely, but avoid using too much dye, as it can cause streaks or uneven coloring. Apply the dye in a circular motion to ensure even coverage.
Remember to wear gloves to avoid staining your hands. Once you’ve applied the first layer, allow it to dry completely before proceeding. Depending on the type of dye and the conditions in your workspace, this could take anywhere from a couple of hours to overnight.
Step 5: Adding Additional Layers
If the first layer of dye does not completely cover the brown color or if you want a darker shade of black, you can apply additional dye layers. As in step 4, ensure each layer dries completely before applying the next one. This process can be repeated until you are satisfied with the color. Remember, patience is key in this process, as rushing could result in uneven coloring or a less desirable finish.
Step 6: Checking Your Work
After the final dye layer has dried, sift through the leather under good lighting. Check for any streaks, patches, or areas where the original brown color is still visible. If necessary, apply additional layers of dye to these areas and allow them to dry completely. Remember to apply the dye in thin layers to prevent creating patches of darker black.

Step 7: Sealing the Dye
Once you’re happy with the color and the dye is completely dry, it’s time to seal it. Apply a leather finish using a clean sponge or brush. This protects the new color and adds a nice shine to the leather.
Follow the instructions on the bottle for the best results. Allow the finish to dry completely before using or wearing the dyed leather. This could take a few hours or may require overnight drying.
Step 8: Cleaning Up
After the finishing sealant has dried, your leather item is ready! Clean your workspace and wash all the tools used. Ensure to properly dispose of any leftover dye and sealant, following the guidelines on their packaging.
Step 9: Maintaining Your Newly Dyed Leather
Regular maintenance is needed to keep your newly dyed black leather looking its best. Use a leather conditioner every few months to keep the leather supple and prevent cracking. Avoid exposing the leather to harsh sunlight to prevent fading.
Step 10: Enjoy Your Transformed Leather
Now, it’s time to show off your rejuvenated leather item. Whether it’s a jacket, a bag or a piece of furniture, it will surely add a fresh and bold statement to your style or interior design. Enjoy your new black leather item and feel proud every time you use it, knowing you have successfully dyed it from brown to black.
By following this comprehensive guide, you can now confidently transform your brown leather items into classic black. Remember, patience and attention to detail are key to a successful dye job.
5 Additional Tips and Tricks
- Testing: Always test the dye on a small, hidden leather area first to ensure the color turns out as you wish.
- Cleaning: Before you start the dyeing process, ensure the leather is clean and free of dust or oils. A leather cleaning solution can be used if necessary.
- Multiple Coats: It might take more than one coat to achieve the desired shade of black. Let each coat dry completely before applying the next one.
- Finishing: After dyeing, applying a leather finisher or conditioner is important to seal the color and protect the leather from fading or cracking.
- Practice Makes Perfect: Dyeing leather can be tricky, so don’t be discouraged if it doesn’t turn out perfectly the first time. You will become more confident and skilled at achieving the perfect black color on brown leather with practice.

Dyeing brown leather black can seem like a daunting task, but with the right knowledge and techniques, it is achievable.
5 Things You Should Avoid
- Over-Saturating the Leather: Applying less dye at once can lead to an uneven finish. Instead, aim for light, even coats, and build up the color gradually.
- Neglecting to Let the Leather Dry: Each coat of dye needs to dry fully before the next one is applied. Rushing this process can lead to a blotchy result.
- Forgetting to Protect Your Work Area: Dye can stain surfaces and clothing, so always protect your work area and wear old clothes or an apron.
- Using Non-Leather Dyes: Not all dyes are created equal. Always use a dye specifically designed for leather to ensure optimal results and prevent damage to the material.
- Skipping the Finisher: A finisher or conditioner is crucial for sealing in the dye and protecting the leather. This step is necessary to avoid the dye fading or the leather cracking.
By avoiding these common mistakes, you can ensure a successful and long-lasting result when dyeing brown leather black.
What Type of Dye is Best for Leather?
When it comes to dyeing leather, there are several options available. The most commonly used dyes for leather are alcohol-based and oil-based. Alcohol-based dyes penetrate the leather more easily, resulting in a more even color, while oil-based dyes are thicker and provide better coverage for larger areas.
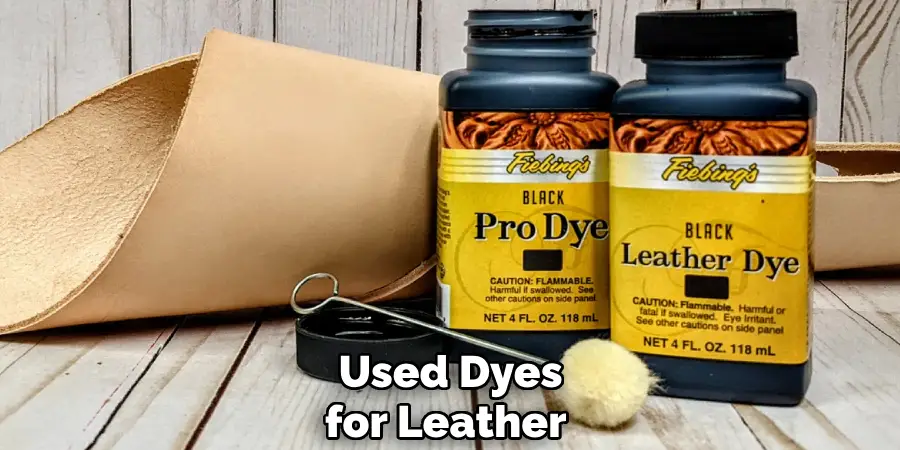
Another option is water-based dyes, which are less toxic and easier to clean up but may have a lower color payoff. Ultimately, the best type of dye for you will depend on your preference and the specific project you are working on.
By following these tips and avoiding common mistakes, you can achieve a professional-looking black color on brown leather and confidently transform your leather goods. Remember always to test, clean, and protect your work area before starting the dyeing process, and be bold and practice until you perfect your skills.
Conclusion
To summarize, dyeing brown leather black is a fun and relatively simple project,, but it is important to take the necessary safety precautions and be aware of the tools and materials needed and the technique used. To make your project successful, consider the type of leather you are working with and do a spot test in an inconspicuous area of the item before starting.
Quality is key, so choose the best products for your work. Be sure to pay extra attention to how long you leave the dye on, considering that it will affect the outcome of your project. Finally, use a good quality wax or polish after dying to seal in all that new color!
Now that you know how to dye brown leather black, don’t wait any longer – get started on your next crafting adventure today!