
Making a leather rose couldn’t be easier with the right tools and some imagination! From fashioning a single, small flower to creating an entire bouquet of homemade roses, you can craft your very own unique floral accessories for any occasion.
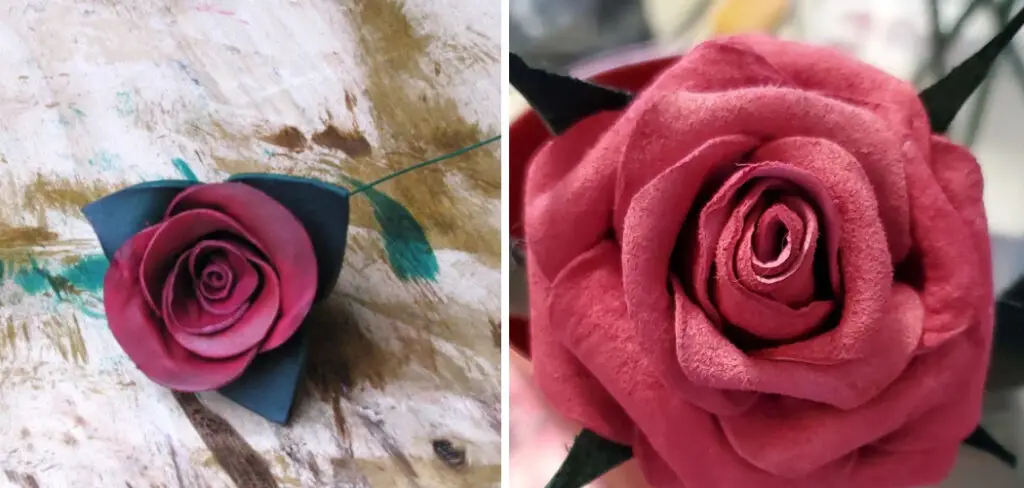
In this blog post on how to make a leather rose, we’ll walk you through every step of the process – from choosing and prepping your supplies to shaping and finishing off each beautiful bloom. So get ready to channel your inner florist: here’s how to make a stunningly realistic leather rose!
Why Choose Leather for Rose-Making?
The short answer is that leather is a beautiful, versatile and resilient material to work with. It’s also surprisingly easy to shape into delicate, natural-looking rose petals – even if you’ve never worked with it before.
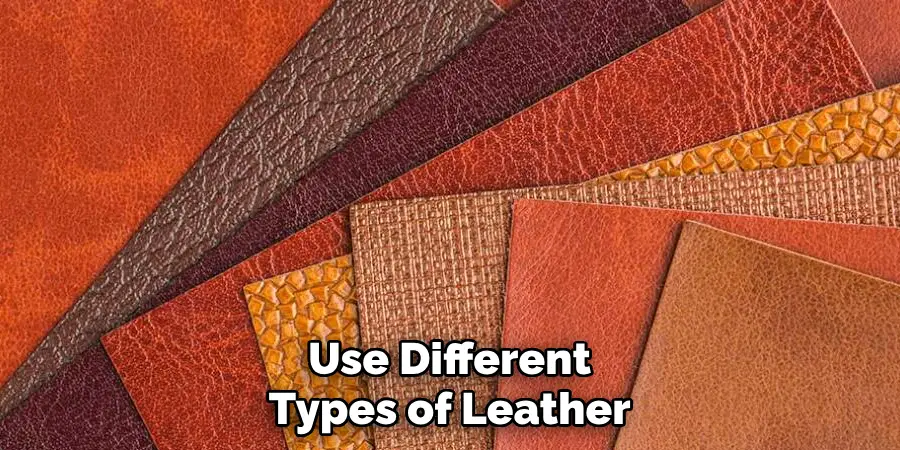
You can choose from a wide range of leather and faux-leather types, including thin sheets, suede, bonded leather or even recycled materials such as old handbags. Genuine animal hide is generally more durable and better for shaping intricate details, while synthetic leathers offer more vibrant colors and textures.
What You’ll Need
- A sheet of genuine leather (in your choice of color)
- Floral wire or pipe cleaners (roughly 8 inches long)
- Fabric glue or hot glue gun
- Sharp scissors or leather cutting tools
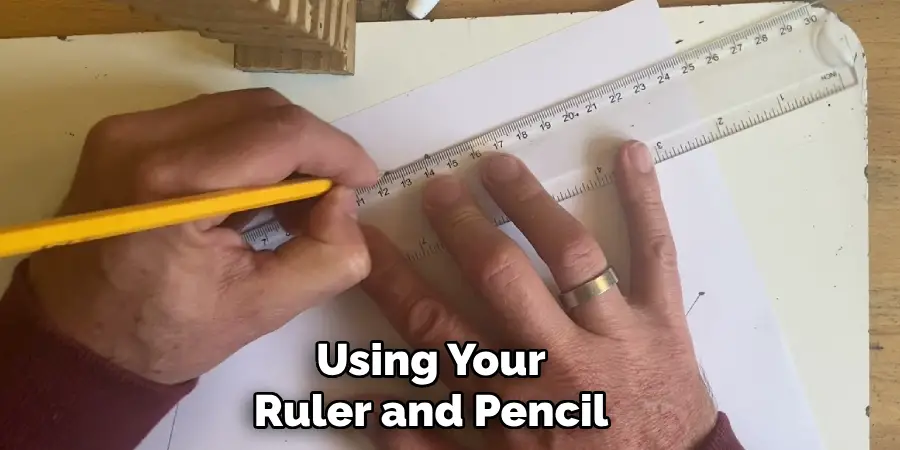
- Ruler and pencil (for measuring and marking)
- Floral tape or other taping material
9 Easy Step-by-Step Guide to Making a Leather Rose
Step 1: Prepping the Petals
Using your ruler and pencil, mark out a petal shape on the back of your leather sheet. The size and shape of your petals will depend on the type of rose you want to make (e.g. a small tea rose or a larger garden rose). Cut out the petal using your scissors or leather cutting tools. You’ll need around 10-12 petals per flower. It’s a good idea to make a variety of sizes and shapes for a more realistic-looking rose.
Step 2: Shaping the Petals
Using your fingers or a blunt tool, gently shape each petal by curving and curling its edges. This will give your rose depth and texture. You can also use a hairdryer on low heat to soften and mold the leather more easily. You can also use a ball stylus or other shaping tools to create more defined veins and creases on the petals. It’s important to work slowly and carefully here, as leather can be delicate.
Step 3: Adding Wire
Take your floral wire or pipe cleaner and push it through the center of each petal. The wire should be long enough to extend beyond the bottom of the flower (for attaching to a stem later). Bend the end of the wire into a small loop at the bottom to keep the petals from sliding off. But leave the top of the wire straight for now. It’s better to add the stem later, rather than trying to work around it.
Step 4: Building the Base
Take 2-3 petals and arrange them into a loose cup shape, overlapping their edges slightly. Attach them together using a dab of fabric glue (or hot glue) in the center. This will be your base or ‘bud’. It’s okay if it looks a bit messy at this stage – the more natural, the better! But make sure the petals are securely attached to each other.
Step 5: Layering the Petals
Take another petal and attach it to the base, slightly overlapping one edge of the first petal. Add more glue where necessary (but not too much). Continue adding petals, rotating them slightly with each layer until you have a full bloom shape. You can also add smaller petals to the center for more dimension. You can also experiment with different petal sizes and shapes until you achieve your desired rose shape.
Step 6: Adding Details
To make your rose more realistic, consider adding some extra details like a few small leaves or sepals made from green leather. You can also use small beads or crystals as accents in the center of the flower. These details are entirely optional, but they can really elevate your finished rose. Although leather roses are beautiful on their own, so don’t feel obligated to add anything extra.
Step 7: Finishing Touches
Once your rose is complete and all the petals are securely attached, let it dry for a few hours. You can lightly mist it with water or use a leather conditioner to give the flower a more natural sheen. If you want to give your rose a stem, you can wrap floral tape around the wire to create a green stem-like effect. You can also add some ribbon or other decorative touches to personalize your leather rose.
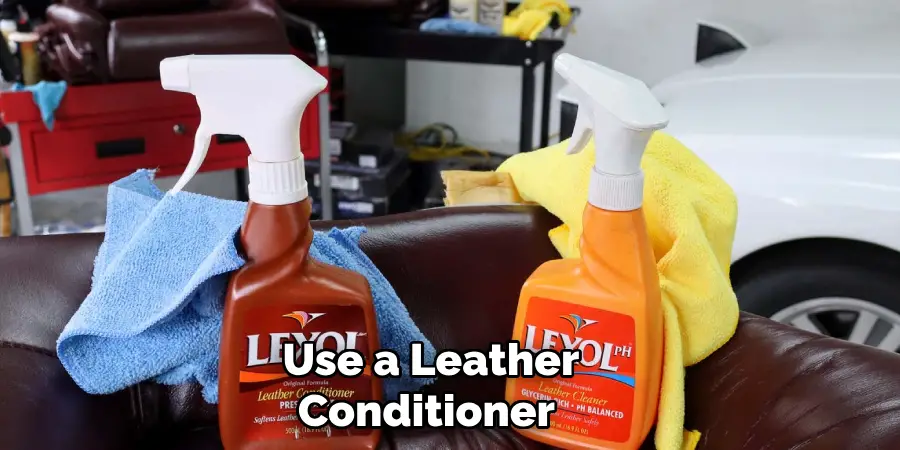
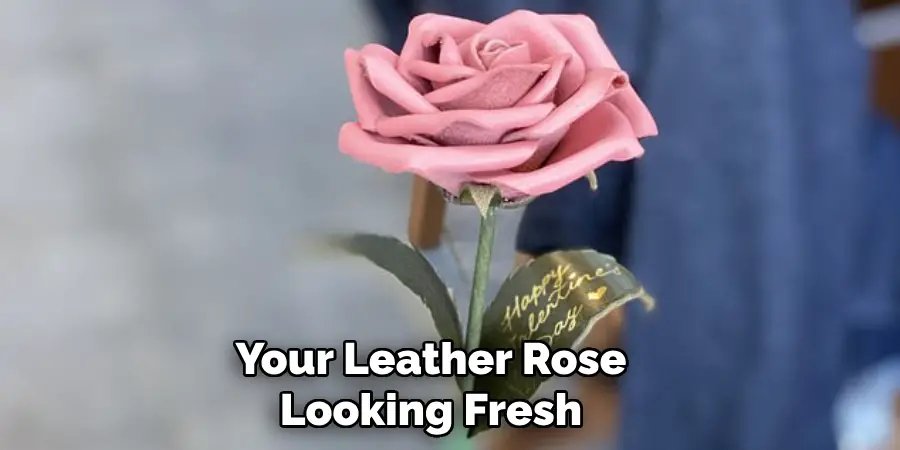
Step 8: Caring for Your Leather Rose
Leather roses are surprisingly durable, but they do require some care and attention to keep them looking fresh. Avoid placing them in direct sunlight or getting them wet. You can gently wipe the petals with a slightly damp cloth to remove any dust or dirt. Avoid bending the petals too much, as this can cause creases and cracks.
Step 9: Enjoy Your Beautiful Handmade Leather Rose!
Congratulations, you’ve made your first leather rose! With practice, you’ll be able to create more elaborate and detailed roses or even other types of flowers. Use your leather roses as accents in bouquets, hair accessories, or home decor pieces. With the right techniques and a bit of creativity, you can make truly stunning leather roses that will last for years to come. Happy crafting! So get creative and start making your own unique leather roses today!
Following these easy steps on how to make a leather rose, you can now make your own leather roses at home. From choosing and preparing the right materials to shaping and adding finishing touches, this guide has covered everything you need to know about making a beautiful leather rose.
Experiment with different colors, shapes and sizes to create unique and realistic-looking flowers. With practice, you’ll be able to master the art of leather rose making and impress your friends and family with your handmade creations.
Additional Tips
- To Add Depth and Texture to Your Leather Rose, You Can Also Use a Heat Gun or Embossing Tool to Create Creases and Wrinkles on the Petals.
- If You Don’t Have Access to Genuine Leather, You Can Still Make Beautiful Roses Using Faux-leather Materials Such as Vinyl or Even Fabric.
- Don’t Be Afraid to Make Mistakes! Leather is a Forgiving Material and You Can Easily Fix Any Imperfections with a Bit of Glue or Trimming.
- Use Different Types of Leather Such as Suede, Patent or Metallic to Create Unique and Eye-catching Roses.
- To Add a Scent to Your Rose, You Can Spritz It with Perfume or Essential Oils.
- Don’t Limit Yourself to Just Roses! You Can Use the Same Techniques to Make Other Types of Flowers Such as Daisies, Tulips or Sunflowers.
- Practice Makes Perfect! Don’t Get Discouraged if Your First Few Attempts Don’t Turn Out Exactly How You Want. Keep Trying and You’ll Soon Be a Pro at Making Leather Roses. So go ahead and give it a try! With patience, practice and a bit of creativity, you can make your own beautiful leather roses that will last for years to come. So gather your materials, follow these steps and let your imagination run wild. Happy crafting!
Frequently Asked Questions
Q1: Can I Use Any Type of Leather to Make a Leather Rose?
A1: Yes, you can use different types of leather such as cowhide, lambskin or even suede to make a leather rose. Experiment with different materials to create unique and interesting textures. It’s also a great way to use up any scraps or leftover pieces of leather.
Q2: Do I Need Special Tools to Make a Leather Rose?
A2: While some basic tools like scissors and fabric glue are necessary, you can also use a heat gun or embossing tool to add more depth and texture to your rose. However, these tools are not essential and can be substituted with household items like a hairdryer or pencil.
Q3: How Do I Store My Leather Rose?
A3: To keep your leather rose looking fresh, store it in a cool, dry place away from direct sunlight. You can also wrap it in tissue paper or a cloth to protect the petals from dust and dirt. Avoid folding or squishing the petals to prevent any creases from forming. With proper care, your leather rose will last for years and continue to be a beautiful addition to your home decor or accessories collection.
Conclusion
In conclusion, making a leather rose can be a fun and creative way to add a unique touch to accessories, decorations, or even gifts. Working with leather is easy and straightforward–all you need are the right materials, an understanding of the craftsmanship involved, and patience as you piece it all together.
With this tutorial on how to make a leather rose in hand, you now have all the tools to make that beautiful leather rose. So get your crafting spirit going and start creating! Who knows? Maybe one day you might even come up with your own signature design for a leather rose.