
Are you looking to upgrade your car’s interior with a luxurious leather look? Installing leather seats in your vehicle is a great way to add sophistication and comfort. Follow these steps, and you’ll sit back in cozy, high-quality leather seating in no time!
Installing leather car seats is a great way to upgrade your interior. It adds style and sophistication, plus it’s easier to keep clean than fabric or vinyl. You can go one step further and replace all the seats in your car with luxurious leather for a sleek look that will turn heads whenever you go out for a drive.
With just some simple instructions, you will be able to install a new leather car successfully seats yourself quickly and easily! Keep reading to learn exactly how to install leather seats in car.
What Will You Need?
Before beginning the installation, make sure you have all the necessary tools and materials:
- Leather seat covers
- Screwdriver
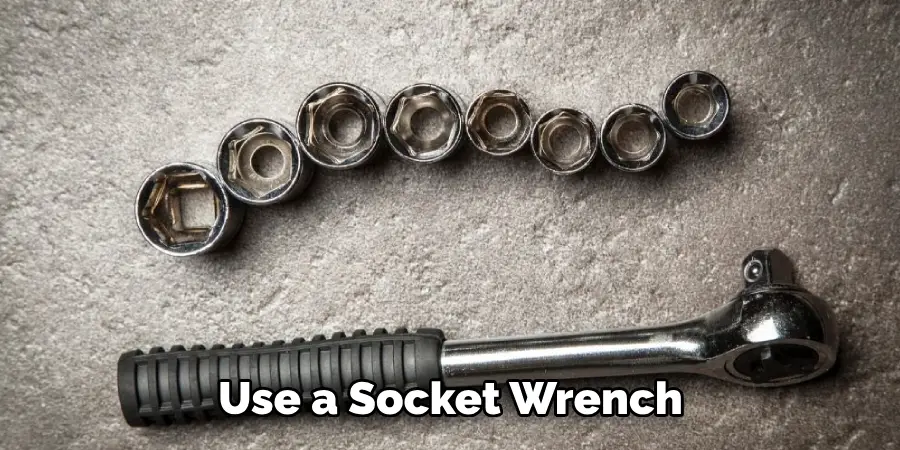
- Socket wrench
- Drill
- Upholstery foam or batting
- Staple gun and staples
- Spray adhesive (optional)
Once you have all of the materials, it’s time to get started!
10 Easy Steps on How to Install Leather Seats in Car
Step 1: Remove the Existing Seats
The first step is to remove the existing seats from your car. Once they are out, inspect them for any damage or broken parts that need replacing. If necessary, take the seats to a shop and have them repaired or replaced before proceeding.

Step 2: Prepare the New Seats
Once you have the old seats out, it’s time to prepare the new seats. Start by attaching the upholstery foam or batting to the leather seat cover using your staple gun. Make sure that it is snug and secure, as this will help support your new seat and ensure a comfortable ride.
Step 3: Install the Seat Frames
After securely attaching the upholstery foam or batting to your leather seat covers, install the seat frames in your car. Use a drill and socket wrench to attach them properly into place. Use a spray adhesive for extra security when mounting them into place.
Step 4: Attach the Seats
Now you are ready to attach the leather seat covers to the frames. Ensure they fit snugly and securely, ensuring a comfortable ride. You can use your staple gun to secure them into place from underneath or use straps with buckles if needed.
Step 5: Secure the Seat Belts
Once the seats are installed, you need to ensure that all of them are properly attached and secure in your car. Use a socket wrench and drill to attach any necessary brackets for seat belts, airbags, or other safety devices required by law. Be careful to attach the seat belts securely and ensure they are all functioning properly.
Step 6: Test the Seats
Before putting everything back together, it’s important to test all of the seats to ensure that they are properly installed and comfortable. Get in each seat, adjust it to your desired position, and ensure everything functions correctly. Don’t forget to check the seat belts and other safety features for proper installation.
Step 7: Reattach the Upholstery Foam or Batting
Once you’re happy with all of the adjustments, reattach any upholstery foam or batting to the leather seat covers from underneath using a staple gun. Make sure that all of the staples are secure before proceeding. Otherwise, your leather seats may be uncomfortable or even unsafe to use.
Step 8: Put Everything Back Together
Now you can put everything back together in reverse order. Start by attaching any necessary brackets for seat belts or other safety devices, then attach the seat frames. From there, simply install the new leather seats, and you’re ready!
Step 9: Check for Comfort
Before taking your car out on the road, check all the seats to ensure they are comfortable. Adjust them as necessary and ensure everyone is happy with their seating position. Remember that leather may initially feel stiff, but it will break in over time.
Step 10: Enjoy Your Leather Seats
Now you can sit back and enjoy your new leather seats! With just a few simple steps, you have successfully installed new leather car seats in your vehicle. You can now use these high-quality materials’ luxurious look and feel whenever you drive.
Congratulations on completing this project! These instructions helped guide you through installing leather seats in your car. Enjoy your new look, and have fun showing it off!
5 Additional Tips and Tricks
- Use a spray adhesive to secure the leather seat covers to the frames for extra support.
- Make sure that all of the staples used to attach the upholstery foam or batting are secured tightly into place before proceeding.
- Always test each new seat before putting everything back together in your car.
- Adjust any necessary brackets for airbags, seat belts, and other safety devices as required by law.
- Take advantage of these high-quality materials’ luxurious look and feel whenever you drive. Enjoy!

Now you know, install leather seats in the car! Follow these steps, and you’ll have comfy leather seating in no time! With just a few simple instructions, you can upgrade your car’s interior with a luxurious leather look that will turn heads whenever you go out for a drive.
5 Things You Should Avoid
- Before you begin, purchase the necessary tools and materials.
- Avoid using too little upholstery foam or batting when attaching it to the leather seat cover.
- Don’t forget to check all the seats for comfort before putting everything back together in your car.
- Don’t attempt to install the seat frames without using a drill and socket wrench.
- Avoid taking shortcuts when attaching any necessary brackets for airbags, seat belts, or other safety devices as required by law.
Avoiding these common mistakes will ensure that you install your leather seats correctly and quickly. Keep these tips in mind, and you’ll be driving in style sooner than you think!
How Do You Install Leather Car Seat Covers With Hooks?
If your car has factory-installed hooks or anchors, you can use these to install your leather seat covers. Start by removing the existing seats and attaching the upholstery foam or batting to the leather seat cover with a staple gun.
Once this is done, attach the appropriate hook or anchor onto each of the four corners of the leather seat cover. Then simply slip it over your car’s existing anchor system and secure it into place with straps or buckles. Ensure they are securely fastened before taking your car out for a spin!
Follow these steps, and you’ll enjoy comfy leather seating in no time! With simple instructions, you can upgrade your car interior with high-quality, luxurious leather seating for a look that will turn heads.
Is Leather Better Than Cloth in Car?
Leather car seats can be a great addition to any vehicle. They offer a luxurious look and feel, often preferred over cloth seats. Leather is also known for its durability, as it is more resistant to tears, cuts, and punctures than other materials.

Also, leather lasts longer than many fabrics since it doesn’t absorb moisture or collect dirt as easily. On the downside, leather can be expensive and difficult to install correctly without proper skill and knowledge. Ultimately, your choice between leather or cloth seats should come down to personal preference and budget considerations.
No matter which material you choose for your car interior, ensure you get the installation done correctly to ensure a comfortable ride for years to come!
What Can Damage Leather Car Seats?
Leather car seats can be damaged by a variety of sources, including:
- Sunlight and UV radiation: Sunlight and UV radiation can cause the leather to fade or crack over time. It’s important to keep your car out of direct sunlight as much as possible.
- Excessive moisture or heat: Leather is sensitive to both excessive moisture and heat. Avoid leaving your car in the sun for extended periods, as this could damage the leather.
- Abrasion and scuffing: Abrasion or scuffing from rough surfaces may wear away at the leather over time. Be sure to use seat covers when needed to protect your seats.
- Incorrect cleaning products: Certain cleaning products or upholstery treatments can damage leather. Always refer to the car’s manufacturer’s instructions when selecting cleaning products for your car seats.
By taking care of your leather car seats and avoiding the sources of damage listed above, you can ensure that they remain in good condition!
Conclusion
Overall, how to install leather seats in car is a fairly labor-intensive job, so it’s important to consider the amount of time and effort that will need to be spent for a high-quality installation.
Whether you plan on doing it yourself or hiring a professional, it can take anywhere from one day to four days for the job to be completed depending on the size and complexity of the vehicle. Be sure to consider all necessary tools and any additional materials that may be needed for a successful installation.
Remember that leather seating isn’t cheap, so taking care of your newly installed seats with appropriate cleaners and stains is essential. Even if yours are factory-installed, regular upkeep will keep them looking showroom ready for years to come!
Investing in quality leather seats can enhance your vehicle’s look and increase resale value. With patience and attention to detail, you’ll have leather upholstery you won’t regret adding!