There are many reasons to begin crafting your leather sheaths, from wanting something custom for a treasured blade or even if you’re just looking to get the most out of an inexpensive blade. It can be intimidating to dive into the leatherworking world, but it is possible with some patience and dedication – even easy!
Whether you’re a beginner or have some experience with leatherworking, this guide will show you how to make a leather sheath.
In this blog post, you’ll learn the basics of creating a beautiful and durable leather sheath that will last for years while equipping yourself with valuable knowledge. With just a few simple tools, step-by-step instructions, and helpful tips produced by experienced makers in mind – you’re well on your way. Let’s take a look at what it takes to make your very own unique leather sheath!
What is the Purpose of Sheath?
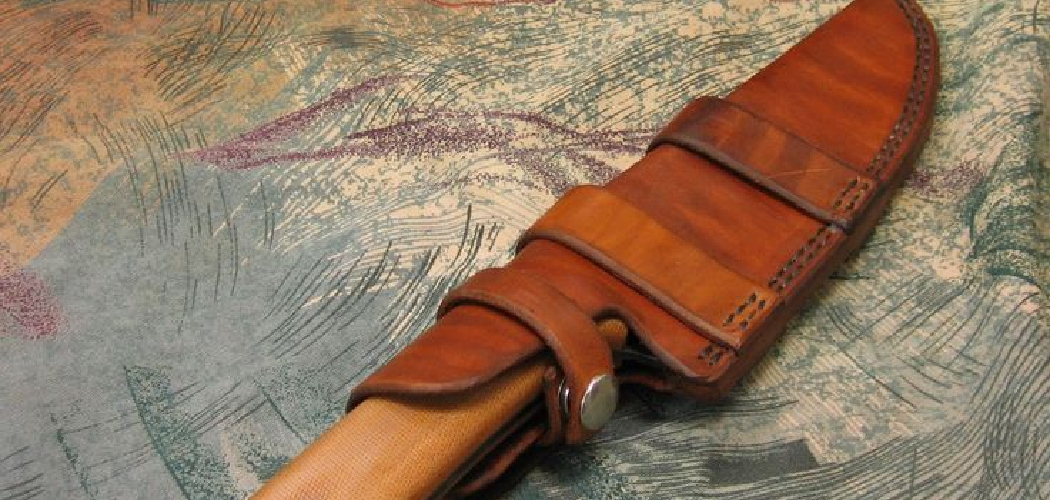
The purpose of a sheath is to protect the blade from damage while it is not in use and provide ease of access when needed. This makes the sheath an important accessory for any knife or sword enthusiast.
Another equally important purpose of a sheath is as a fashion statement. People who carry a knife in their pocket or on their belts often prefer to have something that looks good and matches their personal style.
A leather sheath is the perfect way to achieve both functions in one – not only will it add an element of style to your knife, but also provide the required protection for the blade when not in use.
What Will You Need?
Before you get started on crafting a leather sheath, make sure you have the following materials and tools:
- Leather in your desired thickness (3-5 oz is a popular choice)
- Waxed thread
- Leather needles
- Pricking Irons or Chisels
- Wet Milling & Crafting tools (or a hammer, mallet & block, etc.)
- Beeswax
- Rivets and/or buckles for closure
Once you have all of the necessary materials and tools gathered, it’s time to start crafting!
10 Easy Steps on How to Make a Leather Sheath
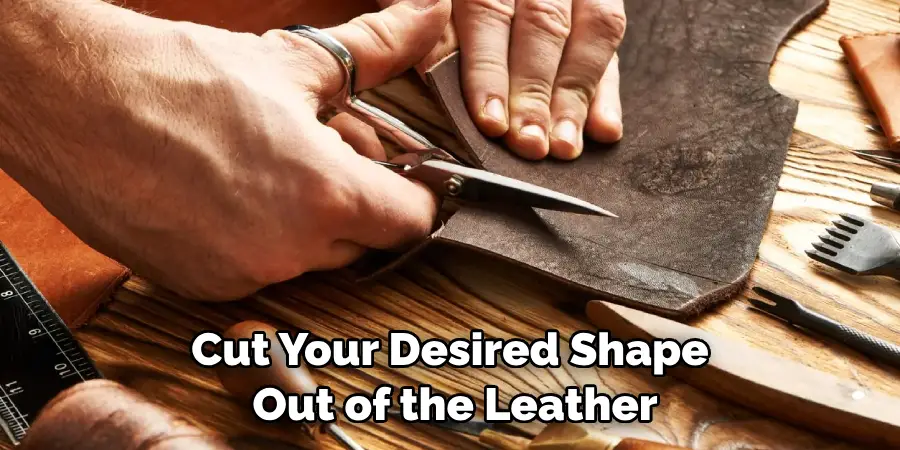
Step 1: Measuring and Cutting the Leather
The first step to crafting your leather sheath is to measure and cut your desired shape out of the leather. The measurements will depend on what you plan to put in the sheath – whether it’s a knife, sword, or something else. Consider how thick and wide your item is to ensure that the sheath fits snugly.
Step 2: Preparing the Edges of the Leather
Once you’ve cut out your shape, use a leveler to prepare the edges. This will create smooth and even edges that look great when finished. You can also use an edge slicker or burnisher for this step.
Step 3: Wet Molding
Wet molding is an important part of leatherworking as it helps give more life to the leather and makes it easier to work with. Soak your leather in warm water for 10-15 minutes before stretching it over a form that matches your desired shape. Allow it to dry naturally or blow dry on low heat if needed.
Step 4: Pricking and Stitching
Now it’s time to stitch your leather sheath. Use a pricking iron, chisels, or a stitching awl to punch holes into the leather for sewing. When you have finished punching the holes, thread the waxed linen thread through the needle and begin making stitches in each hole. Go slowly and evenly to ensure a strong bond.
Step 5: Waxing
Once you have completed all of your stitches, rub some beeswax over the seam line with either your fingers or an applicator brush to seal up any holes in the stitching and add extra protection against moisture. This will ensure that your sheath is waterproof and lasts many years! Additionally, this will give the leather a nice shine.
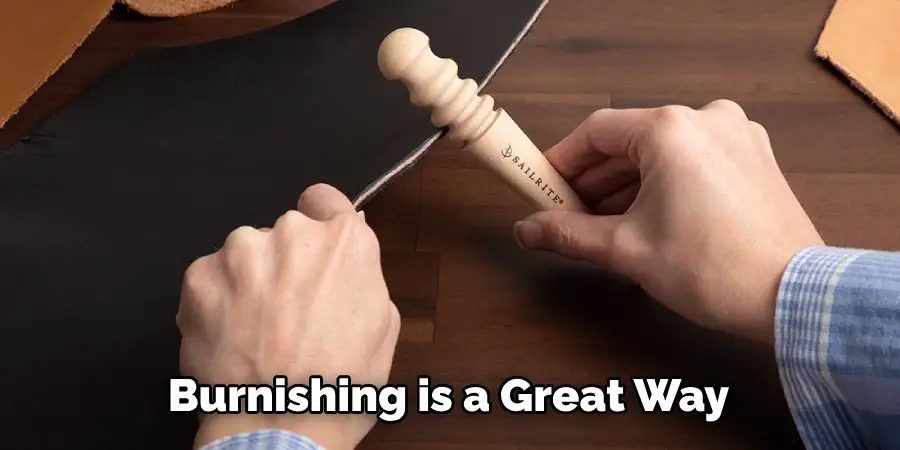
Step 6: Burnishing the Edges
Burnishing is a great way to finish off your leather sheath and give it an attractive shine. Use a burnishing tool, or even just an old rag, to smooth and polish the edges of the leather. This will make sure that they stay smooth for longer.
Step 7: Adding Rivets & Buckles for Closure
Adding rivets or buckles to your leather sheath can help secure it and give it a more professional look. Hammer in some rivets along the edges, or add buckles if you’d like more adjustability. If you’re using buckles, ensure the holes you punch are the same width as your buckle.
Step 8: Finishing Touches
You’re almost done with making your custom leather sheath! All that’s left now is to add the finishing touches. You can use a damp cloth to remove any scuffs or blemishes on the leather and apply a protective finish if desired.
Step 9: Putting it All Together
Finally, you can combine your leather sheath with all its additions. Sew the edges together, attach the closures, and tie off your stitches for a secure hold. Now your custom-made leather sheath is complete! Another great way to finish off your sheath is by adding some decoration, such as tooling, painting, or stamping.
Step 10: Enjoy Your Creation
You did it! Celebrate your accomplishment by taking your new leather sheath out for a spin, and enjoy showing off your hard work with pride. Remember – making a leather sheath is just the beginning of your journey in leatherworking.
By following these simple steps, you can easily create a beautiful and durable leather sheath. Whether you’re looking to protect a treasured blade or just want to make something special for yourself – crafting your leather sheath is an enjoyable and rewarding experience that will last for years!
5 Additional Tips and Tricks
1. Don’t rush it! Take your time and ensure each step is done properly to get the best results.
2. For a quality finish, use leather tools that have been designed specifically for the job.
3. Before you start working on your sheath, practice on some scrap pieces of leather to get used to the tools and techniques.

4. Use contrasting stitching or decorative elements such as rivets to add visual interest to your design.
5. Always sand down any rough edges before you finish off your sheath with a coat of wax or conditioner for additional protection.
With these tips and tricks, you should now know how to make a beautiful leather sheath.
5 Things You Should Avoid
- Don’t skimp on quality materials. Investing in good leather, tools, and hardware will ultimately pay off.
- Don’t use abrasive materials to clean the leather. Use a damp cloth and mild soap instead.
- Don’t rush through any steps or leave out an important detail. Ensure you thoroughly understand each step before going on to the next one.
- Avoid using too much glue when attaching hardware, as it can cause the leather to buckle up or break apart with time.
- Don’t try to force pieces of leather together if they don’t fit properly, as this will weaken their bond and make for an unreliable sheath.
Following these tips and tricks, you should have no problem making a sturdy and reliable leather sheath that will last you many years.
5 Different Design Ideas
- Use simple stitching and a minimalistic design for a classic look.
- Use tooled leather with intricate designs for an eye-catching sheath.
- Consider incorporating decorative elements like conchos or metal studs to add flair to your piece.
- Try using contrasting colors of leather for the inside and outside of the sheath to create contrast and texture.
- Create an embossed pattern on the leather with specialized tools and techniques for dimensionality and visual interest.
With these design ideas in mind, you should be able to make a unique leather Sheath that stands out from the crowd! So get creative and show off your skillset—you won’t be disappointed!
What Kind of Leather Is Used for Sheaths?
The best leather for sheaths is usually vegetable-tanned cowhide, as it’s the most durable and has a natural resistance to wear and tear. If you’re looking for an even more hardwearing option, you could try using chrome-tanned leather treated with chromium salts that give it a tougher finish.
Other types of leather, such as sheepskin or deerskin, can also be used but aren’t quite as hard-wearing as cowhide or chrome-tanned leather.
No matter what type of leather you choose, select a high quality material that won’t easily tear or stretch out over time. By doing this, you can ensure that your sheath will look great and stand the test of time!
Conclusion
Although it may take a few hours, making a leather sheath can be very satisfying. After investing effort and time into creating this useful object, its beauty, and craftsmanship will be noticed.
This item is a great way to learn something new or hone your existing skills while saving money. The tips outlined in this guide should also help you get started in any desired project direction. As with any new skill, practice makes perfect, so keep at it, and you’ll be on your way to becoming a leather-working pro! With the right tools and knowledge, anyone can make an authentic handmade tool or accessory that will last years.
Hopefully, the article on how to make a leather sheath has helped inspire your next project. Have fun and happy crafting!