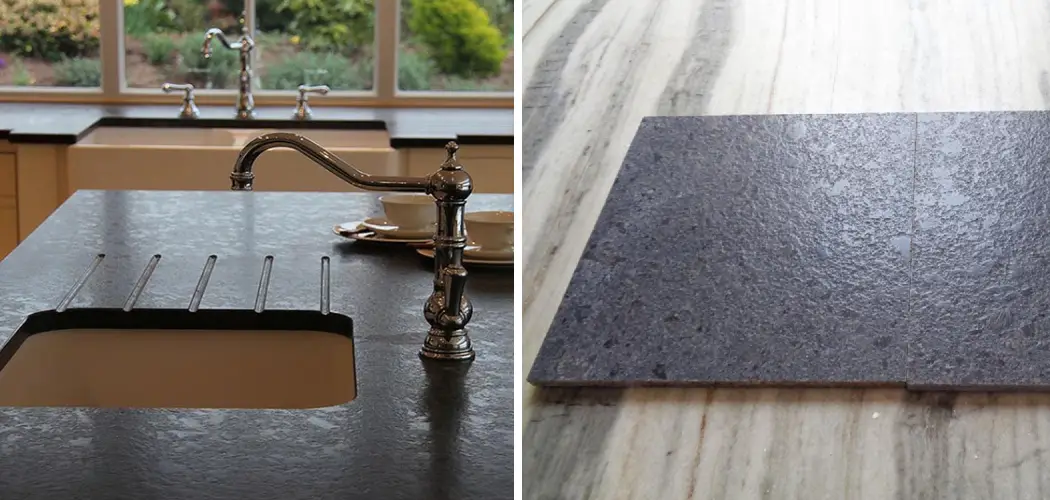
Have you ever looked at a beautiful granite surface and thought, “I wish this could be even more luxurious”? Well, you’re in luck! Now there is an easy way to make your granite not only aesthetically pleasing but also incredibly soft and supple: leathering it. Leathering granite adds an elegant layer of texture to the stone while protecting the underlying finish, making it both durable and beautiful.
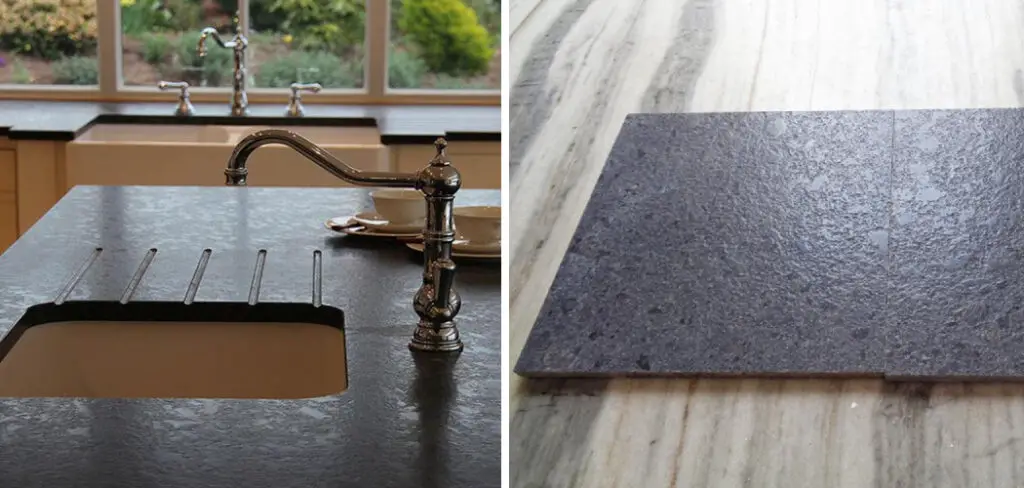
In this blog post, we’ll provide step-by-step instructions for how to leather granite, so that even novice DIYers can achieve professional results with minimal effort. Keep reading to learn how you too can enjoy the truly luxurious look of leathered granite surfaces
Needed Materials
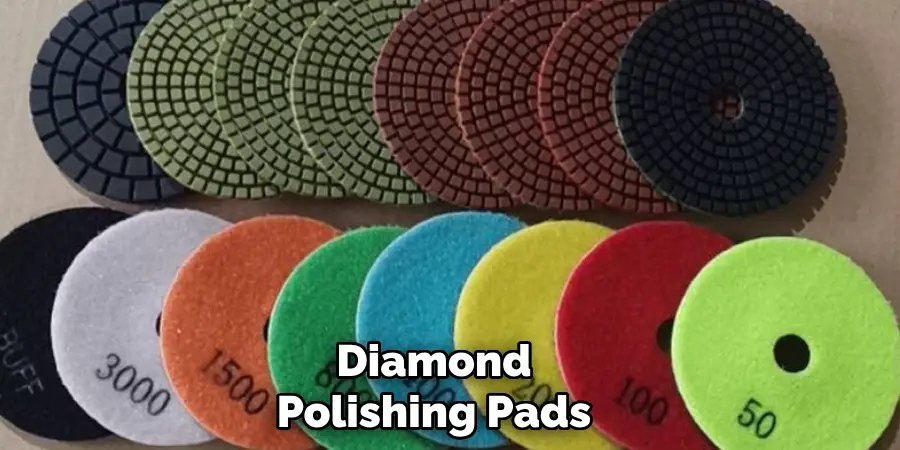
- Diamond Polishing Pads
- Water or a Lubricant Solution
- A Variable Speed Grinder/polisher With a Set of 4″ Diamond Polishing Pads if Needed, You Can Rent Them at Your Local Hardware Store
- Stone Sealer
- A Microfiber Cloth
- A Leathering Brush
- A Wet/Dry Vacuum Cleaner
- A Dust Mask and Eye Protection
10 Step-by-step Guidelines on How to Leather Granite
Step 1: Prepare the Surface
Before starting the leathering process, it’s important to prepare the granite surface. This includes cleaning it thoroughly with a stone cleaner and allowing it to dry completely. Any stains or imperfections should be addressed prior to beginning the process. It’s also important to make sure the surface is completely level and smooth. You can use a leveling compound if necessary. This will ensure even results during the leathering process.
Step 2: Choose Your Grit
Diamond polishing pads come in various grits, which determine the coarseness of the pad. For leathering granite, we recommend using a 50 or 100-grit diamond pad to start with. This will help remove any imperfections and create a rough, textured finish on the surface. But don’t worry, we’ll polish it to a smooth finish in later steps. You can always switch to a finer grit if you want a less textured look.
Step 3: Attach the Pad to the Grinder/Polisher
Once you have your diamond polishing pad selected, attach it to your variable speed grinder/polisher. Make sure it is securely attached and follows the manufacturer’s instructions for proper usage and safety precautions. Otherwise, you can rent a grinder/polisher from your local hardware store.
It’s important to note that some types of granite may require different pads or specific techniques, so it’s best to consult with a professional before beginning.
Step 4: Start Polishing
Using the grinder/polisher and your chosen grit pad, begin polishing the surface of the granite. Move in a circular motion and maintain an even pressure to ensure an even finish. Be sure to cover the entire surface, and don’t hesitate to go over any areas that may need extra attention.
You may need to add water or a lubricant solution to keep the0 pad wet and prevent it from heating up. The process may create some dust and debris, so it’s recommended to use a wet/dry vacuum cleaner to clean up as you go.
Step 5: Texture the Surface
Once you have finished polishing with your initial grit pad, it’s time to create that desired textured look. For this step, we recommend using a specialized diamond-textured brush. Simply attach it to your grinder/polisher and move it back and forth over the surface, creating a random pattern. This will help create that signature leathered texture. Although this may seem like an extra step, it is key to achieving the desired effect.
Step 6: Smooth It Out
After texturing, switch back to your initial grit pad and go over the entire surface again. This will help smooth out any rough edges or imperfections created during the texturing process. Be sure to use water or a lubricant solution to keep the pad wet and prevent any damage to the granite. Otherwise, you can also use a finer grit pad for a smoother finish.
Step 7: Rinse and Dry
Once you have achieved the desired texture and smoothing, rinse the surface thoroughly with water to remove any debris. Then, dry it completely using a microfiber cloth. Make sure to let it dry completely before moving on to the next step. It’s best to seal the surface once it is completely dry.
You can use a stone sealer of your choice, following the manufacturer’s instructions carefully. However, it’s recommended to use a breathable sealer to prevent any moisture buildup.
Step 8: Apply Stone Sealer
Before applying the stone sealer, make sure to follow the manufacturer’s instructions and test it on a small area first. Once you have determined that it is safe to use, apply the sealer evenly over the surface using a clean cloth or roller. Let it sit for the recommended time before wiping off any excess with a clean cloth. But be sure to leave some sealer on the surface for maximum protection.
Step 9: Let It Cure
After applying the stone sealer, make sure to let it cure for the recommended time. This allows the sealer to penetrate and protect the surface properly. Be sure to keep traffic off of the surface during this time, and do not use any harsh chemicals or cleaners.
It’s also best to avoid placing any heavy objects on the surface. You can check if the surface is fully cured by placing a few drops of water on it. If the water beads up, then the sealer has properly cured.
Step 10: Enjoy Your Leathered Granite
Congratulations! You have successfully leathered your granite and now you can enjoy its luxurious texture and protection for years to come. Keep in mind that proper maintenance is key to preserving the leathered finish, so be sure to clean it regularly with a stone cleaner and reapply the sealer every few years.
With these simple steps on how to leather granite, you can easily transform any granite surface into a luxurious and elegant addition to your home.

So why settle for plain old polished granite when you can elevate it to the next level with leathering? Follow our step-by-step guidelines and enjoy the truly stunning and unique look of leathered granite surfaces.
Do You Need to Use Professionals?
It is possible to leather granite on your own, but it requires proper tools and techniques. If you are inexperienced or unsure about the process, it’s best to consult with professionals who have experience in leathering granite. They can also advise on which type of granite will work best for this technique and provide maintenance tips for long-lasting results.
Leathered granite is a beautiful and durable choice for countertops, backsplashes, and other surfaces. With proper care and the help of professionals, you can achieve a stunning and unique look that will elevate the aesthetic of any space. Don’t be afraid to try leathering granite on your own, but always remember to prioritize safety and proper technique.
Frequently Asked Questions
Q1: Can I Leather Any Type of Granite?
A1: While most types of granite can be leathered, it’s always best to consult with a professional before beginning the process. Some types of granite may require different pads or techniques.
Q2: Do I Need to Seal the Granite After Leathering?
A2: Yes, it’s important to seal the granite after leathering to protect it from stains and damage. Be sure to follow the manufacturer’s instructions for proper application and curing time.
Q3: How Often Should I Reapply the Stone Sealer?
A3: It’s recommended to reapply the stone sealer every few years, or as needed. This will help maintain the leathered finish and protect the surface from everyday wear and tear. So why wait? Give your granite surfaces a unique and luxurious touch with leathering today!
Q4: What Other Materials Can be Leathered?
A4: While granite is the most common material for leathering, there are other natural stones that can also be leathered. This includes marble, quartzite, and soapstone. As always, consult with a professional before attempting to leather any type of stone surface.
Conclusion
By following these steps on how to leather granite, you can confidently take on the task of leathering granite. Whether you want to make a feature wall, countertop, or just something unique and fun for your home décor, by understanding the process of leathering stone, you will be able to customize any piece.
When it comes to adding an element of luxury and class to any living space, leather granite is an ideal choice. You may find that some stores already have pre-leathered stones available in colors and patterns that coordinate with any design.
However, if you have an eye for detail and want total control over your project’s outcome, try your hand at leathering granite yourself—it doesn’t take much effort but can make a real difference in bringing your vision to life! Show off your skills today and make something special using the same steps detailed here.
