
Pipe smoking has been around for centuries and is still enjoyed by many today. While there are many ways to store and carry your pipes, the pipe roll is one of the most stylish and functional. Made from leather, a pipe roll can protect your pipes while also looking great. Here’s how to make a leather pipe roll.
Summary: A leather pipe roll is a great way to easily transport and store your favorite smoking pipes. This guide will explain the steps required to make your own roll, including cutting the leather, stitching it together with a needle and thread, and adding pockets for filters or other accessories. You can customize a personalized leather pipe roll with just a few tools to fit your unique needs.
What Is a Leather Pipe Roll?
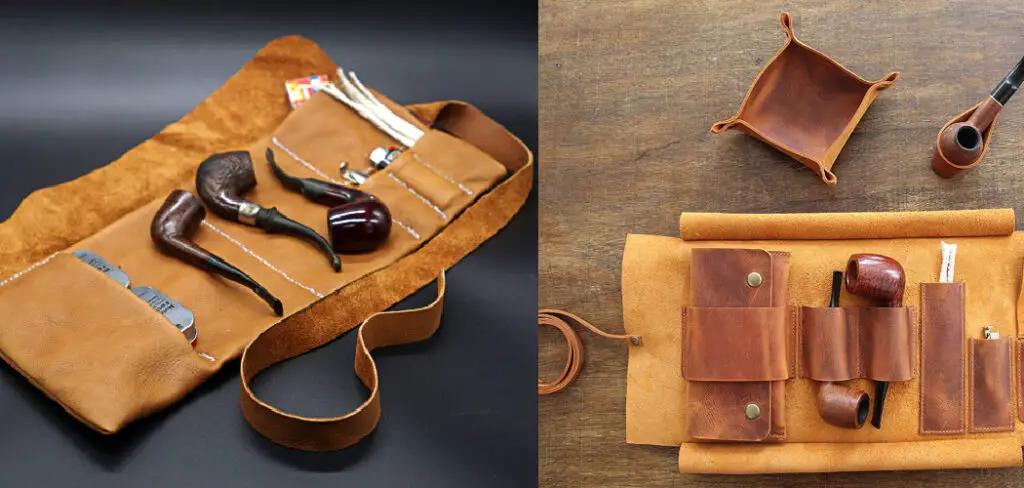
A leather pipe roll is a type of tobacco pouch made from leather. Traditionally, it was used to store and transport pipes and pipe smoking accessories. Today, leather pipe rolls are still popular among pipe smokers for their durability and esthetic appeal. In addition, leather is an ideal material for a pipe roll because it is sturdy and resists water damage.
Pipe smokers often personalize their leather rolls with initials, embossing, or other decorative touches. A well-made leather pipe roll can last for years, providing a handsome way to store and transport a treasured collection of pipes and smokers’ supplies.
Why Should You Make a Leather Pipe Roll?
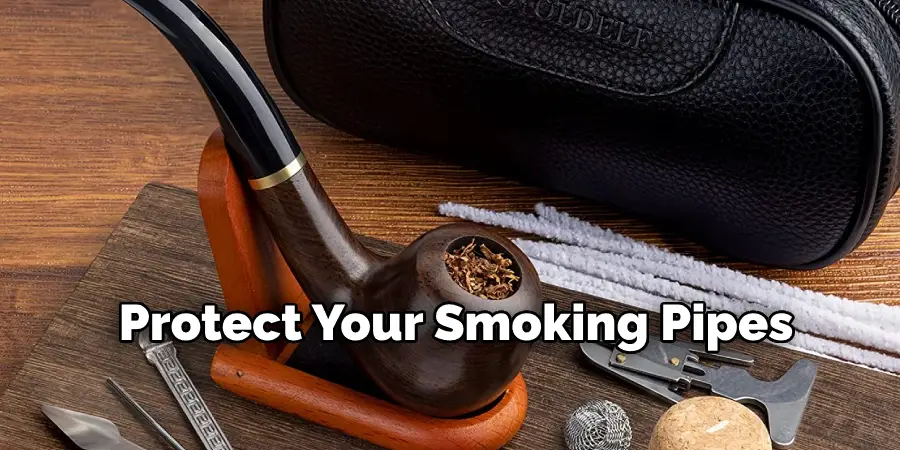
A leather pipe roll is an excellent way to protect your smoking pipes while traveling. Pipes are delicate and can be easily damaged, so it’s important to have a safe place to store them when you’re on the go. A leather pipe roll also makes it easy to keep your pipes and accessories organized in one place.
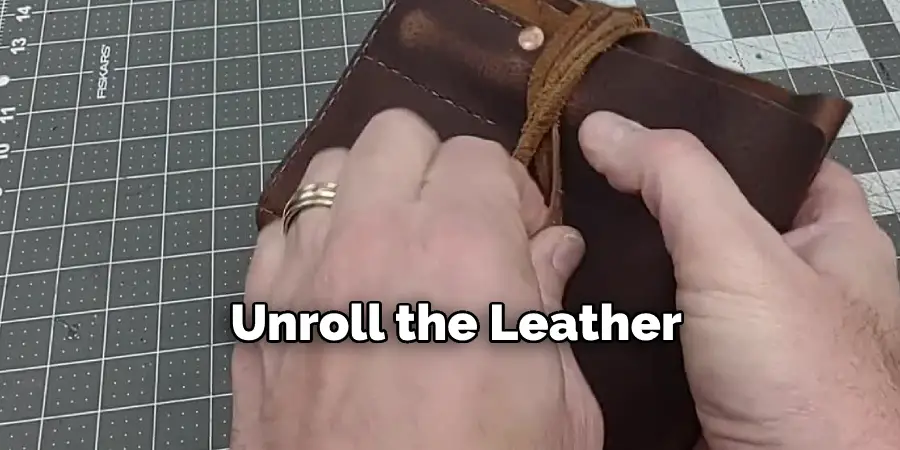
When ready to smoke, unroll the leather and choose the pipe you want to use. Then, when you’re finished, everything can be rolled up and put away until next time. Not only is a leather pipe roll an attractive and functional way to protect your pipes, but it also makes a great gift for any pipe smoker in your life.
How to Make a Leather Pipe Roll Step-by-Step Guide
Making your leather pipe roll is a great way to protect your investment and keep your pipes organized while traveling. Plus, it’s a relatively easy project that doesn’t require too many tools or materials. Here’s what you’ll need to get started:
1. Choose the Right Leather
The first step in making a leather pipe roll is to choose the right type of leather. You’ll want to use a sturdy yet pliable leather that can hold up to repeated use. Leather options include cowhide, buffalo hide, or even vegetable-tanned leather.
2. Trace and Cut the Pattern
Once you’ve selected your leather, it’s time to start the project. First, you’ll need to trace and cut out a pattern for the pipe roll. You can find a variety of patterns online or in leatherworking books.
When tracing the pattern, use a pencil or other thin marking tool, so you don’t damage the leather. Once you’ve cut out the pattern, you’re ready to move on to the next step.
3. Cut the Slits for the Pipes
Now that you have your pattern, it’s time to start cutting the slits for the pipes. Start by cutting a slit down the center of the leather piece. Then, cut additional slits about 1 inch apart from each other. Make sure that the slits are big enough to fit your pipes.
4. Attach the Leather Pieces Together
Now that you have all your slits cut, it’s time to start attaching the leather pieces. Start by attaching the two end pieces. Then, attach the remaining leather pieces, working your way down the row of slits.
5. Mark Where to Put the Pipe Holder
Once all of the leather pieces are attached, it’s time to mark where the pipe holder will go. Use a pencil or pen to make a small mark on the inside of the leather, about 1 inch from the top and 1 inch from the side. This is where you will put the first hole for the pipe holder. Then, make another mark about 3/4 of an inch below that. This will be the second hole for the pipe holder.
6. Punch Holes in The Leather
Now that you have your marks, it’s time to punch holes in the leather. You’ll need two holes for the pipe holder and four for the straps. Start by punching a hole at each mark you made for the pipe holder. Then, punch two more holes about 1 inch from the side and 1 inch from the bottom of the leather.
These will be for the straps that hold the pipe in place. Finally, punch two more holes about 2 inches from the side and 2 inches from the bottom of the leather. These will be for the straps around the rolls outside.
7. Add Snaps or A Buckle Closure
The final step is to add a closure to your pipe roll. You can do this by adding snaps or buckle closure. If you’re using snaps, simply line up the holes and attach the snaps. If you’re using a buckle, thread the strap through the hole and then through the buckle. Then, pull the strap tight and trim off any excess.

That’s it! You’ve now learned how to make a leather pipe roll. This project is a great way to protect your pipes and keep them organized while traveling. Plus, it makes a great gift for any pipe smoker in your life.
How to Customize Your Leather Pipe Roll
Your pipe is an extension of your personality, and your leather pipe roll reflects that. So why settle for a boring, generic roll when you can customize it to suit your style perfectly? Here are four easy ways to make your leather pipe roll unique:
1. Pick a color that reflects your personality. Black leather is classic and sophisticated, brown is warm and earthy, and tan is laid-back and laid-back. Or go for something more unusual, like red or purple.
2. Select a material that matches your lifestyle. If you’re constantly on the go, choose a durable canvas or nylon. Opt for soft, supple suede if you prefer a more luxurious feel.
3. Choose a size that fits your needs. If you only smoke occasionally, a smaller role will suffice. But if you’re a regular smoker, you’ll need something larger to accommodate all of your pipes and accessories.
4. Add personal touches with engraved details or colorful stitching. This is your chance to really make the roll your own – have fun with it!
By following these four simple tips, you can easily create a leather pipe roll that reflects your individual taste and style. So go ahead and make yours today – your pipes will thank you for it!
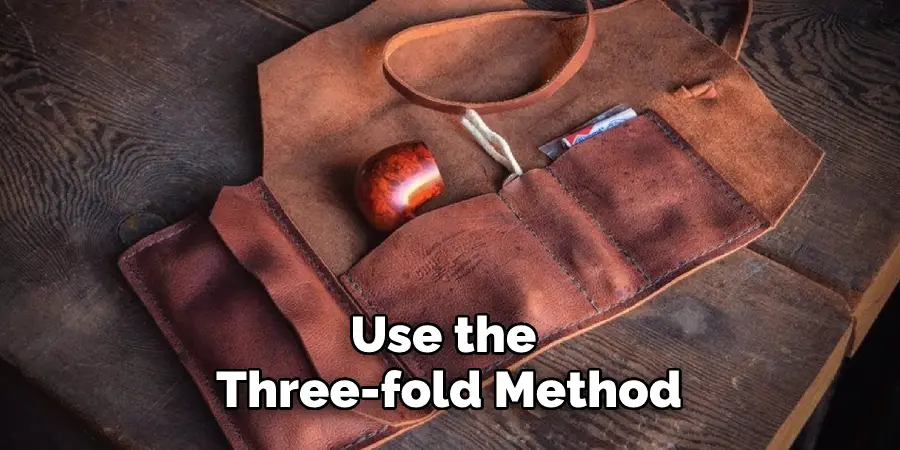
How Do You Keep Your Tobacco in A Leather Pipe Roll?
There are multiple ways to keep your tobacco in a leather pipe roll. The most popular way is to use the three-fold method. This method involves folding the tobacco in thirds, with each fold being about an inch wide. Once you’ve folded the tobacco, you’ll need to tuck it into the pipe roll.
You can also use the half-moon method, which involves folding the tobacco in half and then rolling it up. This method is great for keeping your tobacco fresh and preventing it from drying out. Finally, you can simply crumple your tobacco and place it in the pipe roll. This method is quick and easy, but it doesn’t do much to prevent your tobacco from drying out.
Whichever method you choose, make sure to tightly pack your tobacco so that it doesn’t come loose while you’re smoking. Keep reading for more information about how to make a leather pipe roll.
How Do You Finish the Edges of A Leather Pipe Roll?
The leather pipe roll is a great way to protect your pipes when you’re not using them. But how do you finish the edges of the leather, so it looks nice and clean? Here are three methods you can use:
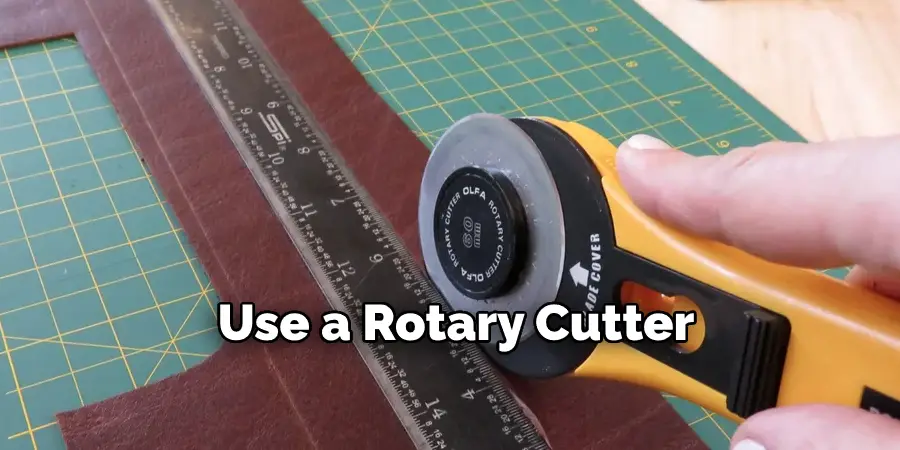
1. Use a Rotary Cutter
This is the quickest and easiest method. Simply run the rotary cutter along the edge of the leather, being careful not to cut into the pipe itself.
2. Use a Utility Knife
This method takes a bit more time, but it’s very precise. Run the utility knife along the leather’s edge, careful not to cut into the pipe itself.
3. Use a Serrated Knife.
This method is similar to the utility knife method but is even more precise. Run the serrated knife along the leather’s edge, careful not to cut into the pipe itself.
Whichever method you choose, be sure to take your time and be careful not to damage your pipes in the process. With a little patience and attention to detail, you’ll have beautiful, professionally finished leather pipe rolls in no time.
Frequently Asked Questions
What is the Best Tool for Rolling Leather?
The best tool for rolling leather will vary depending on the type of leather you are rolling and your experience. However, some general tips that may help include using a sturdy roller with a smooth, even surface and using a moderate amount of pressure while rolling.
How Do You Make a Leather Wrench Roll?
Making a leather wrench roll is a relatively simple process that can be done at home. You will need some rawhide, wax paper, coals or woodburning embers, and your garden hose.
First, cut the rawhide into 1-inch wide strips. Then wet the strips in water and wring them out so that they are pliable. Next, place one strip of rawhide on top of another strip with the shiny side facing down. This will create a handle for your wrench Roll.
Next, heat up the coals or woodburning embers until they are very hot (around 900 degrees F). Place the wax paper overtop of the Rawhides Handle and let it burn for about two minutes until it becomes dark brown in color. Finally, remove Wax Paper from Wrench Roll and enjoy!
Does Leather Need to Be Wet to Roll?
No, Leather does not need to be wet to roll. However, it is often easier and faster if the leather is slightly dampened before rolling. This will help avoid sticking and make the process smoother overall.
Conclusion
So, there you have it! Your very own guide on how to make a leather pipe roll. We hope you found this tutorial helpful and that you will be able to put your new skills into practice soon. If you have any questions or comments, please feel free to share them with us in the comment section below. And once again, happy smoking!