
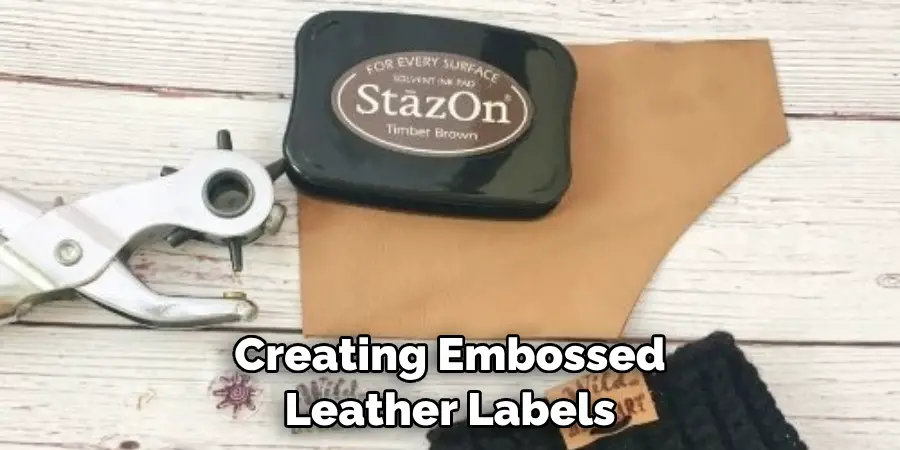
Embossed leather labels are a great way to add dimension and texture to a product or brand. They are attractive, durable and create a unique look that will stand out in the crowd. Leather labels can be used for everything from clothing to luggage tags and even interior decor pieces. Furthermore, with the right tools and knowledge, you can easily create your own embossed leather labels at home.

One of the main advantages of making embossed leather labels is that the finished product looks very professional and stylish, making it suitable for a variety of products and applications. The flexibility offered by the process also allows for unique designs to be created, which can add value to any product. In this blog post, You will learn in detail how to make embossed leather labels.
Step-by-step Instructions for How to Make Embossed Leather Labels
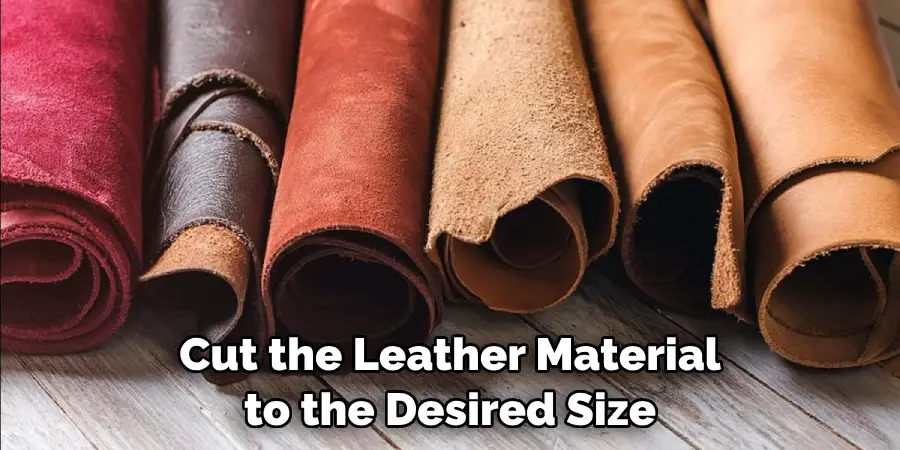
Step 1: Inspect the Leather Material
Choose a piece of leather that is at least the size you need for your label. Inspect the material closely to ensure it is undamaged and suitable for your design. Look for any blemishes, scratches, or unevenness in the texture.
You may also want to consider choosing a higher quality leather as embossed designs can often be felt more prominently on thicker, higher quality leathers.
Step 2: Prepare the Design
Create your design in a program like Adobe Illustrator or Photoshop. The design should be simple enough to fit comfortably within the label size without being too cramped. You can also add any text you wish to include as well.
Cut the leather material to the desired size for your label using a cutting tool. Make sure that you make accurate measurements and cut as straight as possible. If necessary, sand down any rough edges once you are finished.
Step 3: Transfer Your Design onto the Leather
Transfer your design onto the leather by printing it off and then tracing the lines with a pencil or other marking tool. Make sure to use light pressure so you don’t accidentally damage the material.
Using gold leaf, trace out any outlines you want to stand out on your design. This will make the label look more professional and easier to read. Make sure that your design is fully dry before applying the gold leaf.
Step 4: Prepare the Embossing Tool
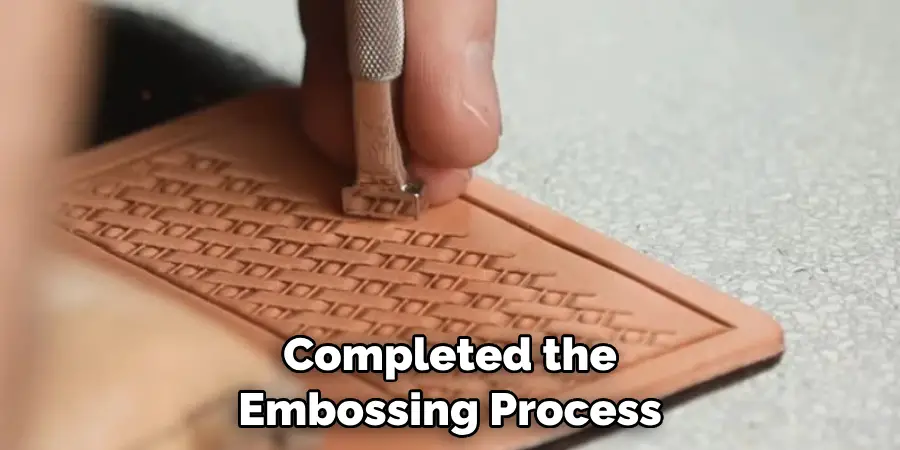
Using an embossing tool, gently press down on each part of the design you want to emboss. Depending on your tool quality, you may need to press harder in some areas than others.
Once all parts of your design are pressed into the leather with the embossing tool, apply heat and pressure to each part using an iron or a heat press. Make sure to apply the necessary pressure and time for each part of your design in order to ensure it is embossed correctly.
Step 5: Remove Excess Gold Leaf
Once all parts of the design have been embossed, use a soft cloth or brush to remove any excess gold leaf that may have been applied. Once all of your embossings is complete, apply a coat of finishing wax to protect the leather label from dirt and moisture. This will also help ensure that your design lasts longer.
Step 6: Allow the Label to Dry Completely Before Use
Allow the leather label to dry completely before using or attaching it. This will ensure that all your hard work has not gone to waste.
With these steps, you can easily create beautifully embossed leather labels for any project. With a bit of practice and patience, you’ll soon have perfected the craft of embossed leather label-making.
Tips for How to Make Embossed Leather Labels
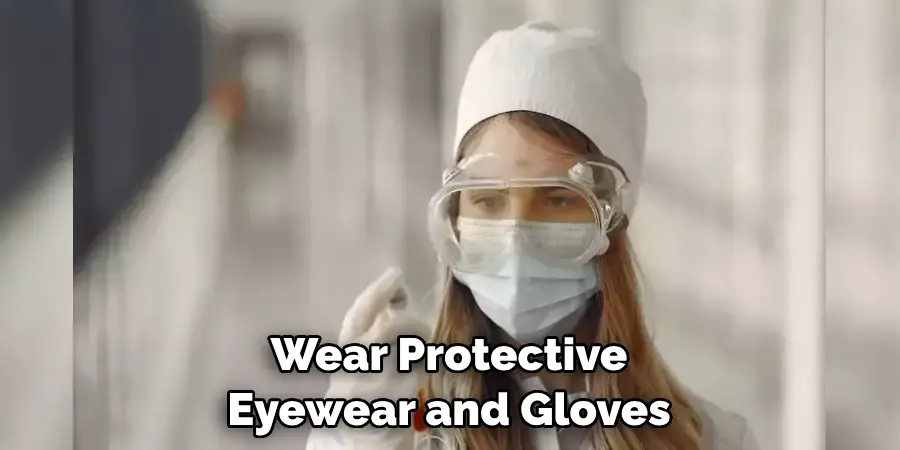
- Have a well-ventilated area when working with leather and embossing tools, as the fumes may be hazardous to your health.
- Wear protective eyewear and gloves while using sharp tools such as needles or knives for cutting and trimming the leather label.
- Avoid using toxic glues or adhesives, and make sure to read the label for safety instructions.
- Place cardboard or a cutting mat underneath your leather pieces when cutting them to protect your work surface.
- Always keep your tools clean and sharpened, which helps prevent slips and injuries while working with leather labels.
- Disconnect all power sources before attempting any repairs or modifications to your embossing tools. This includes plugging the tool out of a power source and unplugging it from the wall outlet.
Following these simple tips can help ensure that you have a safe and successful experience creating unique embossed leather labels. With a little care and caution, your leather label project can go off without a hitch.
What is the Best Way to Store the Embossed Leather Labels When They Are Finished?
When the embossed leather labels are finished, it is important to store them properly to ensure they last for years. The best way to store them is to place them into a plastic container or bag and then place the container or bag in a cool, dry location.
This will help protect them from excess heat and moisture, which can damage leather. Additionally, if the labels are placed in an area that receives direct sunlight, it is important to rotate them periodically to keep them from fading or discoloring.
If the labels will be stored for a long time, placing them in an acid-free envelope or box is beneficial. This will help protect them from dust, dirt, and other potentially damaging elements. Proper storage of embossed leather labels will help ensure that they last for many years.
Finally, it is important to note that any excess wax or oil should be removed before storing the labels to prevent damage and discoloration. With the proper care and storage, the embossed leather labels can last for many years.
How Do You Care for Your Embossed Leather Labels Once They Are Made?
Once you have completed the embossing process and your labels are complete, there are a few things you need to do in order to care for them properly. The most important thing is to make sure that your labels stay out of direct sunlight. Sunlight can cause fading and discoloration over time, so storing your labels in a dark place is best.
You should also use a leather conditioner to keep the leather soft and supple. A small amount of beeswax or natural oil is often enough to protect the labels from cracking and tearing. If you find that your labels have become too dry, it may be necessary to use a specialized leather-care product.
It’s also important to keep your labels dry. Water can damage leather, so avoiding contact with water whenever possible is best. If you find that the label has become wet, you should dry it off as soon as possible using a soft cloth.
What is the Most Important Thing to Consider When Making Embossed Leather Labels?
When creating an embossed leather label, there are several important considerations to keep in mind. First and foremost is the quality of the leather used. If you want a professional-looking label that will last, purchasing high-quality leather is essential to achieve the desired texture and finish.
Another important factor to consider is the type of metal or foil used to emboss the leather. Ideally, this should be an alloy that is both durable and resistant to fading or chipping over time.
Additionally, the label’s choice of font and size should be made carefully, as too small lettering may not appear as clearly when embossed onto the leather.
Finally, when creating embossed leather labels, it is important to consider the label’s overall design and color scheme. Choosing colors that are complementary to one another can help create an attractive and eye-catching label that will stand out from the crowd.
Are There Any Common Mistakes That People Make When Creating an Embossed Leather Label?
Yes, people make a few common mistakes when creating an embossed leather label. First, it is important to ensure that the correct leather type is used for the project.
Not all types of leather can be effectively embossed; choosing the wrong material may cause poor results or even damage to the label over time. In addition, it is important to ensure that the embossing stamp and heat tool are of high quality and in good condition.
Poorly made tools may fail to evenly emboss the leather or create an uneven shape, resulting in a label that looks less than professional. Finally, careful attention should be paid to ensure that all lines of text are properly aligned and that the embossed characters produce a clear, legible font. These steps will help you create a beautifully embossed leather label that will last for years.
Conclusion
In conclusion, making embossed leather labels is a great way to add an extra special touch to your products or projects. The process of embossing involves carving out the desired pattern into the leather, which can be done with hand tools or a die press machine. After the design has been carved out, you then need to heat up and press down the metal plate to create a relief.
Finally, you can finish off the look with paints or dyes if desired. With some practice and patience, you can easily make your own embossed leather labels that will add rather than detract from the overall look of your products or projects. I hope reading this post has helped you learn how to make embossed leather labels. Make sure the safety precautions are carried out in the order listed.