Making jewelry is a fun and easy way to show your creative side. And, best of all, you don’t need expensive equipment or supplies to get started. This article will show you how to make faux leather earrings without cricut machine. Let’s get started!

Faux leather is an excellent material for DIY jewelry. If you don’t know what a Cricut machine is, it’s a specialized machine that can cut intricate shapes out of various materials. The round shape of the earrings is why Cricut machines are so prevalent in jewelry making, but you can get faux leather without one too!
Required Tools and Materials
- Glue Gun
- Scissors
- Leather Cord (About 1.5 inches for each earring)
- Earring Hooks (2 per earring)
- Xacto Knife
- Something to use as a circle template Faux Leather or Leather: I purchased Faux Leather from Hobby Lobby
- Leather Punching Tool (Or a sewing needle)
How to Make Faux Leather Earrings Without Cricut Step by Step Instruction
Step 1: Design Your Pattern
You can make your pattern or use one you found online. For this project, I looked at my current pair of earrings to get an idea of the shape and size I wanted. Then, I drew them out on paper with a pencil until I was satisfied with the design. Once done, then trace over in pen or marker so that it stands out more clearly when traced onto the leather.
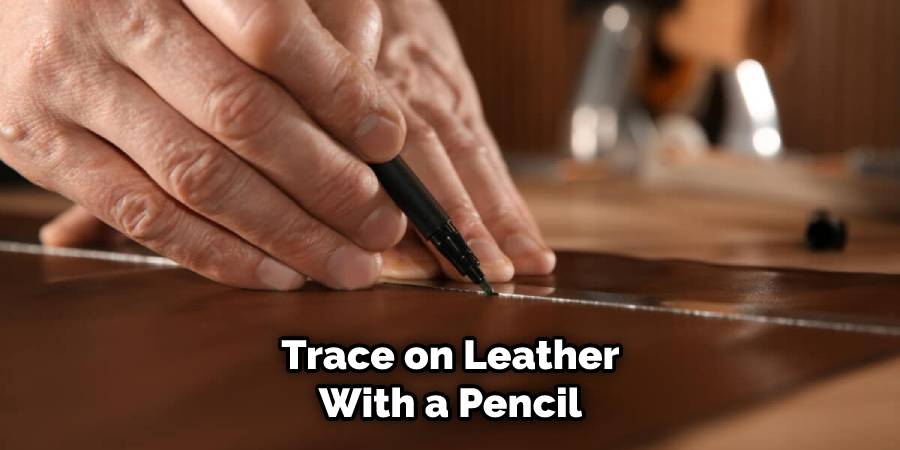
Step 2: Trace Your Pattern Onto Leather Using Your Pencil
It is essential to trace onto the leather with a pencil because it will disappear after you punch through it when you use your stitching tool (or sewing needle). After tracing, cut around the pattern using Xacto Knife. Cut your design smaller, so there is room for error.
Step 3: Punch-Out Each Piece of Leather Using Stitching Tool (Or Sewing Needle)
After cutting around the pattern, use your leather stitching tool or sewing needle to punch out each piece by pushing it through the leather. You can make it until you breakthrough, then pull back. Now punch all pieces apart from one another, so they are now individual pieces used for earrings later on. This is a crucial step in how to make faux leather earrings without cricut.
Step 4: Punch-Out Circle Template Then Trace Using Pen
After punching out all of the pieces, punch out a circle template. Once punched, it can be thrown away or kept as a template for other projects that require circular patterns. To use the template again, place it back into the leather and trace it over with a pen or marker. The traced circle can now be cut off and set aside for later use (possibly to glue onto the backsides of earrings).
Step 5: Glue Earring Pieces Together
Take one piece of leather and make it sticky by applying some hot glue from the glue gun around the edges. Next, apply another layer of glue after waiting one minute for the first layer to dry slightly (you don’t want them to fuse completely). Next, take one piece of leather and overlap it onto the first piece to make a smooth transition.
Step 6: Glue Linked Earring Pieces Onto Circle Template
Now apply some glue to the earrings where you want them to sit on the trace-on-leather circle template. Place glued pieces back down on traced template, making sure that they are straight this time. Ensure they are fully secure, then wait for the glue to dry completely before moving on to the next step.
Step 7: Punch Holes in Circles Using Stitching Tool (Or Sewing Needle)
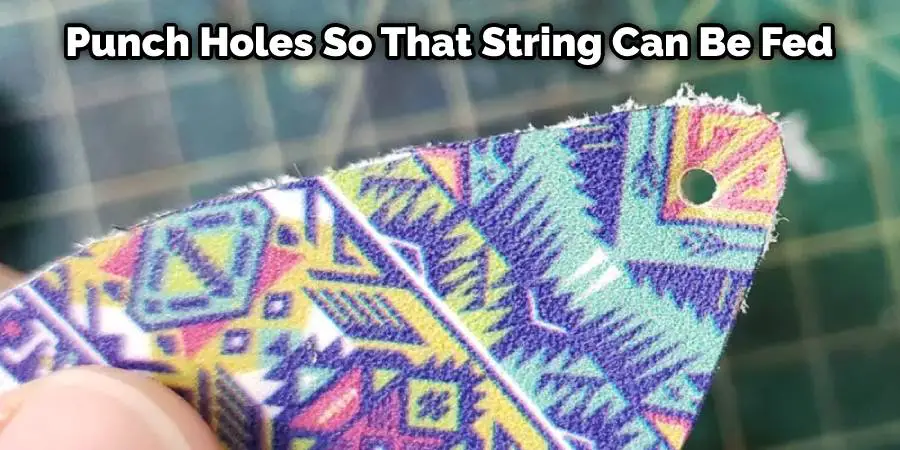
After your two pieces have dried together with a circle template underneath, it is time to punch holes so that string can be fed through later once you have linked the earrings together. Using your stitching tool or sewing needle, punch holes along the traced line until you have made a complete circle. After punching all the way around, go back and double-punch in some areas to save time later when linking items together.
Step 8: Cut String into Two Pieces of Equal Length
For this step, you will need two pieces of string that are equal in length. How much is required will depend on how long your leather cord is and how big you want your earrings to dangle from your ears. Once cut, take one string and thread it through the first hole from the bottom up to exit toward the top of the earring piece. The opposite side of the string should stay threaded down the earring piece.
Optional Step: Twist String
Twist string on either side of the earring to help strengthen it before moving on to the next step. This will lessen the chances that your design might unravel or break while wearing them. Next, apply some hot glue to the twisted area, let dry for about one minute, then twist again with a second-string and hold until glue dries (about two minutes).
Step 9: Link Earrings Together Using Second Piece of String On Opposite Side
Thread the second string length through the hole directly across from the first one exiting out toward the bottom-middle portion of other earring pieces. Twist this around as you did above with the first string length, let it sit for about a minute, then twist again and twist on the opposite end of the earring.
This will help everything secure together thoroughly while allowing enough space for the earrings to rest on your neck if worn as a choker or shorter necklace (finished length should be around 3-4 inches depending on how tight they are twisted and how thick you made them).
Step 10: Cut Second Length of String Short
After both ends have been twisted twice, use some scissors to cut the second length of string off at an angle just above the final twist, then burn the frayed edge with a lighter to eliminate any unevenness that might occur from cutting. You can also apply some more hot glue over the area where the string was cut to ensure it doesn’t unravel during wearing throughout the day/week.
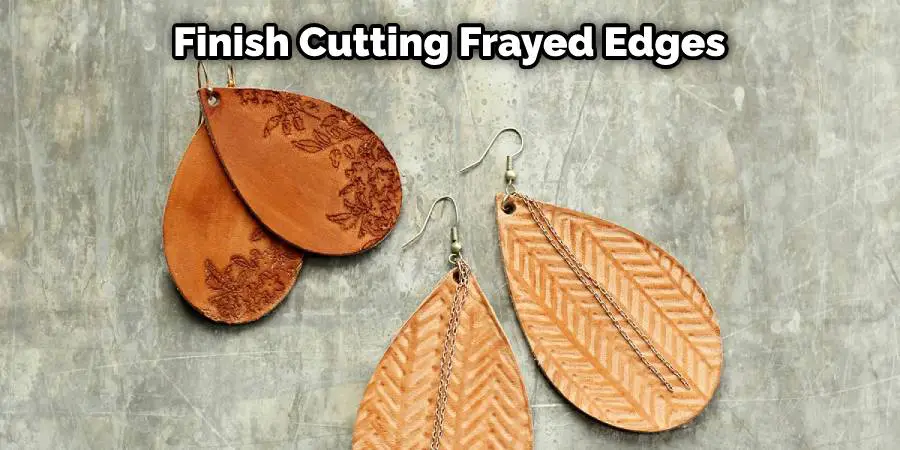
Step 11: Finish Cutting and Burn Frayed Edges
Now that your earrings are complete, you can finish cutting any remaining frayed edges of string until they look relatively friendly. You can also apply some more hot glue over the area where the line was cut to ensure it doesn’t unravel during wearing throughout the day/week. After everything has dried completely, all that’s left for you to do is put them on.
Step 12: Wear Earrings
Earrings can be worn as a choker/necklace or as a shorter dangle earring by threading one end through the top of the ear and coming back down the other side. How many times it is threaded will affect how long they dangle from the ears by moving up and down accordingly.
Clip-on is great for making sure that everything stays in place while you wear them, but after clipping on, make sure to take a small piece of string and pull it up over the clip, so nothing gets caught behind it during wearing. This will make your faux leather earrings last longer with less risk of breaking. These steps will help in how to make faux leather earrings without Cricut.
Frequently Asked Questions
Can You Make Leather Earrings Without a Cricut?
It depends on the type of leather earrings you are making. However, generally speaking, it is possible to make leather earrings without a Cricut.
If you are using thin leather, it is likely that a standard sewing machine can be used to sew the earrings together. If you are using thicker leather, then a Cricut may be necessary to cut out the pieces of leather. Additionally, some people may use a hot glue gun or other adhesive to attach the leather pieces together.
What is the Best Glue for Faux Leather Earrings?
There are a variety of types and brands of glue that can be used to attach faux leather earrings to the ear, depending on the type of earrings and the material they are made from. Some popular types of glue include:
1. E6000 glue – This type of glue is ideal for attaching metal or plastic earrings to the ear, as it is strong and durable.
2. Hot glue gun – This type of glue is useful for attaching small objects, such as faux leather earrings, to larger objects, such as the earring posts.
3. Glue stick – This type of glue is useful for attaching small pieces of fabric or paper to the surface, such as a faux leather earring backing.
It is important to choose a suitable glue for the particular type of earrings and material being used. Once the correct glue has been selected, it should be applied to the earring post and allowed to dry. If any adjustments need to be made to the earrings after they have been attached, a fresh coat of glue should be applied and allowed to dry again.
Does Faux Leather Break Easily?
Leather is a durable material, but like all materials it can break if not handled properly. Faux leather is made from a variety of materials, including leather, synthetic materials, and even plastic. All of these materials have their own strengths and weaknesses, which can affect how easily they break.
Synthetic materials are generally more durable than traditional leathers, but they also tend to be less expensive and less flexible. They are typically used in applications where durability and flexibility are not as important as cost and weight.
Plastic materials are the weakest of all the materials used for faux leather, but they also have the advantage of being non-toxic and resistant to water damage. They are often used in applications where water resistance is not a critical requirement, such as applications that require light weight or a low cost.
Is Faux Leather Cheaper Than Real?
The price of faux leather may vary depending on the brand, style, and color. However, it is generally safe to say that faux leather is cheaper than real leather.
Conclusion
So, now that you know the basics of how to make faux leather earrings without cricut machine, it’s time for you to get creative! You can create any design or pattern you want and add some personality to your jewelry collection with these simple steps. Don’t be afraid to experiment with different colors and materials- the possibilities are endless! So, have fun with it and happy crafting!
You may also like – How to remove stains from faux leather