
Are you looking to make a fashion statement with something that will stand the test of time? Look no further than leather belts! Not only are they stylish, but when cared for properly, they can last for years.
In today’s blog post, we’ll dive into the process of how to make leather belts from scratch – outlining everything you need to know in order to craft the perfect custom accessory. Keep reading if you’re eager to learn more about this classic piece and how it can add a unique touch to your wardrobe!
Supplies You Will Need to Make Leather Belts
Before you can start making your own leather belt, you’ll need to gather some materials. All of these items can be found at local craft stores or online retailers:
- Leather (choose a quality hide that is firm, yet still has some give)
- Cutting tools like scissors and an X-Acto knife
- Heavy-duty thread
- A piece of scrap wood (optional)
- Leather dye in your desired color or shades
- Buckles, snaps, or other decorations for personalization
Step-by-Step Guidelines on How to Make Leather Belts
Step 1: Cut the Leather
Measure and cut your chosen leather using the cutting tools you’ve gathered. The size of the belt will depend on how wide and long you want it to be, but make sure that it is at least an inch longer than your waist size. While cutting, be sure to leave a few extra inches on both ends so you can trim them later on.
If needed, use scrap wood as a surface for cutting more intricate pieces.
Step 2: Mark the Leather
After cutting, lay the leather flat on a piece of scrap wood or another hard surface. Use a ruler to measure out 1-inch intervals along its length and then use an awl to punch small holes into the leather where the marks are made. This will allow you to add a buckle or other decorations later on.
Step 3: Color the Leather
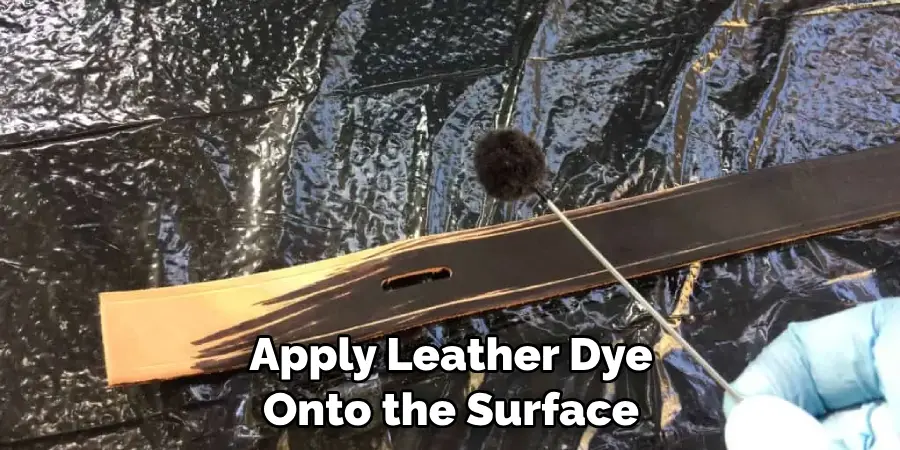
Once your leather is cut and marked, it’s time to give it some personality. Apply leather dye onto the surface of the belt with cotton swabs or a sponge brush. To get an even finish, make sure to apply the dye in thin layers and let them dry completely before adding more. Choose several colors to mix and match or just stick with one for an understated look.
Step 4: Attach the Buckle
Once you’ve finished dyeing the leather, it’s time to attach the buckle. Thread sturdy waxed thread through a needle and then sew it through the holes along your leather belt. Make sure it’s tight enough to hold the buckle in place as you backstitch the ends.
After the buckle is attached, trim off any excess thread and leather so that your belt looks neat and tidy.
And there you have it! With just a few simple steps, you’ve created your very own custom leather belt. Whether you’re looking to finish off a casual outfit or dress up something more formal, this timeless accessory is sure to make a statement. Enjoy!
Additional Tips and Tricks to Make Leather Belts
1. Choose a quality leather for your project. Not all leather is created equal, and the quality can make a big difference to the finished product. Go for genuine leather from reputable sources if possible.
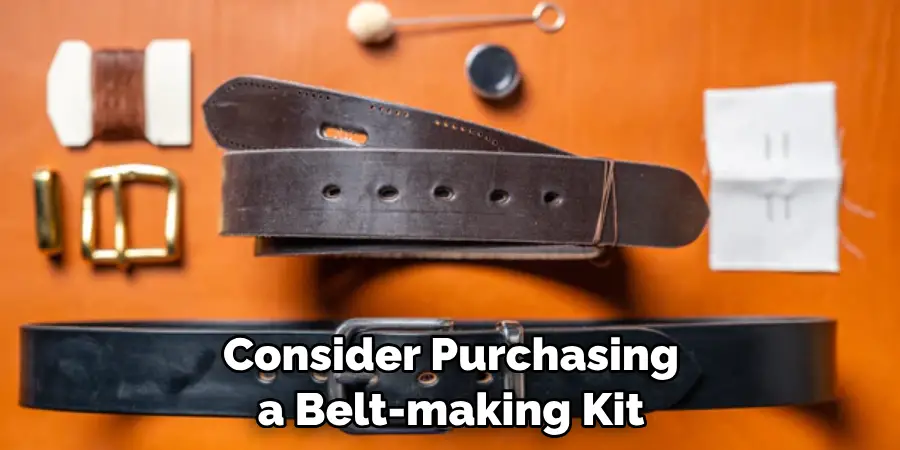
2. Consider purchasing a belt-making kit that includes pre-cut pieces, buckle sets, hardware, and tools for an easy start.
3. Measure your waist or hips to get the correct belt size and adjust accordingly.
4. Cut pieces of leather to the desired length, using a sharp knife or rotary cutter for accuracy. Ideally, these should be 1 ½ – 2 inches longer than necessary, as they can be easily trimmed down if needed.
5. Mark where the holes for the buckle should go and punch them out with an awl or hammer and nail.
6. Attach the buckle to one end of the belt, making sure that it is securely fastened. Use rivets if possible; otherwise, use a strong adhesive such as epoxy glue or contact cement.
7. Cut the edges of the belt to ensure a neat finish and then dye or paint it in the desired color.
8. Apply a waterproofing sealant to protect the leather from fading and cracking, as well as make it more durable overall. Regularly condition your belt with a good quality leather conditioner to keep it looking its best.
9. If you want to add extra detail, consider using inlays or contrast stitching for an eye-catching look.
Making leather belts is a fun and rewarding activity that can be done with minimal tools and supplies. With some practice and patience, you can create unique and stylish accessories that will last for years to come.
Things You Should Consider to Make Leather Belts
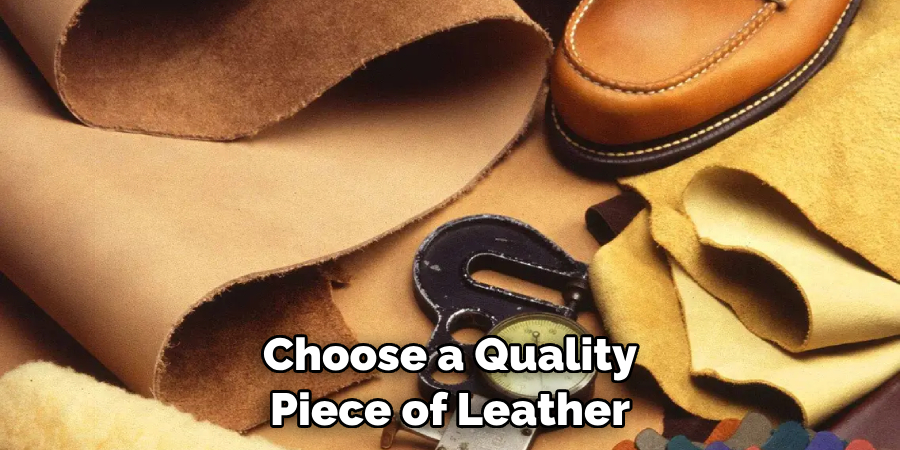
1. Quality of the Leather:
When making leather belts, it is essential to choose a quality piece of leather that is strong and durable enough for your needs. Look for full-grain leather which has not been split or corrected in any way as this will be more long-lasting and less likely to tear or crack over time. Choosing a quality piece of leather with the right thickness can also help to ensure your belt is strong and long-lasting.
2. Quality of the Hardware:
The hardware you choose for your belt is just as important as the leather itself. Look for metal buckles and clasps that are strong and durable, such as those made from stainless steel or brass. Make sure they fit together snugly and securely to avoid any slipping or loosening over time.
3. Type of Stitching:
To give your belt extra strength and durability, consider using a strong thread for your stitching. Waxed linen or polyester thread is the best choice as it will be more resistant to fraying and stretching over time. If you are working with thicker leather, use an even heavier thread to ensure extra strength.
4. Finishing Touches:
Finally, consider adding some finishing touches to your belt such as a hand-stamped design or a coat of leather conditioner to give it an extra touch of luxury and protect the leather from wear and tear. With the right attention to detail, you can create a unique and eye-catching belt that will last you for years to come.
5. Finishing the Edges:
To finish your leather belt, use a burnishing tool or sandpaper to smooth down the edges and create a nice, rounded look. Be sure to use protective gloves when burnishing as this can be a dangerous process if done incorrectly. Once the edges are smooth, you can apply a sealant or wax to protect them from water and dirt damage.
By following these considerations, you can create a high-quality leather belt that is strong and durable enough to last you for years. Investing in quality materials and taking the time to craft your own belt gives it a unique look and feel that cannot be replicated with mass-produced products. With a few tools and some practice, anyone can make their own beautiful leather belt!
Frequently Asked Questions
What Type of Leather is Best for Making Belts?
Vegetable-tanned leather is the most commonly used and recommended material for belt-making due to its durability and flexibility.
However, it can be difficult to work with and may require specialized tools like an electric edge creaser or a burnishing machine. Other types of leather such as latigo, bridle, and Chrome-tanned are also suitable for making belts, but may not be as durable or pliable.
What Tools Are Needed to Make Leather Belts?
The basic tools needed for making a belt from leather include an awl (or hole punch), scissors, needle and thread, a mallet or hammer, an edge creaser (for marking lines), and a burnishing machine (for polishing the belt).
Depending on the type of leather used, some specialized tools such as an aniline dye applicator may also be necessary. Additionally, you will need various materials such as rivets, buckles, and dye for the belt.
How Do I Cut Leather to Make a Belt?
Leather should be cut using sharp scissors or an electric leather-cutting tool. To ensure accurate measurements, carefully use a ruler and marker to make lines that indicate where you will cut, then gently press along these lines with the edge creaser tool before cutting. Additionally, it’s important to make the cuts as cleanly as possible without any jagged edges.
Conclusion
To sum it up, how to make leather belts can be a rewarding and fun process. It’s an ideal way to add your own personal touch to an everyday accessory. Whether you use a pre-made belt or start with a blank canvas, there are many steps you can take to make sure your belt looks just the way you want it to look.
From finding the right leather material to cutting the holes perfectly, from creating designs with inks and paints or embossing patterns to finishing off with buckles and rivets, taking the time and care to make your leather belts can really pay off in terms of both satisfaction and style!