
Are you the proud owner of a leather hat that needs reshaping? With proper supplies and some patience, it’s possible to transform an outdated or misshapen leather hat into something impressive.

Whether you’re restoring a classic fedora, outfitting yourself with cowboy chic, or just making sure your lid looks good for special occasions, there are numerous ways to give your favorite headgear a new lease on life. In this blog post, we’ll take you through all the steps needed for how to reshape a leather hat! Keep reading to learn more!
Supplies You Will Need to Reshape a Leather Hat
- A leather hat
- Hot water
- Towels
- Hat-shaping bands or strips of cotton fabric
- Hard surfaces, such as a table or countertop
- Hat pins or other small objects for weighting down the fabric strips, if needed
Step-by-Step Guidelines on How to Reshape a Leather Hat
Step 1: Soften the Leather with Hot Water
To start reshaping a leather hat, submerge it in hot water for about 10 minutes. This will soften the leather and make it more pliable, which is crucial to a successful reshaping job. Once submerged, remove the hat from the water and let it cool for at least an hour before beginning work.
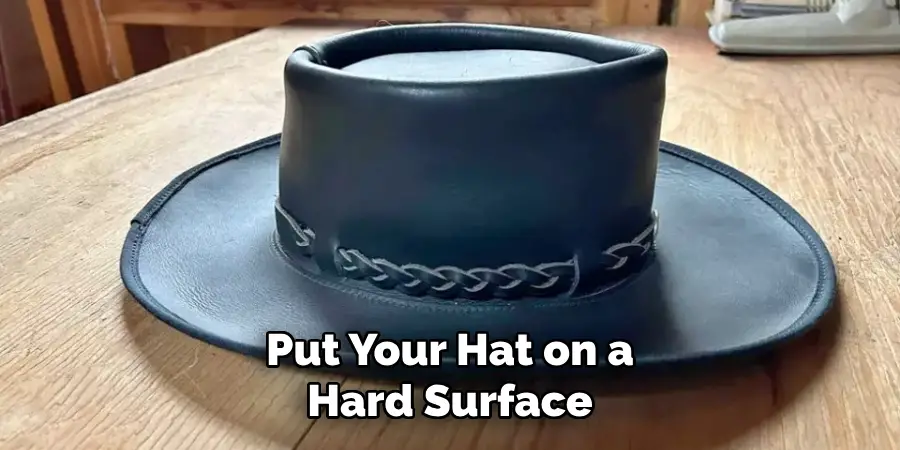
Step 2: Place the Hat on a Hard Surface
Once cooled, put your hat on a hard surface such as a table or countertop. This should be done with care so as not to deform the leather. If you need assistance, you can ask a friend to help you hold it in place. Placing the hat on a hard surface allows you to get an even shape and makes reshaping much easier.
Step 3: Secure it with Fabric Strips or Hat-Shaping Bands
Next, secure the hat in place using strips of cotton fabric or hat-shaping bands. Make sure your fabric is not too tight as this can cause damage to the precious leather. The fabric strips should be pinned down with hat pins or other small objects for weight. This will help you keep the shape of the hat during reshaping.
Step 4: Manipulate and Mold
Once secured, manipulate the hat until it’s shaped to your desired look. This may involve pushing in certain areas to give it a more pronounced shape or pulling the brim to make it wider. Use your hands to mold and reshape, being careful not to damage the leather in the process.
Step 5: Hold in Place with Towels
Finally, fold a few towels over the hat and let it sit for 24-48 hours. This will help keep your newly reshaped look intact. After this, remove the towels and enjoy your newly reshaped leather hat. You’re now ready to show off your sartorial skills with a stylish hat that’s sure to turn heads.
Congratulations on learning how to reshape a leather hat! With these simple steps, you can restore an old favorite or make sure that special occasion headgear looks just right. For more hat care tips and tricks, check out our blog here at Hat Heaven!
Additional Tips and Tricks to Reshape a Leather Hat
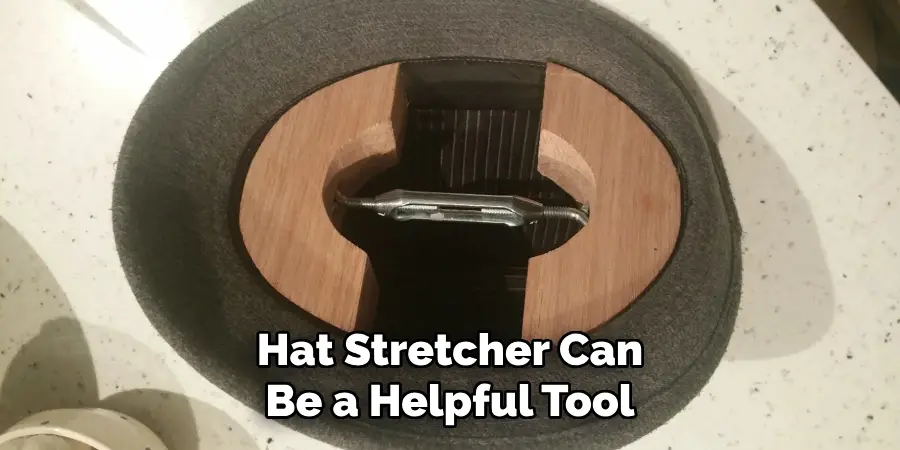
1. A hat stretcher can be a helpful tool to use when reshaping your leather hat. Be sure to get one that is the same size as your hat to prevent any damage or stretching out of proportion.
2. Before starting, make sure that you have enough time and patience to finish the task. It is important not to rush through it in order for the hat to turn out like you want it.
3. You can also use a damp cloth and hot water to loosen up the leather fibers if necessary. Be careful not to get your hat too wet, as this could cause permanent damage.
4. Once the leather has softened, you can start reshaping it using your hands or with a hat-shaping block and mallet. The block and mallet will help the hat keep its shape while you are working on it.
5. Once you have completed reshaping the hat, let it air dry completely before wearing it. You can also use a blow dryer on a low setting to speed up the drying process.
6. After your leather hat has been reshaped, be sure to take proper care of it. Conditioning it regularly with a high-quality leather conditioner or cream will help keep it looking new for years to come.
7. If your leather hat needs more than just reshaping, you may want to consider having it professionally cleaned and restored. This can help restore the original shape of the hat and make it look brand new again.
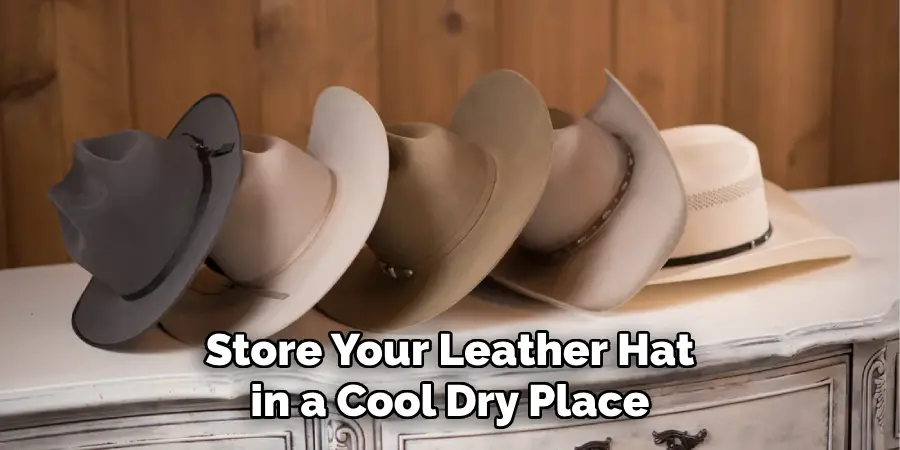
8. Lastly, be sure to store your leather hat in a cool dry place when not wearing it. This will help preserve the shape and keep it looking its best for years to come.
Following these tips and tricks will help you reshape your leather hat and make sure it looks great for years to come. With a little patience and the right tools, you’ll have your leather hat looking like new in no time! Good luck with reshaping your leather hat!
Precautions Need to Follow for Reshaping a Leather Hat
- Make sure the hat is completely dry before starting. Leather can easily shrink or change shape if it is wet.
- Use leather conditioner to make sure your hat retains its properties and does not lose any of its original character.
- Use a wide toothcomb or brush for reshaping, it will help you get even pressure on all sides without damaging the hat.
- Heat is necessary for reshaping; use a hair dryer to warm up the leather until it becomes pliable. Make sure not to overheat it, as this can damage the fibers in the material.
- Take your time when reshaping and make sure you’re keeping an eye on how much of a change you making in the hat’s shape.
- Once you are happy with the results, leave it to cool off and let the leather set in its new shape.
- Finally, apply leather conditioner again to help protect your newly reshaped hat from the elements.
Following these precautions should ensure that your hat is reshaped correctly without any damage. However, if you are ever in doubt about what to do it’s best to seek out a professional’s opinion. With the right guidance and care, your leather hat will look great for years to come!
Frequently Asked Questions
Is It Possible to Reshape a Leather Hat?
Yes, it is possible to reshape a leather hat. Depending on the material of the hat, you can either steam the leather or use a hair dryer or wet towel to soften and reshape the material.
You will need to wear the hat while re-shaping it in order to ensure the new shape fits your head, and that you are happy with how the hat looks. Be sure to use gentle, steady pressure when reshaping so as not to damage or weaken the leather material.
How Long Does It Take To Reshape A Leather Hat?
The time required to reshape a leather hat will depend on the type of material and how much you need to reshape it. In general, you should expect to spend a minimum of 20 minutes reshaping your leather hat.
You may need to work with the leather in several stages, taking breaks as necessary to ensure that the material is soft enough for reshaping without being weakened or damaged.
What Should I Do If My Leather Hat Does Not Fit After Reshaping?
If your leather hat does not fit after reshaping it, then the best course of action is to consult a professional. A tailor or leather craftsman may be able to help you reshape the hat so that it fits properly and looks how you want it to. If this is not an option, then you may need to purchase a new hat that is the right size.

Can I Reshape A Leather Hat Myself?
Yes, it is possible to reshape a leather hat yourself, depending on the type and quality of the material. Make sure you have access to the correct tools for the job, such as a steamer or hair dryer, and use gentle pressure when reshaping the hat. Be patient and work slowly to ensure that you get the desired look of your hat without damaging or weakening the leather material.
What Are The Potential Risks Of Reshaping A Leather Hat?
The potential risks of reshaping a leather hat include damaging or weakening the material, resulting in a hat that does not fit properly or looks inferior. Additionally, mishandling the material can lead to tearing or other damage that may not be repairable.
As such, it is important to use gentle pressure and work slowly when reshaping your leather hat so as not to cause any damage or weaken the material. It is also best to consult a professional if you are uncertain about how to handle the reshaping process.
Conclusion
All in all, knowing how to reshape a leather hat can be a great skill to have, allowing you to maintain or customize the look of your favorite headwear.
However, it is important to be aware of the potential risks associated with reshaping leather hats and always take necessary precautions so as not to damage or weaken the material. If in doubt, consult a professional for assistance. With proper preparation and care, you can successfully reshape your leather hat and maintain its original shape. Happy shaping!