
Resoling your Birkenstocks may seem daunting, but it is actually a simple and cost-effective way to extend the life of your beloved sandals. In this guide, we will walk you through the steps on how to resole Birkenstocks, so you can keep them looking and feeling like new.
The main advantage of resoling your birkenstocks is that it will save you money. Birkenstock sandals are known for their high-quality materials and durability, but the soles can wear out over time. Rather than buying a new pair of sandals, which can be expensive, you can easily learn how to resole them yourself. In this blog post, You will learn in detail how to resole birkenstocks.
Step-by-step Instructions for How to Resole Birkenstocks
Step 1: Inspect Your Birkenstocks
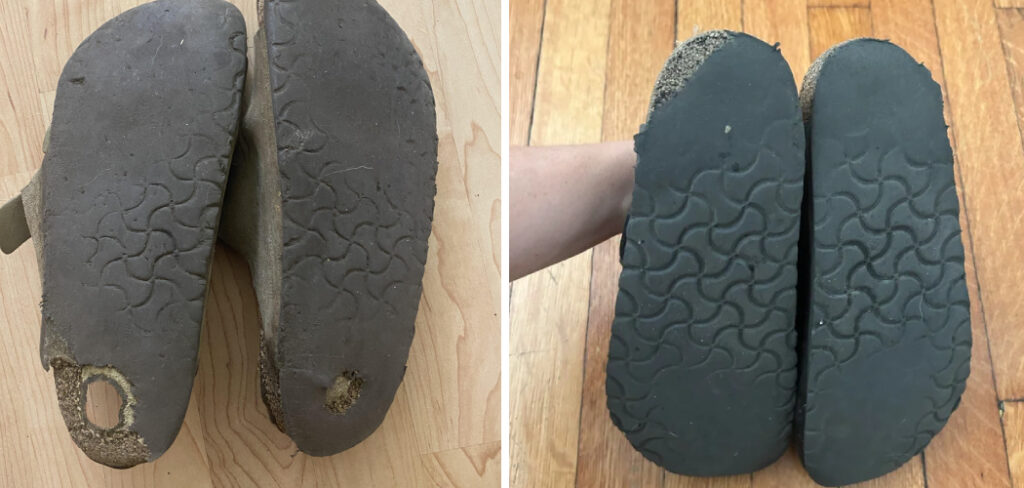
Before starting to resole your birkenstocks, you need to inspect them thoroughly. Check the sole of your sandals for any holes, cracks or uneven wear. Also, check the footbed for any damage or deformities that may affect how your feet fit in the sandals.
Step 2: Gather Materials Needed
To resole your birkenstocks, you will need a few basic materials:
- New Birkenstock soles (can be purchased online or at your local shoe repair shop)
- Sharp scissors
- Sandpaper
- Rubber cement glue
- A flat surface to work on
Step 3: Remove Old Soles
Using the sharp scissors, carefully cut around the edge of the old sole and remove it from the footbed. If there is any remaining glue or debris, use sandpaper to remove it and make sure the footbed is clean and smooth.
Step 4: Trace New Soles
Place the new sole over the old one and trace around it with a pencil or marker. This will serve as a guide when cutting the new soles to fit your birkenstocks perfectly. Using the scissors, cut along the traced line to create new soles for your sandals. It is important to cut as accurately as possible to ensure a good fit on your birkenstocks.
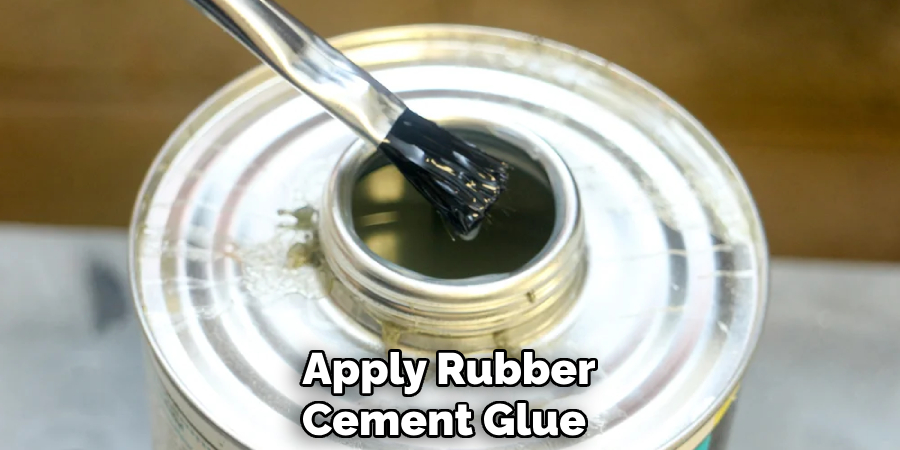
Step 5: Apply Rubber Cement Glue
Using an old paintbrush or small applicator, apply rubber cement glue evenly to the entire footbed of your birkenstocks. Make sure to cover all areas, including the edges. Carefully place the new soles onto the glued footbed, making sure they are aligned correctly with the edges of your sandals. Press down firmly to ensure a secure bond.
Step 6: Let Dry
Allow the glue to dry completely. This can take anywhere from 30 minutes to an hour, depending on the type of glue used. Once the glue is dry, use scissors to trim any excess material around the edges of your sandals for a clean finish. You can also use sandpaper to smooth out any rough edges.
Congratulations, you have successfully resoled your birkenstocks! Now you can enjoy wearing them for many more years to come. Just make sure to regularly check and replace the soles as needed to maintain the comfort and durability of your sandals.
Precautions for How to Resole Birkenstocks
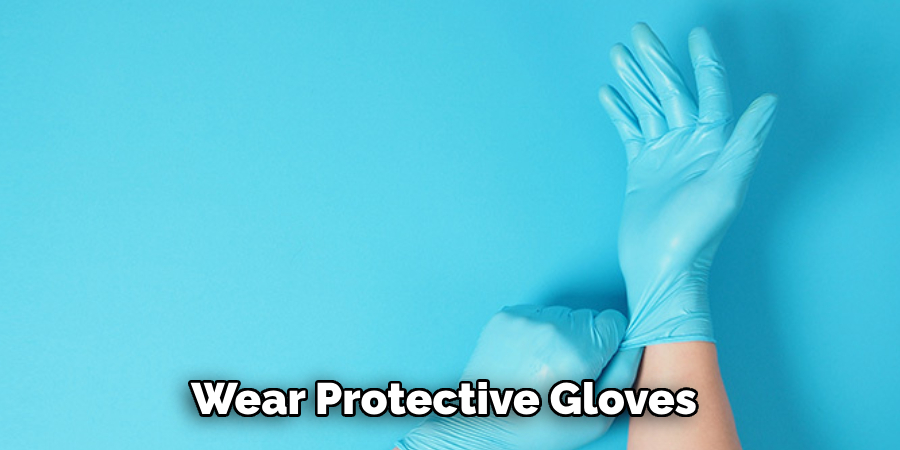
- Wear protective gloves to avoid direct contact with the adhesive and chemicals used in the resoling process. This will protect your skin from irritation or potential burns.
- Work in a well-ventilated area to prevent inhaling any fumes from the adhesives and chemicals.
- Only use specialized adhesives made for shoe repairs when resoling your Birkenstocks. Avoid using super glue or other household adhesives as they may damage the shoe.
- Familiarize yourself with the resoling process before attempting it. This will help prevent mistakes and ensure a successful outcome.
- Use clamps or weights to hold the sole in place while the adhesive dries. This will prevent any shifting or misalignment of the sole.
- Take your time when removing the old sole and cleaning the shoe. Rushing this step may cause damage to the shoe or affect the adhesion of the new sole.
- If you are unsure about resoling your Birkenstocks, it is always best to seek professional help. Improper resoling can permanently damage your shoes.
How Long Does It Take for Birkenstocks to Wear Out?
Birkenstocks are well-known for their durability and longevity. However, like any other shoe, they will eventually wear out over time. How long it takes for Birkenstocks to wear out depends on a few factors such as frequency of use, type of sole, and care. Generally speaking, Birkenstock sandals can last anywhere from 2-4 years with regular use.
This is because the cork footbed and leather straps can become worn down from daily wear and tear. However, with proper care and occasional resoling, you can prolong the life of your Birkenstocks.
Now, let’s dive into how to resole your Birkenstocks. The process involves replacing the sole with a new one, which can be done at a cobbler or by purchasing a resole kit.
If you choose to do it yourself, make sure to follow the instructions carefully and use the correct materials. First, prep your Birkenstocks by cleaning them with mild soap and water. Next, remove the old sole using pliers or a scraper. Then, apply adhesive glue to both the footbed and new sole before carefully pressing them together. Allow time for the glue to dry and set before using your Birkenstocks again.
What Are the Common Signs That Your Birkenstocks Need to Be Resoled?
When it comes to resoling your Birkenstocks, there are a few things you should consider. One of the most important factors is the type of sole that your Birkenstocks have. There are three main types of soles used in Birkenstock sandals: EVA, cork, and rubber.
EVA (ethylene-vinyl acetate) soles are lightweight and flexible, making them a popular choice for many Birkenstock styles. However, they are known to wear out faster than other types of soles. Cork is the traditional sole material used in Birkenstocks and is known for its comfort and durability. Lastly, rubber soles are most commonly found in newer styles of Birkenstocks and tend to be more durable than EVA soles.
Factors Affecting the Frequency of Birkenstock Resoling
Several factors can contribute to how often you will need to resole your Birkenstocks, including:
- Your Activity Level: If you wear your Birkenstocks daily and engage in activities that put more strain on the soles, such as hiking or running, you may need to resole them more frequently.
- Your Body Weight: The weight of your body can put pressure on the soles of your Birkenstocks and wear them down more quickly, meaning they will need to be resoled more often.
- Your Gait: How you walk or run can affect how often you will need to resole your Birkenstocks. If you have an uneven gait or tend to put more pressure on one side of your foot, that can wear down the soles faster.
- The Quality of the Birkenstock Soles: Cheaper, lower-quality Birkenstocks may need to be resoled more frequently compared to higher-quality ones. This is because the materials used in cheaper versions may not withstand regular wear and tear as well.
- Environmental Factors: The climate and terrain you live in can also impact how often you will need to resole your Birkenstocks. For example, if you live in a rainy or snowy area, the moisture and salt on the ground can cause faster wear and tear on the soles.
- Maintenance Habits: Proper care and maintenance of your Birkenstocks can also affect their longevity. If you regularly clean and protect the soles, they may need to be resoled less frequently.
- The Type of Resoling Done: Depending on the method used for resoling, the frequency can vary. Some methods may last longer than others, meaning you won’t have to resole as often.
Knowing these factors can help you better understand how to prolong the lifespan of your Birkenstocks and when it may be time to resole them. By taking care of your Birkenstocks and being aware of these factors, you can ensure that they stay comfortable and durable for years to come.
Are There Any Ways to Prevent the Need for Frequent Resoling of Birkenstocks?
While factors such as activity level and body weight may be out of our control, there are some steps you can take to prevent the need for frequent resoling of your Birkenstocks. These include:
- Rotating Your Shoes: By alternating between multiple pairs of Birkenstocks, you can spread out the wear and tear on each pair and minimize the frequency of resoling.
- Avoiding Excessive Moisture: As mentioned earlier, moisture can cause damage to the soles of your Birkenstocks. Avoid wearing them in wet or snowy conditions and be sure to dry them off if they do get wet.
- Using Protective Products: Applying waterproof sprays or protective oils can help protect the soles of your Birkenstocks from environmental factors that can cause damage.
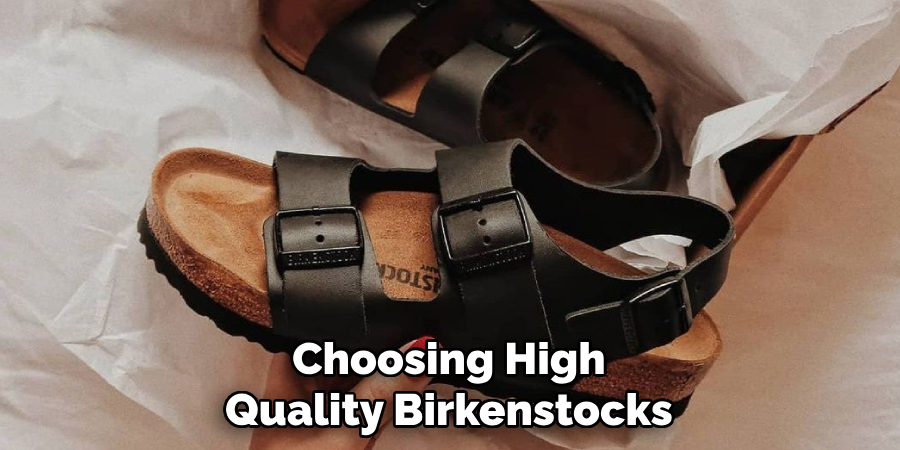
- Choosing High-Quality Birkenstocks: Investing in a pair of well-made, high-quality Birkenstocks can save you money in the long run. These typically have more durable soles and may not need to be resoled as often.
By following these tips, you can potentially extend the lifespan of your Birkenstocks and reduce the frequency of resoling, saving you time and money in the long run. So next time you slip on your beloved Birkenstocks, remember to take care of them so they can continue to support your feet for years to come.
Conclusion
In conclusion, learning how to resole birkenstocks is a valuable skill for any shoe enthusiast. Not only does it save you money, but it also allows you to customize and personalize your favorite pair of Birkenstocks. With the proper tools and techniques, you can easily extend the life of your beloved sandals and keep them looking brand new.
Remember to always start by assessing the condition of your Birkenstocks and deciding which resoling method would work best for them. You can choose between a DIY approach, using a resole kit, or taking them to a professional cobbler.
Whichever method you choose, make sure to follow the instructions carefully and take your time to ensure a successful result. I hope this article has been beneficial for learning how to resole birkenstocks. Make Sure the precautionary measures are followed chronologically.