Leather couches are a popular choice for furniture because they are stylish and durable. However, over time the leather can become worn and faded. If you want to give your couch a new look, you can reupholster it with leather. This is a project that can be done by most people, but it does require some basic skills and knowledge.

In this article, we will walk you through the steps involved in how to reupholster a couch with leather. We will also provide some tips on how to make the process easier. Reupholstering is the act of changing an old seat cushion with new, more comfortable materials. Sometimes the entire couch is reupholstered, but often just the seat cushions are replaced.
Things You’ll Need
- Leather
- Flat nose Screwdriver
- Nails
- Heavy Duty Scissors
- Chalk
- Hammer
- Staple gun and staples or upholstery tacks and an upholstery hammer.
How to Reupholster a Couch With Leather Step by Step Instructions
Step 1: Remove Existing Leather
Before you start, remove the existing fabric from your couch. How to do this is different for every couch and will vary depending on what type of couch it is.
If nails are holding the fabric to the couch, you’ll need a flat nose screwdriver or an upholstery hammer that will work instead of buying a specialized tool just for this purpose. Then, all you need to do is tap each nail out carefully so that they don’t ruin the wood behind them and then pull the fabric off.
Ensure that you store all metal furniture components like screws and springs someplace where they won’t get lost and remember where they go when it’s time to put everything back together. You can purchase replacement materials at any upholstery supply store for a minimal cost.
Step 2: Preparing New Leather
Before you can apply the new leather to your couch, you need to prepare it. First, cut a piece as wide as the seat of the couch and long enough to go from front to back with about 2-3 inches extra, just in case. How much material you’ll need will vary depending on how oversized your couch is.
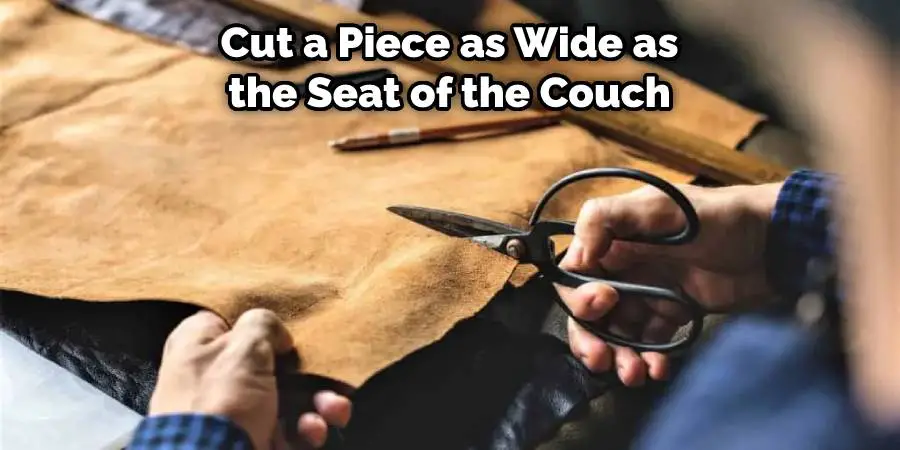
When measuring out your leather, be sure that it’s straight and not crooked because this will affect how well the end product fits together. If you’re not good at cutting straight lines with scissors, try using an x-acto knife or, even better yet, invest in a heavy-duty pair of fabric scissors.
After you cut out your pattern, you want to make sure that they are perfectly symmetrical with one another so that you have a nice even line on the outside when it’s done.
Step 3: Preparing New Fabric
Next, get out your new fabric and lay it flat on the floor. How you’re going to prepare this will depend on what type of fabric is available to purchase at your local upholstery supply store.
In this example, we will use flat, pre-quilted fabric that is one piece. If you have a three-piece pattern, the upholstery techniques will need to be slightly adjusted accordingly.
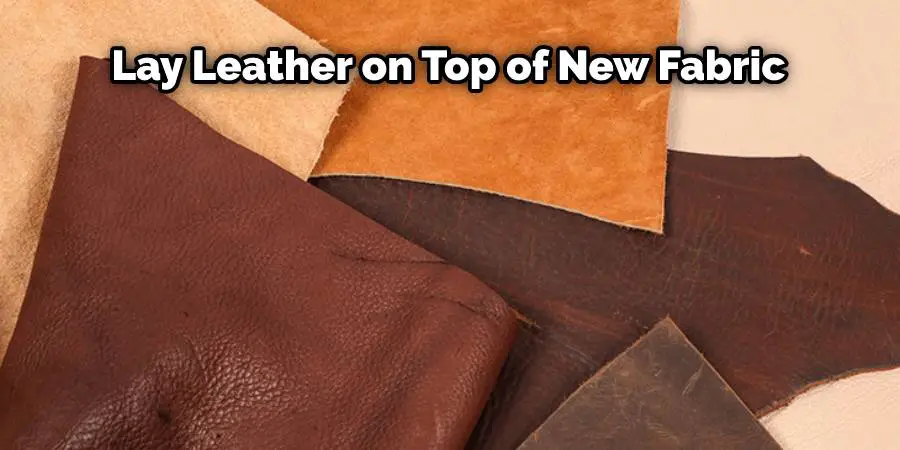
Now, lay your leather on top of your new fabric, lining it up along the outside edges and matching the lines carefully so that when they come together, there is no overlap or extra material in any areas. How much additional material you allow in each section will affect how well everything fits together.
Next, cut around the inside of where your leather meets, making sure that you leave about an inch from where it begins to meet itself because this is where the seam will show later on if it isn’t done correctly.
Then, fold the edges of your new fabric over and tack it down to make sure that everything fits together well by tacking down both sides of each section on the insides all of the ways around. How much material you leave is up to you, but don’t leave too little or too much because it will affect how easy it is to put everything back together later.
Step 4: Creating New Seams
Now, lay your couch face down on a flat surface to work with all four sides of it at once. If necessary, some couches have screws underneath them holding them in place, so if yours does have these, use a screwdriver to remove them first before turning it over.
Once you’ve flipped your couch over, make sure that it’s laying flat, and then center your leather section onto the couch’s seat, making sure that it lays comfortably inside of each well in the upholstery. How well it lays is dependent on how much material you’ve allowed for in each section when you cut out your new pattern earlier.
When everything is laid down properly, begin tacking everything together, starting from one end and working to the other, starting with the sides first because these are more visible than anything else on your new seat cover. Make sure that all of your seams are lined up evenly before moving forward to come together seamlessly later on after they’re connected. How you combine them will also depend on what type of upholstery supplies you have available at your local store.
Step 5: Reattaching the Seat Cover to Your Couch
After laying your leather and tacking all of the pieces together, carefully flip your couch back over so it’s right side up. Then, using a screwdriver or drill, reattach each of the screws underneath to support everything on top of them where they can’t be seen.
After you’ve fastened down all four corners with the screws, go ahead and turn your couch over again so that it’s face down again. How tight or loose you have each one depends on how well they fit, but if they are too loose, try pulling at the fabric from front to back while someone holds the couch steady and then gently tighten them up until they’re secure enough to keep it place without slipping around when you try and move it.
How tight or loose you make them also depends on the type of fabric that you’re using, but if it’s stretched too tightly before being stapled in the next step, it will be challenging to staple through without tearing.
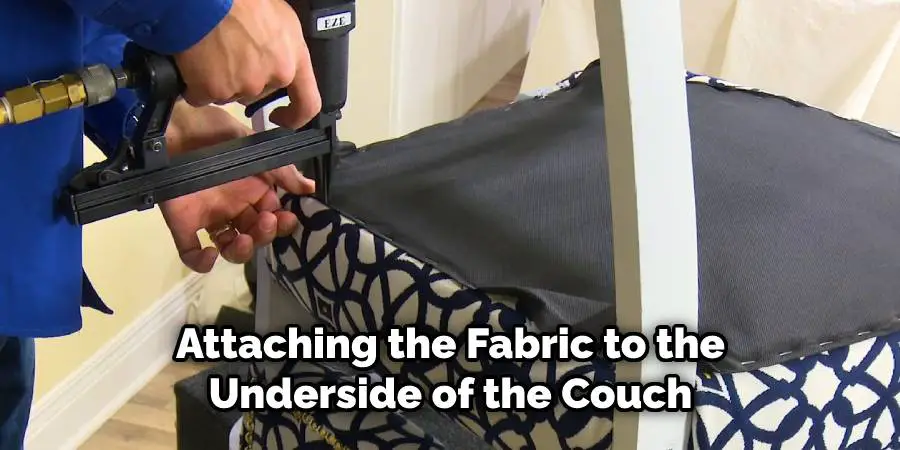
After you’ve attached all four corners as securely as possible, use a wooden block as a guide and go underneath with your staples gun and begin attaching the fabric to the underside of the couch, making sure that every staple goes through that they stay secure. Again, how much pressure should be used is up to you, but these shouldn’t have to be put down extremely hard because this could cause damage to both your new leather seat cover and your couch itself.
Step 6: Finishing Touches
Once you’ve finished attaching the fabric to your couch, take off your gloves by pulling them inside out and then cleaning up any extra staples or loose ends of thread that show using a pair of sharp scissors. How much time you spend doing this is up to you, but if you leave things for too long, they could affect how well the leather seat cover will fit later on.
Then, flip your couch back over so that it’s right side up and use small tacks or nails to attach each section of leather where they meet including all four sides, because these are typically unsecured underneath after step 4. How many staples or nails you’re able to stick in before having to stop also depends upon your type of material as well as the size of your couch; however, these should be placed in at regular intervals so that they can act as extra support when everything is put back together.
After the tacks or nails are in, you can go ahead and turn your couch over once more so that it’s laying face down again and use a staple gun to attach the corners by pulling them together so that they meet then stapling through both layers into place underneath.
How tight or loose you make these depends on how well you’ve sewn or fastened the seams earlier but like before, only enough pressure should be used because any excess will cause damage. Finally, flip your couch over to look at your finished product one last time if everything looks good, congratulations! You’re done. These steps will help in how to reupholster a couch with leather.
Frequently Asked Questions
Can I reupholster a couch myself?
Yes, you can reupholster a couch yourself. There are a few things you’ll need to do in order to get the job done properly, though. First, you’ll need the right tools – a straight edge, a saw, and some seam rippers (or a serger if you have one). Then, you’ll need to measure your couch and find the right fabric. You can choose a fabric that is similar to the original or use a design that you like. Once you have the fabric selected, it’s time to start cutting. Make sure to account for any extra folds or bumps that may be on your couch – these will create extra seams that will need to be sewn down. After cutting and sewing, it’s time to finish up by applying the finish and fixing any mistakes that come up. Congratulations! You have successfully reupholstered a couch yourself!
Can you reupholster over existing leather?
Yes! You can reupholster existing leather with a new coat of fabric. However, be sure to account for any gaps or tears in the leather and fix them before you start sewing. Also, make sure that the seams are sewn correctly so that there is no possibility of water permeating through and damaging your furniture’s finish.

Once you have finished reupholstering, be sure to test it out by spraying some water on it from a distance to see if there are any leaks or problems.
What is the Average Cost to Reupholster a Sofa
The average cost to reupholster a sofa ranges from $250 to $450. This price depends on the size, fabric, and materials that are used in the reconstruction project. It is important to make sure that you choose a reputable firm with years of experience in this field so that your sofa will look its best once completed.
When selecting your fabrics, it’s important to consider what type of upholstery you want: leather or synthetic. The choice largely depends on how often you would like to use the couch and whether or not stains occur easily. Leather tends to be more expensive but lasts longer thanks to its natural oils and characteristics. Synthetic cushions tend not to stain as easily but may require periodic cleaning because they don’t retain moisture well.
It is also helpful if the contractor can provide a detailed design for your space before beginning work in order to ensure accuracy and proper placement of all furniture adjustments during the installation time frame.
What is the Best Material to Recover a Sofa?
There are a few different materials that can be used to recover a sofa. The most popular option is neoprene, which is made from synthetic rubber and works well because it’s waterproof and difficult to stain. Other options include cotton canvas, silk fabric, or faux leather.

Once you select the material, determining how large of a piece you need depends on the size of your sofa and any repairs that may need to be done. For example, if your couch needs sewing together, then you’ll need more than one piece of material (for both sides). However, if just some minor tears need fixing, then only one piece will suffice.
Once you have selected the material and secured it in place with staples or screws (if necessary), start spraying an adhesive onto either side of the cushion coverlet/padding and press down firmly*. Then wait for 30 minutes before smoothing out any wrinkles with a flat iron**.
Conclusion
You’ve successfully reupholstered your old couch with leather; now it’s time to cap off the project by applying a protective finish. This will keep dirt and dust from sticking to the surface of your new upholstery work. We recommend using an acrylic-based water repellent that can be applied in a spray or wipe form, so you don’t have to worry about any drips. It also won’t change the color of your fabric! We hope you have learned how to reupholster a couch with leather.
