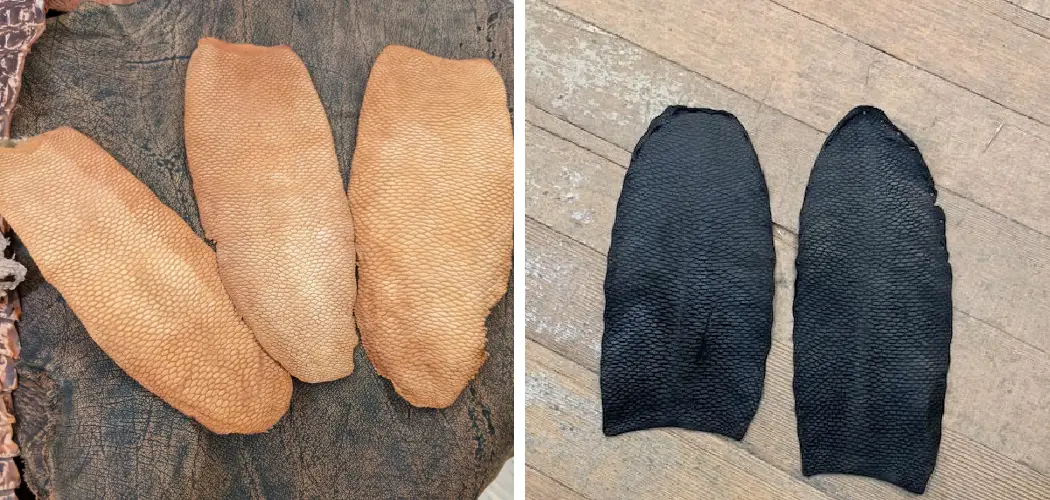
Tanning a beaver tail is a traditional method of preserving the hide and making it more durable. It also gives the hide an attractive, glossy sheen. This makes it perfect for use in crafting hats, bags, clothing, or other items. Tanning a beaver tail is not difficult to do, but there are some steps you need to take to ensure it is done properly.
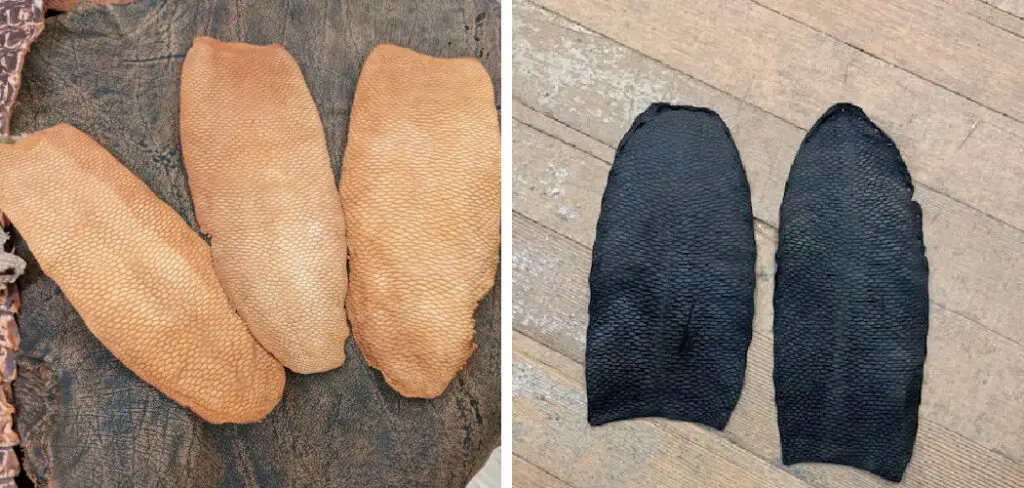
Tanning a beaver tail offers several advantages. First, it allows you to preserve the fur and create a unique keepsake that will last for years. Tanning also ensures that the fur stays soft and supple and provides protection from environmental damage such as UV exposure and dirt.
Additionally, tanning can help keep the scent of the animal away from your home. In this blog post, You will learn how to tan a beaver tail in detail.
Step-by-Step Processes for How to Tan a Beaver Tail
Step 1: Inspect the Beaver Tail
If the beaver tail is freshly caught, it should be soaked overnight in a mixture of one part hydrogen peroxide and two parts water. This will help to remove any blood or dirt residue that may still be on the tail. Take a sharp knife and carefully skin the fur off of the tail. Once the fur is removed, use a wire brush to remove any remaining tissue from the underside of the fur.
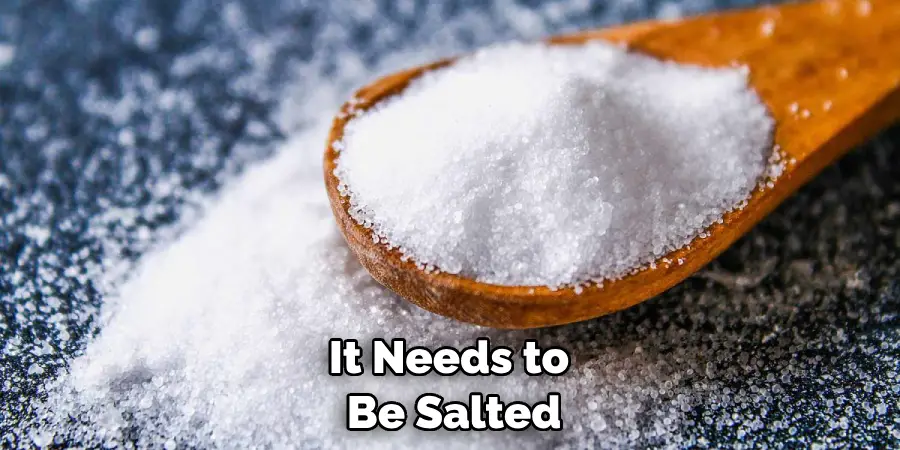
Step 2: Salting the Beaver Tail
To help preserve the beaver tail, it needs to be salted. Spread a large layer of rock salt on a flat surface and lay your beaver tail in it. Make sure the salt covers the beaver’s tail evenly and completely. Let the tail sit for 24-48 hours to allow the salt to penetrate into the fur.
Step 3: Washing off the Salt
After letting the beaver tail sit in rock salt, rinse it off with cold water until all of the excess salt is removed. Bring two gallons of water and one tablespoon of baking soda to a boil in a large pot. Reduce the heat to low and place the beaver tail into the mixture. Allow it to simmer for 45 minutes before removing it from the pot.
Step 4: Drying the Beaver Tail
Remove the beaver tail from the pot of water and dry it off with a towel. Once it is completely dried, spread it out on a flat surface to begin stretching and drying. With one hand, hold onto the base of the tail and grab hold of the tip of the tail with your other hand. Gently pull the beaver tail in opposite directions to help stretch it out until it’s almost double its original size.
Step 5: Softening the Beaver Tail
Mix one-half gallon of boiling water in a large pot with two cups of salt and two tablespoons of vinegar. Place the beaver tail into the mixture and let it simmer for 30-45 minutes before removing it from the pot. After letting the beaver tail soak in the vinegar solution, dry it off with a towel and spread it out on a flat surface to finish drying.
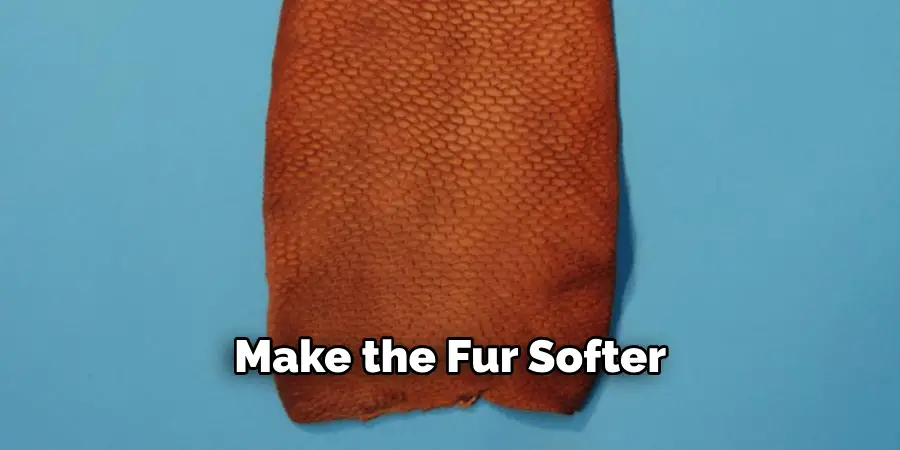
Step 6: Softening the Fur
Once the beaver tail is completely dried, apply a layer of leather softener to the fur. This will help to make it more pliable and easier to work with. Allow it to sit for 30 minutes before beginning the tanning process. You can now begin tanning your beaver tail! Follow these simple steps, and you will have a beautiful tanning beaver tail that you can use for crafts, decorations, costumes, and more.
Safety Tips for How to Tan a Beaver Tail
- Wear safety goggles and gloves to protect your eyes from harmful chemicals and your hands from any cuts or nicks when handling the beaver tail.
- For outdoor tanning, ensure you work in a well-ventilated area to avoid inhaling fumes that may come with some of the tanning solutions used.
- Always use a degreasing agent like sawdust or talcum powder to remove any excess grease from the tail before tanning. This will help ensure that the tannins can penetrate into the hide for better adhesion.
- Rinse thoroughly after degreasing and before tanning; this helps remove any lingering chemicals or residue.
- Use a tanning solution that is designed for beaver tails, as they need an acid-based tanning agent to penetrate the hide and bond with the fibers adequately. Acid tans also produce leathers that are more resistant to water and other liquids.
- Store your finished beaver tail in a cool, dry place. Excess moisture can cause the tanning solution to break down and grow mold or mildew on the leather.
- Do not leave any beaver tails in direct sunlight, as this will discolor them and make them brittle over time. Regular use of a conditioner can help maintain your leather’s color and suppleness.

Following these safety tips will help ensure that you tan a beaver tail properly, yielding durable leather that lasts long.
What is the Best Way to Prepare the Beaver Tail for Tanning?
Before tanning a beaver’s tail, you need to prepare it properly. Start by removing any flesh or fur from the tail. Next, use a sharp knife to cut down the center of the tail and spread out the fur for easier access while cleaning. Use soap and warm water to clean off any excess dirt, oils, or debris that may be on the tail. Once the tail is clean, you will need to let it dry completely before you can begin tanning.
After the tail has dried, you will want to flesh it by scraping away any remaining flesh or fat from the hide.
This step is necessary for a successful tan. It removes oils and improves the absorption of tanning agents. You can use a scraping tool for this step or your fingers to pull away the flesh from the hide.
Once your beaver tail is properly prepared, you are ready to begin the tanning process. Tanning will preserve the fur and prevent it from breaking down over time. It also helps to make the fur softer and more supple. The preparation process may vary slightly Depending on the type of tanning agent you choose.
What Are the Most Common Mistakes People Make While Tanning a Beaver Tail?
One of the most common mistakes people make when tanning a beaver’s tail is not properly preparing it for tanning. This means that all fatty tissue and meat must be removed from the tail, or bacteria will form, leading to an inferior product.
Other common mistakes include not drying it out completely before beginning the tanning process and not using the correct tanning solution and ingredients for the specific type of hide being tanned.
Additionally, not allowing sufficient time for the tan to develop or trying to speed up the process by using excess heat can lead to a poor outcome. Finally, improper storage after tanning is complete can cause discoloration or degradation of the hide, so it is important to take the time to store your finished product properly.
By preparing and tanning a beaver tail correctly, you can preserve its soft and supple texture while protecting its color and durability. With proper care, you can create a beautiful product that will last many years.
Is There Any Way to Tell if the Beaver Tail Has Been Properly Tanned?
Yes, there is a way to tell if the beaver’s tail has been properly tanned. Once tanned, the tail should have an even color and feel soft to the touch. You can perform a simple test to ensure that the tail has been properly tanned.
Take a small piece of the tail and rub it between your fingers. If the tail feels soft and smooth, then it has been properly tanned. You can also take a look at the color of the tail. An even, light tan signifies that the process has been successful.
It is important to note that some tails may not tan evenly. This is usually due to imperfections in the animal’s fur. If this is the case, you may need to apply a secondary tanning process to even out the color of the tail.
To do this, simply submerge the tail in a solution of potassium alum for up to twenty-four hours. This will help darken any light areas and even out the color. Once complete, rinse with cool water and allow to dry completely before using.
Conclusion
One of the main disadvantages of tanning a beaver’s tail is that it can be quite time-consuming. If done properly, the process may take several days and requires patience and care to ensure that the skin does not dry out or become brittle.
In conclusion, tanning a beaver’s tail is an interesting process that requires attention to detail. It involves working with several different processes and materials, such as scraping the fur off the tail, soaking it in brine, stretching it out to dry, and finally, working with oils or other treatments to soften and preserve the fur.
With patience and care, anyone can learn how to properly tan a beaver’s tail and create a unique piece of animal hide. I hope reading this post has helped you learn how to tan a beaver tail. Make sure the safety precautions are carried out in the order listed.