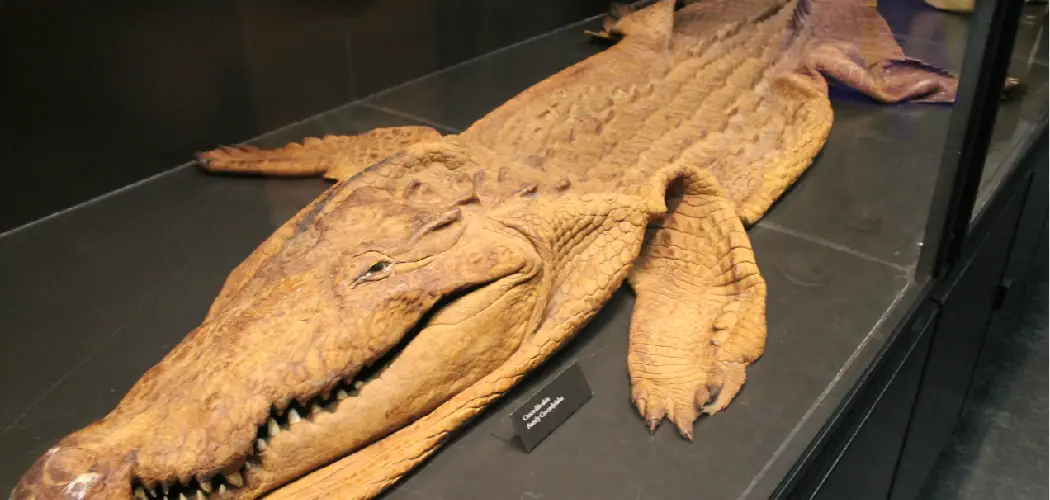
Tanning an alligator hide is an age-old process that has been practiced for centuries to preserve the hides of these large reptiles. This method of preservation prevents the hide from deteriorating, allowing it to be used in various ways, such as making clothing, accessories, and even art objects. Tanning also reduces the odor of any alligator hide, which is an important factor for many people.

Tanning an alligator hide has many advantages. It preserves the material’s natural beauty, making it a popular choice for use in clothing and other fashion items. Tanning also adds strength and durability to the hide, allowing it to last longer than untreated hides.
The tanning process also kills bacteria that can cause unpleasant odors, which can sometimes occur with untreated hides. In this blog post, You will learn in detail how to tan an alligator hide.
Materials You Will Need
- Alligator hide
- Non iodized salt
- Lime powder
- Large rubber or plastic container with lid
- Distilled white vinegar
- Water
- Ammonia
- Washing soda (sodium carbonate)
- Dawn dish soap
- Neutralizer (calcium sulfite, calcium hydroxide, or borax)
- Neutralizer water solution
- Stretching tools for drying and stretching the hide: a piece of wood, two sticks, an upholstery needle with thread or twine
Step-by-Step Processes for How to Tan an Alligator Hide
Step 1: Inspect the Alligator Hide
Make sure the hide is in good condition before starting the tanning process. If there are any tears or holes, repair them with a strong needle and thread before beginning. Place the alligator hide in a large container of clean, cold water and let it soak for several hours to help loosen any dirt and debris.
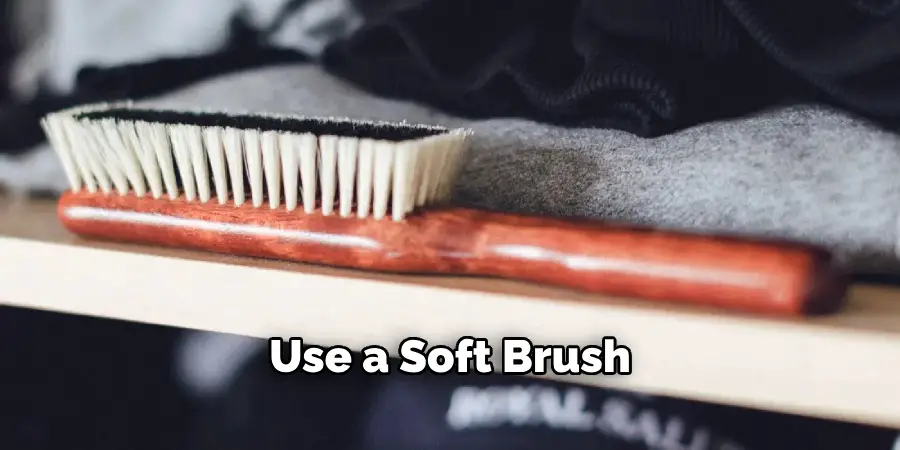
Step 2: Clean the Hide
After soaking, use a soft brush to remove any dirt or debris from the hide. Ensure you brush gently, as alligator skin is very delicate. Once the hide is clean, rinse it in cold water and add 1 cup of white vinegar to the water. Let the hide soak in the mixture for 10-15 minutes to neutralize the pH level and help preserve it.
Step 3: Remove Excess Water
After neutralizing, remove any excess water by using a soft towel or sponge. Ensure you do not rub too hard, as this can damage the hide. Choose a tanning agent that is appropriate for alligator hide, such as Chromium Sulfate or Formic Acid. Follow the directions on the package and rub the solution into the hide using a soft cloth, paying special attention to any cracks or wrinkles. Let it sit for 10-15 minutes.
Step 4: Rinse the Tanning Agent
After the tanning agent has been applied, rinse off the hide in cold water to make sure all of the solution is removed. Once rinsed, gently dry the hide using a clean towel or sponge. Be sure not to rub too hard, as this can damage the hide.
Step 5: Oil the Hide
After drying, apply a thin layer of oil over the entire hide. This will help protect it and keep it from cracking. Finally, hang your tanned alligator hide in a warm, dry place until it is completely dry. Once it is fully dried, the tanning process is complete, and your hide is ready to use.
By following these steps, you can preserve this material for years to come.
Tips for How to Tan an Alligator Hide
- Make sure to wear protective gloves, long sleeves, and pants while handling the hide.
- Always use a safety mask or respirator when tanning in order to avoid inhaling any of the chemicals involved in the process.
- Work with alligator hides outside and in an area that is well-ventilated.
- Use a flooded tanning bath, which is the safest method for tanning an alligator hide that does not involve any additional chemicals beyond salt and water.
- Wear protective eyewear when using power tools to flay or cut the skin off of the alligator carcass.
- Dispose of the tanning chemicals and alligator flesh safely and in accordance with local regulations.
- Make sure to keep all tools clean and sharp, as dull tools can cause unnecessary damage to the hide.

Tanning an alligator hide is a process that requires skill and patience, but following these safety tips will ensure that it is done safely and effectively.
How Long Does the Tanning Process Typically Take?
The time it takes to tan an alligator hide will vary depending on the size and type of tanning products used. Generally speaking, it can take anywhere from one week up to several months for a full tanning process to be completed. The smaller the hide, the shorter the time it will likely take.
When tumbling in a rotary tumbler, it will take between 8-12 hours. It can be left in the sun for two or three days when drying. If you are using oils, they may need to be reapplied up to three or four times before the hide becomes fully tanned and soft to the touch. Finally, finishing with some form of polish or wax will need to be left overnight before it is deemed completely tanned.
It is important to note that timing can vary depending on the type of tanning products used and the size of the hide. Invest in quality tanning products and follow all instructions closely to ensure that the hide is properly tanned. Doing so will help ensure that the hide is properly tanned and will last many years.
What is the Best Way to Preserve the Hide After It Has Been Tanned?
Once an alligator hide has been tanned and is ready to be used, it is important to store the hide properly in order to maintain its quality. Store the hide in a cool, dry area away from direct sunlight for best results.

Before storing it, dust off any excess powder or dirt that may have accumulated on the surface of the hide. When storing the hide, make sure to hang it in an area with plenty of air circulation to help prevent mold or mildew from forming.
Additionally, using a breathable material such as burlap or cotton when wrapping the hide for storage is important. This will allow air to circulate freely and reduce humidity within the bag or sack. It is also important to occasionally apply a leather conditioner to keep the hide soft and prevent cracking.
This should be done by gently massaging a small amount of conditioner into the hide with clean hands. Be sure to avoid using too much, as excess can cause discoloration.
Are There Any Common Mistakes People Make When Tanning an Alligator Hide?
When attempting to tan an alligator hide, people make several common mistakes. One of the most frequent errors is not thoroughly skinning the hide. If this step is skipped, it can lead to streaks and imperfections in the end product.
Another mistake people make when tanning a hide is not properly cleaning it before beginning the tanning process. Alligator hides are often contaminated with dirt, bacteria, and other substances that can cause discoloration or weaken the hide. It’s essential to thoroughly clean the hide before continuing.
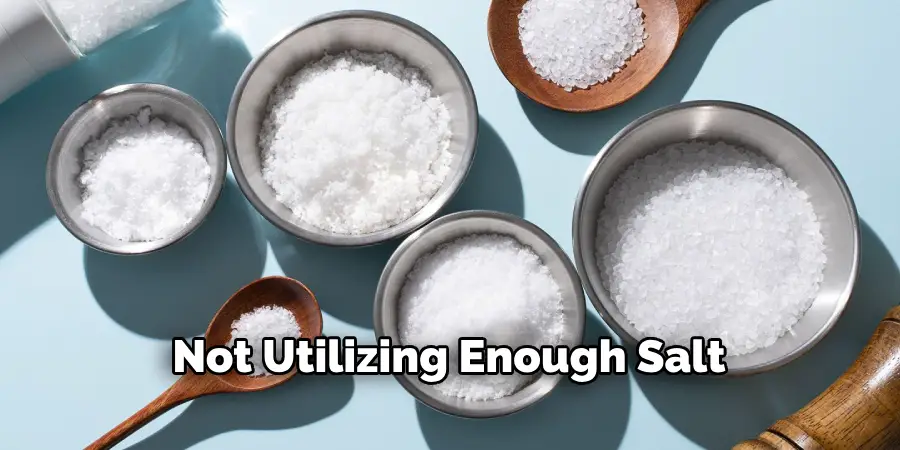
Another common mistake is not utilizing enough salt in the curing process of the alligator hide. Not using enough salt means the hide won’t be properly preserved and may not last as long as it should.
Finally, people often neglect to use a good quality tanning solution when treating alligator hide. Not using a high-quality solution can cause discoloration or unevenness in the finished product. Choosing a reliable and long-lasting tanning solution is important for optimal results.
What Should You Look for When Choosing a Quality Alligator Hide?
When buying an alligator hide for tanning, it is important to choose a quality hide. Look for hides that are free of damage, such as tears, cracks, or holes. The hide should also be thick enough to withstand the tanning process and provide a long-lasting product. Choose one that is well-cured and dry; any moisture remaining in the hide can cause problems during tanning.
The hide’s size should also be considered; for best results, choose one that is large enough to cover a usable area. Finally, ensure that the hide has not been treated with chemicals or other treatments. This may interfere with the tanning process and affect the final product. With these guidelines in mind, you will be well on your way to tanning a quality alligator hide.
Conclusion
In conclusion, tanning an alligator hide is no easy task, but it can be done with the proper tools and techniques. It requires patience, attention to detail, and the right combination of chemicals and processes. With a little bit of effort, you can create a beautiful leather product out of a once-living animal!
Tanned alligator hide can be used for clothing, footwear, and interior decorator items like wall hangings. With the proper care, a tanned alligator hide will last many years. I hope this article has been beneficial for learning how to tan an alligator hide. Make Sure the precautionary measures are followed chronologically.