
Are you looking to add a touch of sophistication and luxury to your home décor? With leather upholstering, you can achieve a timeless, elegant look that will last for years. But if you’re not sure where to start or what the process involves, don’t worry – we’re here to take you through every step from selecting the right type of leather and cutting it accurately right down to attaching it securely in place.

In this blog post, we’ll show you exactly how to upholster with leather so that whether it’s seating furniture like chairs and ottomans or bedheads or footstools – be prepared for everything needed including information on tools and alternative materials. Read on as we reveal all!
Needed Materials
Given below is a list of items that you will need to successfully upholster with leather:
- Leather Fabric
- Upholstery Thread and Needle
- Fabric Scissors
- Seam Ripper
- Staple Gun, Staples, Hammer
- Tape Measure or Ruler
- Sandpaper (Optional)
11 Step-by-step Guidelines on How to Upholster With Leather
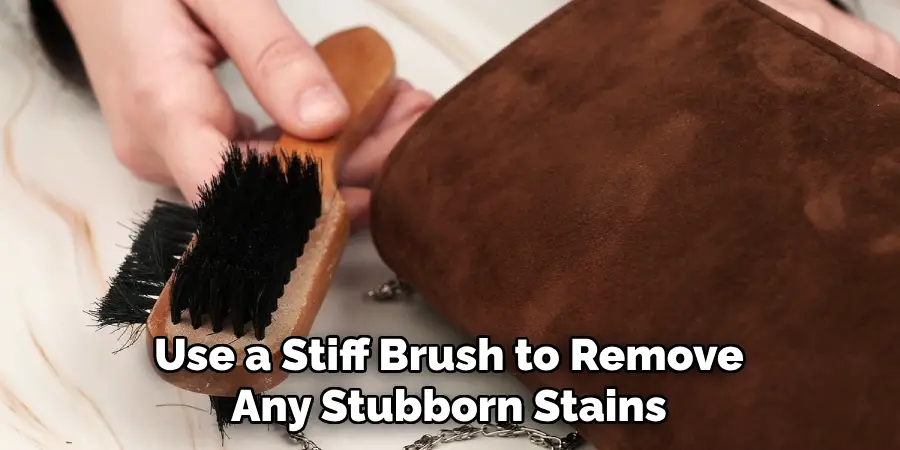
Step 1: Clean the Surface
Before starting the project, make sure to clean the surface you are going to upholster with leather. Start by wiping it down with a damp cloth to remove any dirt or dust, then let it dry. If necessary, you can use a stiff brush to remove any stubborn stains. But be careful not to damage the surface.
It’s also important to note that if using a fabric-based cleaner, you should test it on an inconspicuous area first. But if using a solvent-based cleaner, always make sure the area is well-ventilated.
Step 2: Measure the Furniture
To get an accurate measurement of your furniture, use a tape measure or ruler and calculate the length and width of all sides. Make sure to also note down any curves in the design for reference when you cut out the leather pieces.
It’s important to add an extra two inches of leather on all sides to be certain that there is enough material for the job. This is especially important if the furniture has curves.
Step 3: Cut Out Fabric Pieces
Using fabric scissors, cut out leather pieces that fit each side of your furniture according to the measurements taken earlier. If needed, use a seam ripper to make small adjustments. If the furniture has curves, make sure to draw these out on paper first and then use a straight edge to cut along the curve.
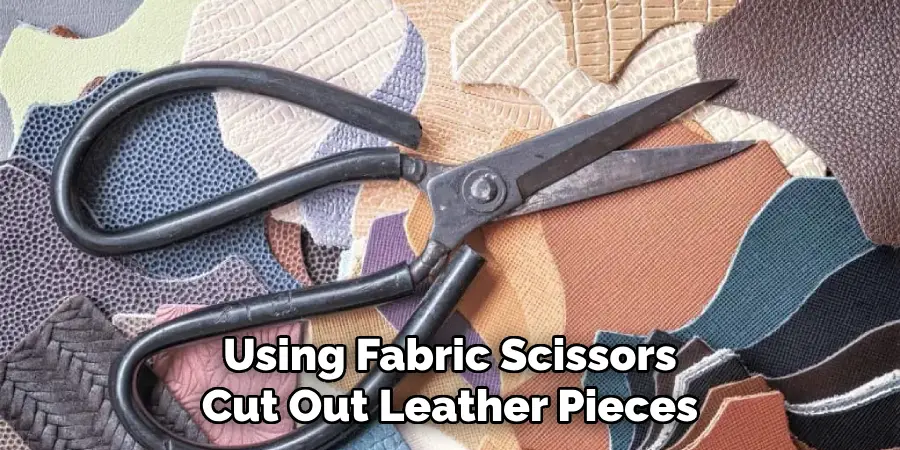
This will ensure that the fabric pieces fit perfectly. It’s also important to remember that leather stretches when it is sewn or stapled, so be sure to add an extra couple of inches when cutting out the pieces.
Step 4: Sand Down Upholstered Area (Optional)
If you’re upholstering an older piece of furniture with worn-in areas, use some sandpaper to lightly sand down the surface. This will help ensure that the leather adheres better to the upholstered area. But be careful not to sand down any areas that have painted details. It’s also a good idea to vacuum the area after sanding to get rid of any dust.
Step 5: Attach Leather Pieces
Once you have all your pieces cut out, start attaching them one by one using a staple gun and staples. Hammer in any stubborn staples if needed, then move on to the next piece. This process can be time-consuming, but it’s important to ensure accuracy and that no staples are visible on the finished product. It’s also important to note that leather is a naturally thick material, so be sure to use plenty of staples when attaching it.
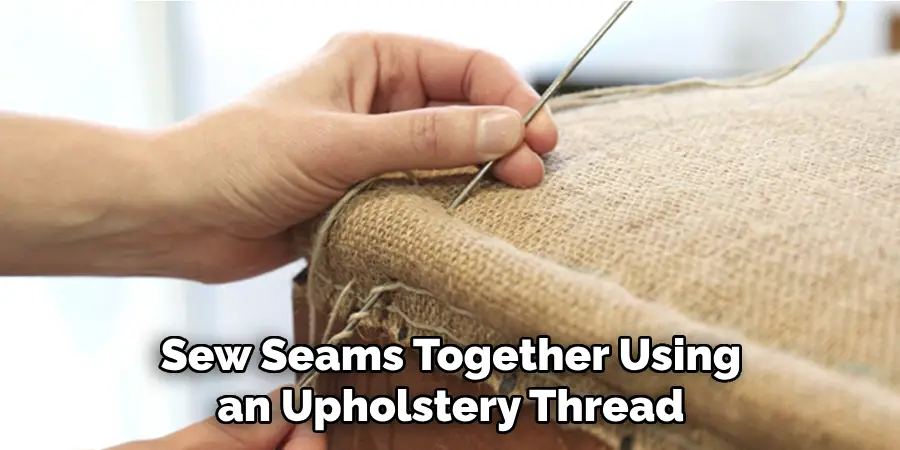
Step 6: Sew Seams Together (Optional)
If you’re wanting a more secure hold for your leather fabric, sew seams together using an upholstery thread and needle. Make sure you tie off each end of the thread securely so there’s no room for unraveling. If you’re not confident in your sewing skills, it’s best to get a professional upholsterer to do the job for you. This will ensure that all the seams are neat and secure.
Step 7: Test-fit Fabric Pieces
Before attaching the leather pieces to your furniture, test-fit all the pieces to make sure they fit perfectly. If there are any discrepancies between the measurements taken and what you’ve cut out, make adjustments with a seam ripper before proceeding.
Although the leather pieces may fit on paper, it’s important to check that they fit together properly. You don’t want to have pieces that are too small or too big when they’re fitted. It’s also important to make sure that the fabric pieces fit snugly around any curves or corners.
Step 8: Attach Fabric Pieces With Staple Gun
Now that you’ve made sure everything fits perfectly, attach the fabric pieces to your upholstered area using the staple gun and hammer if needed. Make sure to pull tightly as you go along so that it’s snug and secure when finished. But be careful not to pull too much as this can cause the fabric to tear.
It’s also important to note that if you’re attaching leather to a wooden frame, be sure to use enough staples as it can be hard to get the fabric to stick. This will ensure that the fabric pieces fit perfectly.
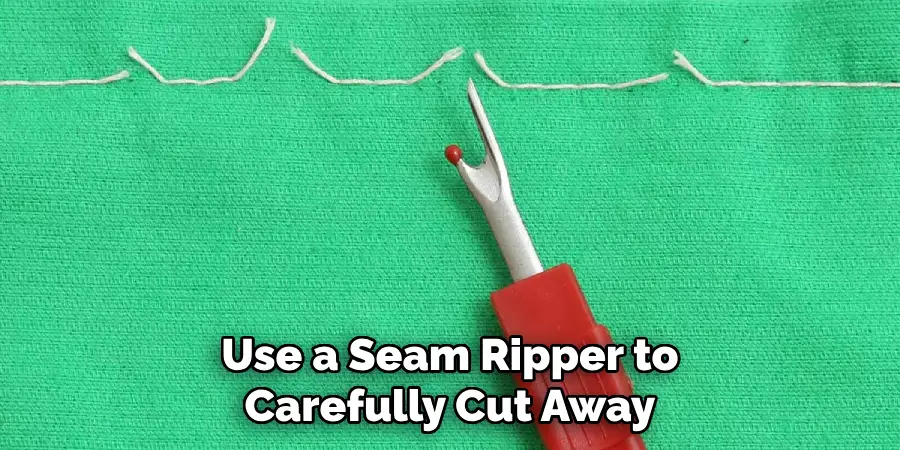
Step 9: Check for Uneven Areas (Optional)
If there are any uneven areas or bumps in places where two pieces of fabric overlap, use a seam ripper to carefully cut away any excess material. It’s important to make sure that the fabric pieces fit together perfectly, as any bumps or uneven areas will be easily visible when the job is finished.
It’s also important to make sure that the edges of each piece are lined up correctly. However, if the pieces don’t fit perfectly, it’s best to get a professional upholsterer to do the job for you.
Step 10: Trim Edges
Using fabric scissors, trim and neaten up all the edges of your leather pieces before you finish off with the staple gun. If there are any areas that need to be tucked in, use a seam ripper to do this.
This will ensure that the finished product looks professional and neat. It’s also a good idea to use some sandpaper to lightly sand down any areas that aren’t perfectly smooth. This will help create a more uniform finish.
Step 11: Secure With Staple Gun
Finally, secure all the leather pieces in place with the staple gun by hammering in any stubborn staples if needed. Your piece of furniture is now ready for use! Always remember to keep the leather clean and conditioned to ensure a long-lasting finish.
If you are unsure of how to clean and condition leather correctly, it is best to seek professional advice. But by following these steps, you can easily upholster with leather and complete a professional-looking job.
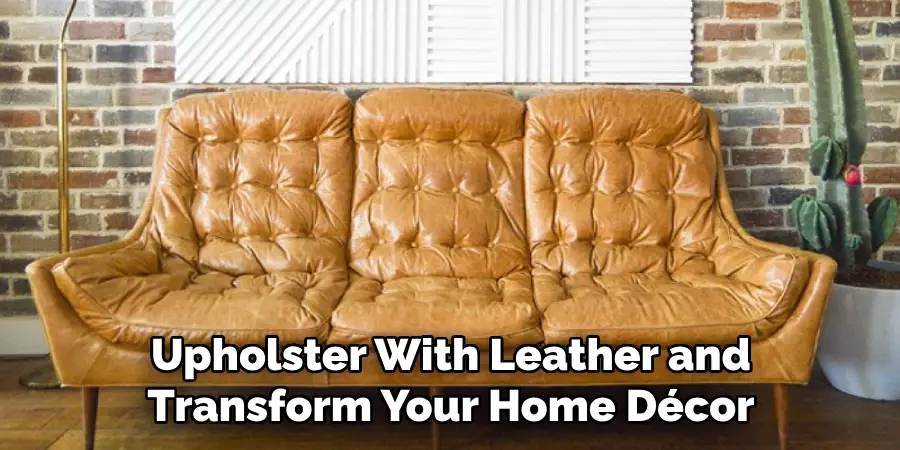
By following our easy step-by-step guide on how to upholster with leather, you’ll be able to successfully upholster with leather and transform your home décor into something stylish and timeless. With just a few tools and materials, you can experiment with different types of leather fabric to create a unique look that’s guaranteed to last for years. Good luck!
Frequently Asked Questions
Q1: What Type of Leather Should I Use for Upholstery?
A1: You should choose a thick, heavy-duty leather that’s been treated with a waterproof coating for upholstery. This will help prevent staining and wear and tear over time.
Q2: Can I Upholster With Vinyl or Faux Leather?
A2: Yes, you can use vinyl and faux leather to upholster furniture as they are often cheaper than real leather. However, they may not be as durable or long-lasting so make sure to check the quality before buying in bulk.
Q3: How Often Should I Clean My Furniture After Upholstering With Leather?
A3: Depending on how much your furniture is used, it’s recommended that you clean it every few months with a leather cleaner to keep it looking its best.
Q4: Can I Upholster With Leather By Myself?
A4: Yes, upholstering with leather is a relatively simple process once you’ve mastered all the techniques. Just make sure to take your time and go through each step carefully so that it looks perfect when finished.
Conclusion
Upholstering with leather may seem intimidating, but it doesn’t have to be. With a few straightforward steps and the right supplies, you can produce an attractive and long-lasting product that can impress your family and friends.
A good upholstery job is all about utilizing the right materials and having patience. Buy high quality leather or vinyl material if you want to get the best results. Don’t forget about investing in the right tools like heavy duty upholstery needles and strong threading such as twine or kite string.
Utilizing these strategies will ensure that your upholstery job looks professional once finished. Understanding the basics of upholstery will give you confidence in your project, so don’t hesitate to start today! Who knows – maybe you’ll discover a newfound passion for DIY projects along the way! Thanks for reading this article on how to upholster with leather.