
Do you want to add something unique and special to a hat or other clothing item? Are you looking for a crafty and creative way to add flair and personality to your hats? Adding leather patches is one great way to make your hat look unique and stylish while building up an interesting collection of fashion items.

Adding a leather patch is an excellent way to make a statement with your clothing, and it’s relatively easy too!
With the right supplies and some patience, you’ll be able to attach a beautiful, custom leather patch to any hat or accessory. In this blog post, we will discuss why you should add a leather patch.
The various tools that are required for the task, examples of how different patches can be used on hats as well as other items – such as bags and backpacks – and finally step-by-step instructions on how to attach leather patch to hat for attaching the leather patch itself.
Why Do You Need to Attach Leather Patch to Hat?
1. Add Style
Adding a leather patch to a hat is one of the best ways to customize your fashion items and make them truly unique. Not only does it add an interesting textured element, but you can also choose from a variety of shapes, sizes, designs, colors, and textures. A leather patch also adds a level of sophistication and class, making the hat look sophisticated and stylish.
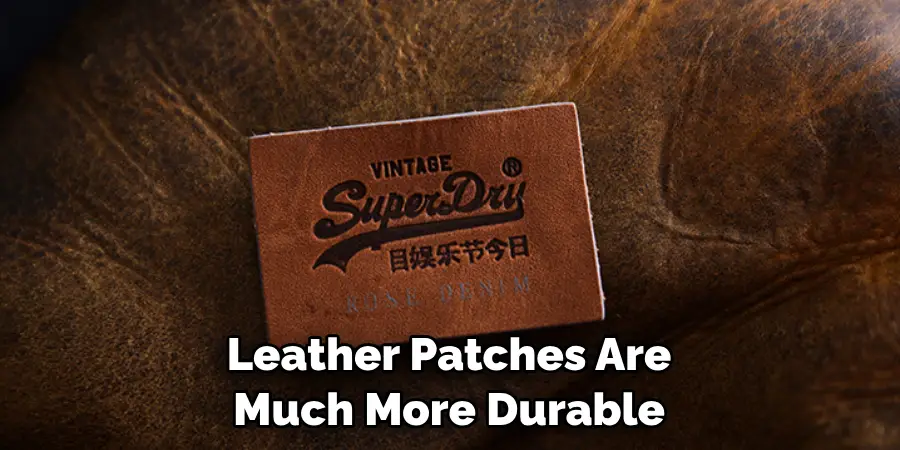
2. Strength and Durability
Leather patches are much more durable than other materials, such as fabric or paper patches. This makes them great for hats that will be worn frequently since they won’t break down from wear and tear as quickly. Additionally, leather patches are water-resistant and will hold up better in harsh weather conditions.
Required Items to Attach Leather Patch to Hat
- Hat or other clothing item (for this example, we are using a baseball cap).
- Leather patch of your choice.
- Leather adhesive or glue.
- Heavy scissors or an X-Acto knife.
- Pressing cloth or parchment paper.
- Iron.
- Tape measure or ruler
10 Instructions on How to Attach Leather Patch to Hat
1. Measurement
Lay the hat flat and locate where you want the patch to be placed. Measure out the size of the patch and use a tape measure or ruler to mark out an area for it. While the patch should be between 1 to 2 inches wide, you can make this larger or smaller depending on your preference and the hat’s size.
2. Cut Out Patch
Lay the leather patch onto a flat surface and use either heavy scissors or an X-Acto knife to cut out the design. Be careful not to make any mistakes during this process. While the patch should be between 1 to 2 inches wide, you can make this larger or smaller depending on your preference and the hat’s size.
3. Test Fit the Patch
Take the cut-out leather patch and place it on top of the hat in the area where it will be attached. Make sure that it fits properly before proceeding any further. The patch should fit snugly on the hat and not be too large or small.
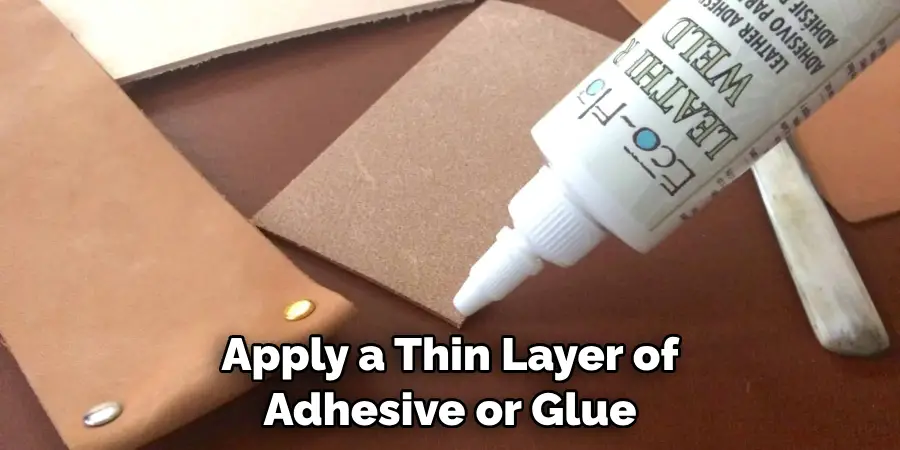
4. Apply Adhesive/Glue
Once you’ve made sure that the patch fits properly, apply a thin layer of adhesive or glue onto the backside of the leather patch. Make sure to cover the entire surface evenly and completely. You may need to experiment with different adhesives and glues until you find one that best suits your project.
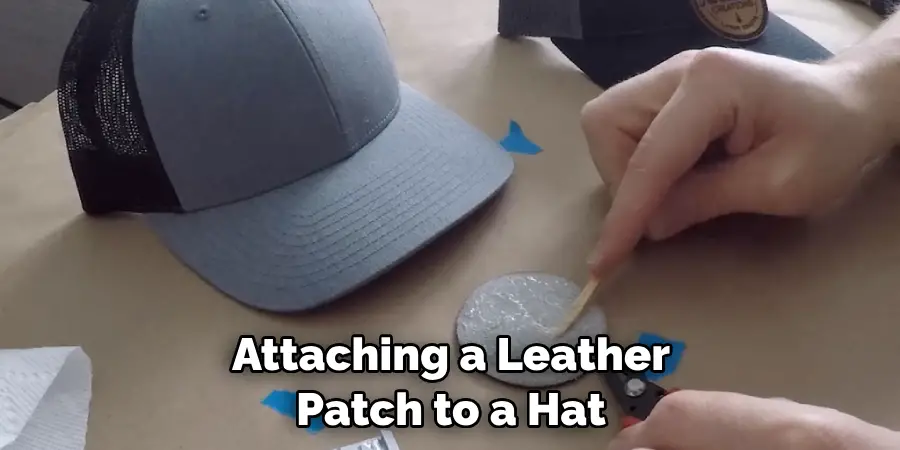
5. Press the Patch onto the Hat
Once the adhesive/glue is applied, place the patch onto the hat in the designated area. Make sure that it’s centered and aligned properly before pressing down firmly on all sides of the patch.
6. Secure with Pressing Cloth
To ensure that the patch is properly secured, place a pressing cloth or parchment paper over the top of it and press down firmly with an iron. Make sure to move the iron in slow, circular motions for about 15-20 seconds.
7. Let Patch Cool Down
Once the patch has been heated with the iron, let it cool down for a few minutes before removing the pressing cloth. Cooling down the patch will help to secure it even further.
8. Remove Excess Adhesive/Glue
Once the patch has cooled, carefully remove any excess adhesive/glue that may have spread outside of its boundaries during the pressing process. Be sure to be very gentle and use a cloth or spatula to scrape away any excess adhesive/glue.
9. Trim Away the Edges of the Patch
Once the adhesive has been removed, carefully trim away any excess edges of the patch with either scissors or an X-Acto knife. This will help to give it a neat and finished look. Trimming away any excess fabric will also help to prevent fraying or unraveling of the edges.
10. Finishing Touches
After trimming away the edges, you can further secure the patch by stitching along its boundaries with either a needle and thread or a sewing machine. This will ensure that it stays in place on the hat for years to come.
And that’s it! You have now successfully attached a leather patch to your hat with ease. With these simple steps, you can create a stylish and unique look for any headwear item. Whether you choose to add a logo or monogram, the possibilities are endless with a little bit of creativity!
7 Safety Precautions to Follow
Attaching a leather patch to a hat can be tricky. It requires precision and patience because the patch needs to lay flat against the surface of the material without any bumps or creases. To help ensure that your project turns out perfectly, here are seven safety precautions to consider before you begin:
1. Wear protective goggles and gloves while working with any sharp tools or materials. Protective wear will help ensure your safety and minimize the risk of injury. That’s why you need to wear protective goggles and gloves when attaching a leather patch to a hat.
2. Make sure you have the right tools for the job. You will need scissors, an awl, a piece of sandpaper or an emery board, tweezers, and various other items, depending on the type of leather patch you are attaching. Having the right tools will make the process easier and smoother.
3. Read through any instructions that come with your leather patch carefully before you begin. This will help to ensure you understand how to properly attach it to your hat. It is important to take your time when reading through the instructions.
4. Gently mark out the area where you want to attach the leather patch using a pencil or marker. Doing this will help you measure and guide yourself while attaching the patch.
5. Cut along the edges of the leather patch with scissors if necessary, so that it fits perfectly against the surface of your hat. Make sure to use sharp scissors and cut slowly and precisely.
6. Use an awl to punch small holes around the edges of the leather patch before attaching it safely to your hat. Doing this will help keep the patch in place and prevent it from slipping or shifting while you work with it.

7. Use tweezers to carefully place the leather patch in its desired location and press down on it until it is secure. Be sure to use gentle pressure so as not to damage or tear the material.
By following these seven safety precautions when attaching a leather patch to your hat, you can rest assured that it will be done properly and quickly. Remember to take your time and use the right tools for the job.
Frequently Asked Questions
How to Maintain My Leather Patch on a Hat?
The best way to maintain your leather patch on a hat is to choose the right type of adhesive when attaching it. Make sure you use an adhesive that is suitable for both the material of your hat and the material of the patch. You can also apply a waterproof sealant over the top of your patch once it is attached.
This will help protect the patch from any moisture or weathering that may occur over time. If you are unable to find a suitable adhesive, you can also use small sewing stitches around the edges of the patch to ensure it stays in place. Additionally, avoid cleaning your hat with harsh chemicals or abrasive materials, as these could damage the patch.
Can I Put Leather Patches on Other Clothing?
Yes! In fact, leather patches can be added to any type of clothing or accessory. However, it is important to make sure you choose the right adhesive for the material and patch before attaching it. In addition, you may want to waterproof the patch after attaching it in order to prevent damage from moisture or weathering over time.
Conclusion
Attaching a leather patch to a hat is not as difficult as it seems. With the right supplies, instructions on how to attach leather patch to hat, and patience, anyone can craft a perfect item. Not only will you learn an amazing skill that can be used with practically any fabric item, but you’ll also take pride in creating something unique and special.
If you’re looking for a creative project that won’t break your bank account or take up too much of your time, attaching a leather patch to a hat is the perfect solution. Gather your supplies today and get crafting! After all, when it comes to crafting, there are no limits or boundaries; if you have an idea in mind, let it come to life with the help of this incredibly easy process. So what are you waiting for? Craft to your heart’s content!